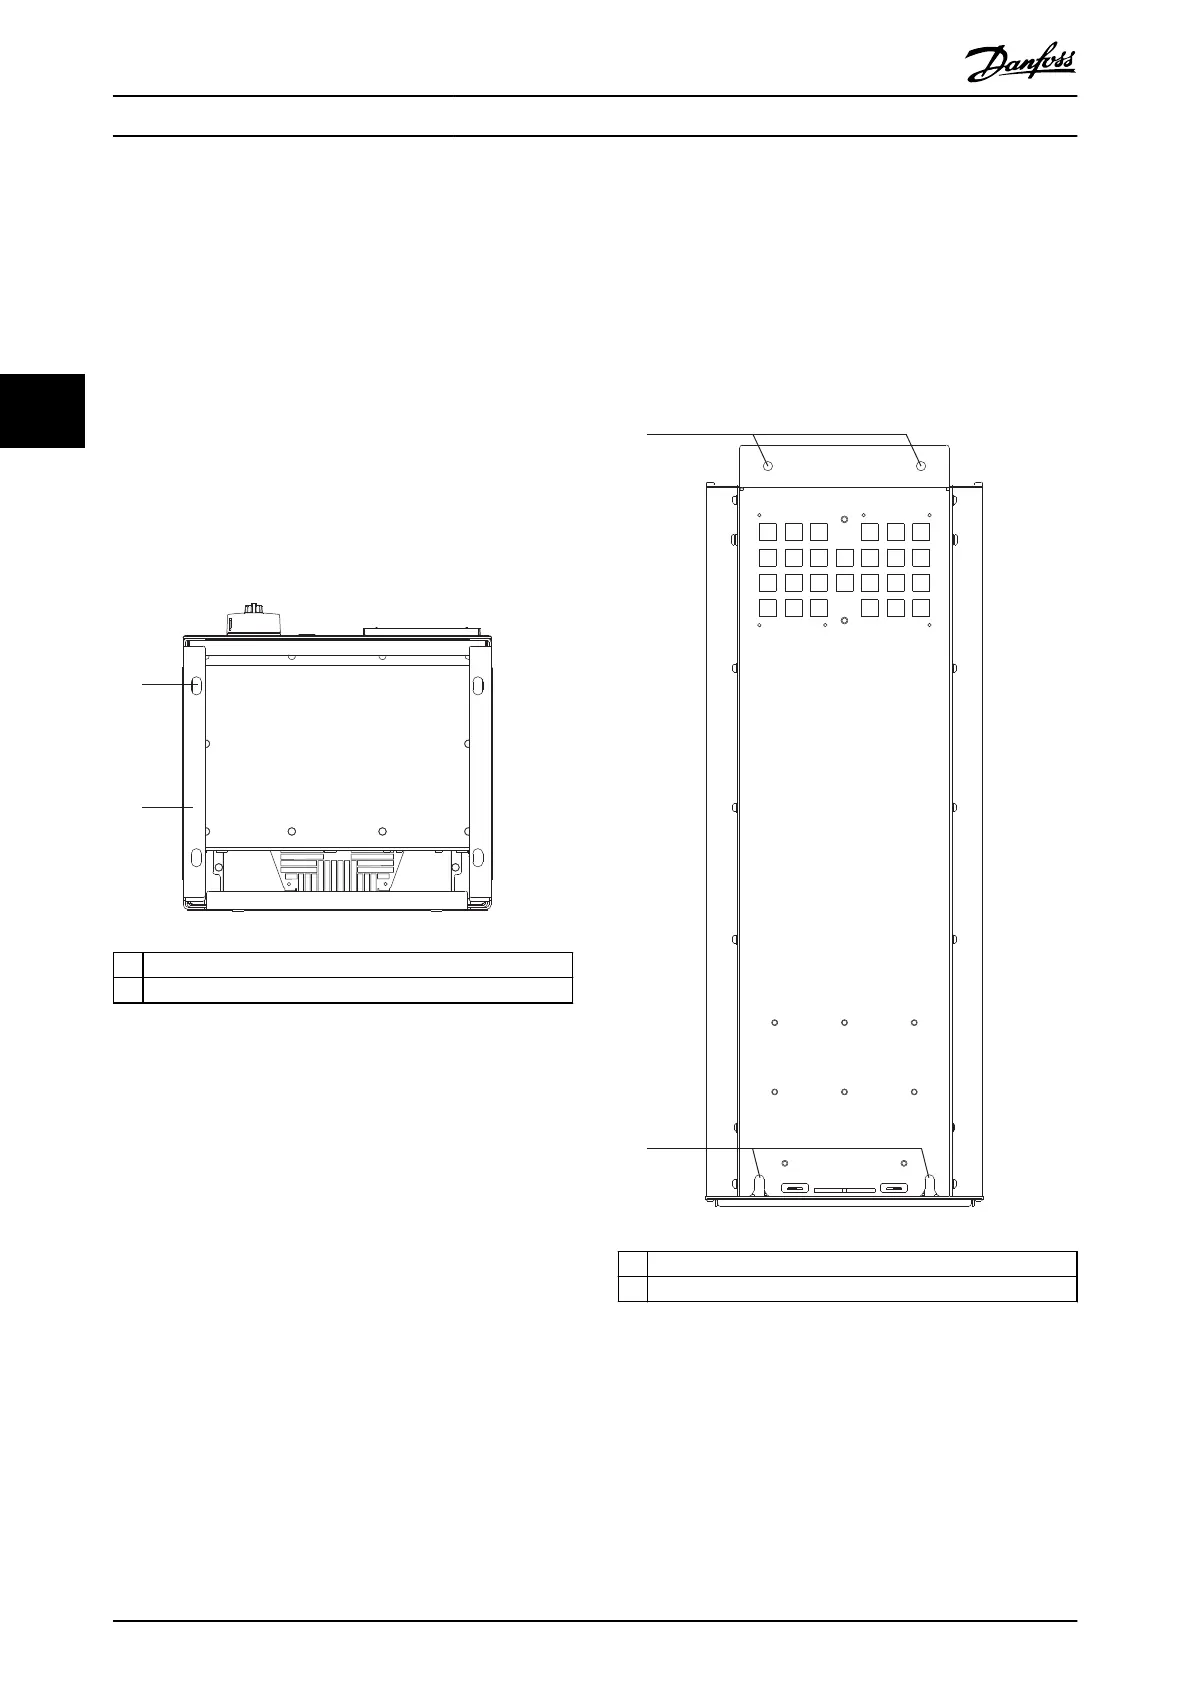
Floor mounting the drive
To secure the pedestal to the oor (after attaching the
drive to the pedestal), use the following steps.
1. Fasten 4 M10 bolts in the mounting holes at the
bottom of the pedestal, securing it to the oor.
See Illustration 4.7.
2. Reposition the pedestal front cover plate, and
fasten with 4 M5 screws. See Illustration 4.6.
3. Slide the pedestal wall spacer behind the
mounting ange at the top of the drive. See
Illustration 4.6.
4. Fasten 2–4 M10 bolts in the mounting holes at
the top of the drive, securing it to the wall. Use 1
bolt for each mounting hole. The number varies
with enclosure size. See Illustration 4.6.
1 Mounting holes
2 Bottom of pedestal
Illustration 4.7 Pedestal-to-oor Mounting Holes
Wall mounting the drive
To wall mount a drive, use the following steps. Refer to
Illustration 4.8.
1. Fasten 2 M10 bolts in the wall to align with the
fastener slots at the bottom of drive.
2. Slide the fastener slots over the M10 bolts.
3. Tip the drive against the wall, and secure the top
with 2 M10 bolts in the mounting holes.
1 Top mounting holes
2 Lower fastener slots
Illustration 4.8 Drive-to-wall Mounting Holes
Mechanical Installation VLT® AQUA Drive FC 202
22 Danfoss A/S © 09/2018 All rights reserved. MG21A502
44

 Loading...