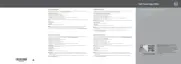
Figure 63. Installing a processor
1.
socket-release lever 1 2. pin–1 corner of the processor
3. processor 4. slot (4)
5. processor shield 6. socket-release lever 2
7. processor socket 8. tab (4)
NOTE: Ensure that you install the heat sink after you install the processor. The heat sink is necessary to maintain proper
thermal conditions.
1. Install the heat sink.
2. Follow the procedure listed in the After working inside your system.
3. While booting, press F2 to enter System Setup and verify that the processor information matches the new system
configuration.
4. Run the system diagnostics to verify that the new processor operates correctly.
Related concepts
System Setup
Related references
Safety instructions
Using system diagnostics
Related tasks
Before working inside your system
Removing the cooling shroud
Installing a heat sink
Installing and removing system components
117

 Loading...