Next steps
Follow the procedure listed in After working inside your system.
Cooling fans
Removing a cooling fan
Prerequisites
1. Follow the safety guidelines listed in Safety instructions.
2. Follow the procedure listed in Before working inside your system.
3. Remove the sled.
Steps
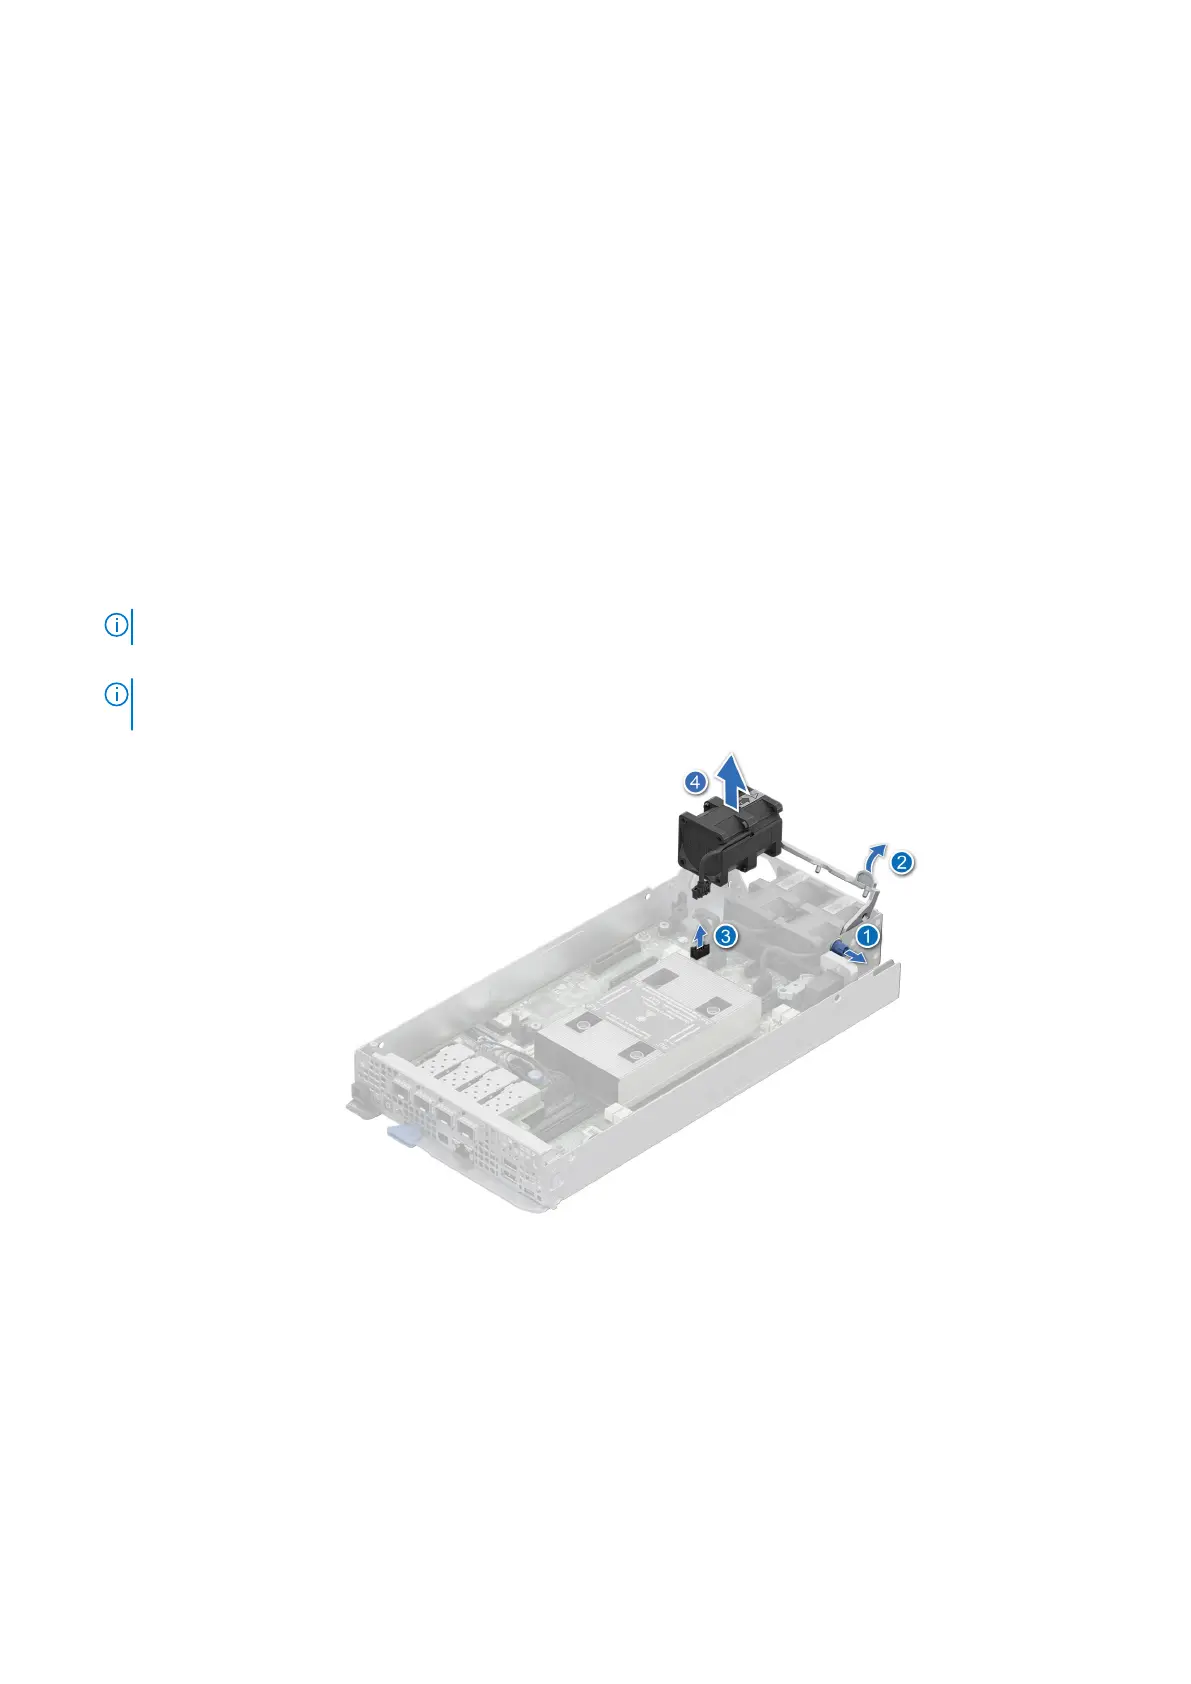
1. Pull the blue latch on the side of the fan module.
2. Slightly pull back the fan handle to disengage it from the guiding pin and then lift to release the fan handle.
3. Disconnect the fan cable that is connected to the system board connector.
NOTE: Fan 1, 2, and 3 are connected to the 1U sled system board.
4. Pull slightly to disengage the fan cable from the fan guard and then lift the fan module out of the fan cage.
NOTE:
If the airflow directional arrow is indicating outward on the fan, this indicates Reverse-Air-Flow (RAF). If the
airflow directional arrow is indicating inward on the fan, this indicates Normal-Air-Flow (NAF).
Figure 19. Removing a cooling fan
Next steps
1. Replace a fan
2. Install the sled
Installing and removing system components
55

 Loading...


