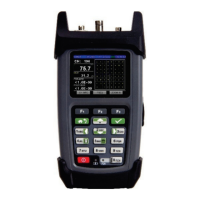
Handheld Cable/Antenna Analyzer
11-3 Making a Burst Power Measurement
The following is a step-by-step guide for conducting a Burst Power measurement in Inline High Power Meter
mode. This application measures time-gated (non-CW) signal bursts, while the duty cycle describes the
percentage of time in a given period during which the signal is on.
Procedure:
1.
Tap the
Measurement
main menu softkey to open the Measurement menu on the right side of the
display. Select
Burst Power
.
2.
Tap the
Frequency
main menu softkey. Under the
Frequency
submenu, set your desired center
frequency. There are two ways to accomplish this.
a.
Manually enter the desired start frequency by tapping
Center Freq
and using the arrow
keys, data keypad, or rotary knob to adjust. Press Enter to confirm.
b.
Open the
Signal Standard
submenu and tap
Select Signal STD.
Double-tap your preferred
signal standard on the list to select it and return to the submenu, then select the signal type
by tapping
Uplink
or
Downlink
. Set a specific channel of interest to test, or enter a
Ch Step
of 1 to test all available channels.
3.
Tap the
Amplitude
main menu key. Use the
Max
and
Min
softkeys, along with the arrow keys, rotary
knob, or data keypad, to adjust the amplitude range to display on the on-screen power meter. You
can also tap
Auto Scale
to set the max and min values to where the current measurement is easily
visible, or
Full Scale
to display the entire measurement range.
a.
Adjust
Ref Offset,
if necessary, to compensate for external input attenuation or gain.
b.
Remember to select the appropriate measurement units.
4.
Tap the
Sweep
main menu key. Set Sweep Type to
Cont
for continuous measurement, or
Sngl
for a
single sweep.
5.
Still in the Sweep main menu, open the
Average
submenu. Toggle Averaging
On
to activate the
per-sweep averaging function, where the measurement displays the mean data of numerous
sweeps (as determined by the
AVG Factor
). Use to obtain stable readings from an erratic signal.
6.
If the instrument is properly connected and configured, the yellow needle on the display will swing
to indicate the burst power reading. The duty cycle percentage will appear in a small numerical
pane below.
7.
You can toggle
Max Hold
to the left of the display (or in the Sweep menu) to freeze the reading at
its highest measured level.
8.
The red and green regions on the meter display indicate limit lines. Tap the
Limit
main menu key to
adjust your upper and lower limits for pass/fail testing. Enable
Limit Alarm
for an audio failure cue.
Saving the Measurement:
When you have conducted a successful measurement and wish to save the results for later viewing or
analysis, press the
Save
button to the top-right of the display. Power meter measurements will save as .PMM
files. For more details on naming and saving files to the instrument or USB, see Section 17-2.