13
Inspect Blades
Inspect each blade prior to installation:
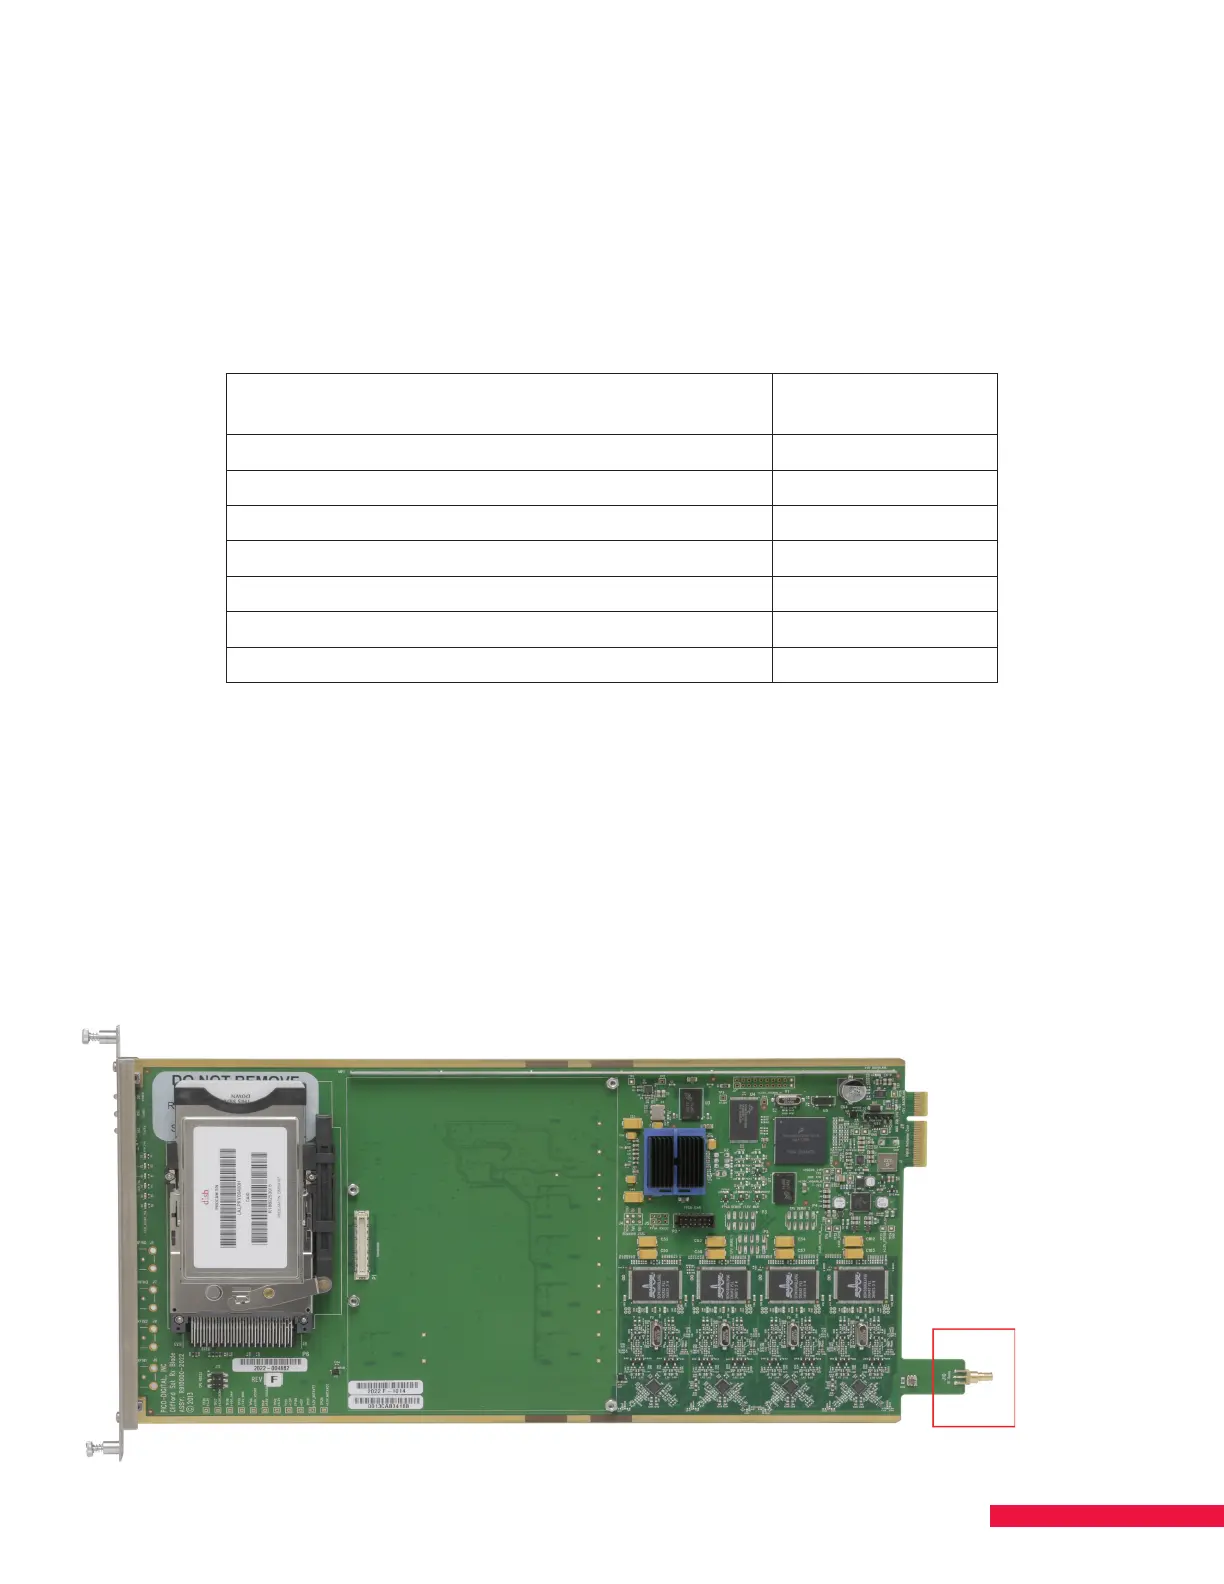
1. Verify that each satellite receiver blade has an RF connector (See Figure 3.) to connect the blade to
the backplane.
2. Verify that each satellite receiver blade has either two ProCAM 1.0s or one ProCAM 2.0. ProCAM 1.0s each
have a visible SmartCard while ProCAM 2.0s have embedded chips. Inspect to confirm that all ProCAMs
have been fully inserted into their cradle and the SmartCards have been fully inserted in the ProCAMs (only
when using ProCAM 1.0s).
3. Verify that heat sinks are in place on all blades and transcoder modules.
Component
Number of Heat
Sinks
Satellite Receiver Blades 1
Satellite Receiver Blades with Transcoder Modules 6
ATSC Receiver Blades 7
QAM 16 Blades 2
QAM 48 Blades 4
QAM 96 Blades 6
NTSC Blades 7
Install the Blades and Filler Plates
1. Install satellite receiver blades according to the distribution plan.
a) Slide the blade into the appropriate slot; ensure the satellite receiver blade is correctly installed.
b) Finger-tighten the screw on front of the blade to secure in chassis.
2. Install the remaining blades (QAM, ATSC, NTSC) according to plan; finger-tighten the front screws to secure
them to the chassis.
3. Install blank filler plates in empty slots; finger-tighten screws to secure them to the chassis.
Figure 3. RF Bullet Connector