9
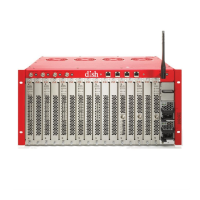
Installation Overview
The following is an overview of the process of assembling, testing and delivering SMARTBOX to a customer site.
Subsequent chapters contain detailed step-by-step instructions. Follow the information flow of the chapters to
ensure a successful setup of SMARTBOX hardware and software.
• Assemble Power Components — Connect cables, power supplies and power.
• Install Blades — Plan distribution of blades and install.
• Configure Computer Network Settings — Configure computer settings to access SMARTBOX
User Interface.
• Login to SMARTBOX — Login to the SMARTBOX User Interface to begin configuring your system.
• Enable Satellites — Enable satellites and verify that tuners lock properly.
• Update Software — Download software, connect to network, update software and reboot.
• Authorize SMARTBOX — Authorize SMARTBOX with DISH and resolve any authorization problems.
• Scan for Satellite Services — Scan for satellite services to populate Services page based on visible
orbitals/transponders and authorized programming.
• Set Up Data Port(s) — Specify Content/Control Interface for data ports.
• Set Up CAS Server — Enter address and details for encryption if Verimatrix or Lynk is employed.
• Map Services (Bulk) — Configure services for output (QAM, NTSC, IP Stream) and set up the
Program Guide.
• DISH QAM (Digital Upgrade) — Configure transponders and frequency range.
• Export Configuration File — Store this file, save your mapped services for this configuration.
• Perform Soak Test — Run SMARTBOX 24 to 48 hours. Perform a functional test at the end of the soak to
ensure all components are working.
• Prepare to Ship — Shut SMARTBOX down, remove the power supplies and ship the unit to the
customer site.
• Install on Customer Site — Connect SMARTBOX to satellite feeds, power sources and Internet connection;
refresh satellites, scan for authorized services and set up Welcome Channel(s) and the
Program Guide.
NOTE: To ensure the latest software download, set up and test SMARTBOX just before it is due to be set up on
the customer site.