19
Enable Satellite Inputs
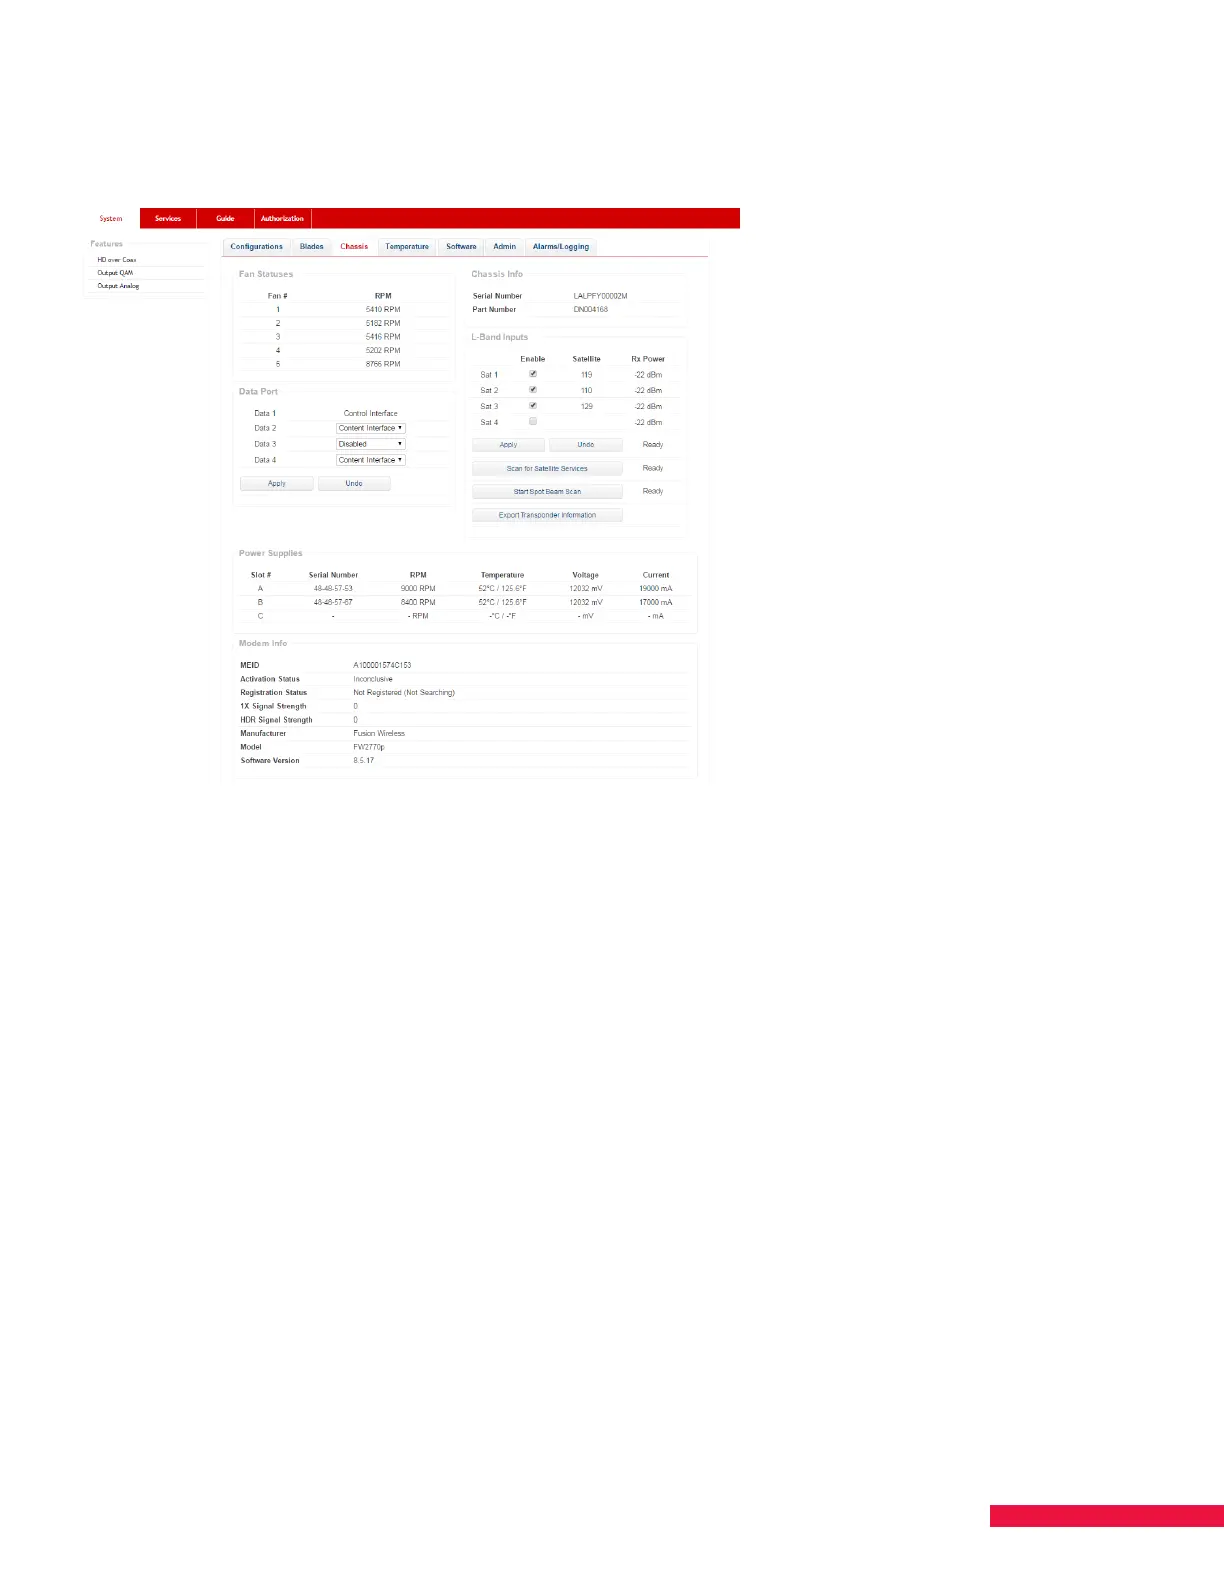
1. Click the Chassis tab (See Figure 8.) .
Figure 8. Chassis Tab - Enable Satellites
2. Under L-Band Inputs, click the check boxes in the Enable column. Check a box for each satellite connected
to the SMARTBOX satellite inputs (Sat ports 1-4).
3. Click the Apply button under the Enable column. If a message regarding disruption of satellite services
appears, click OK. (Cancel allows you to stop the process.) The status of the satellite discovery appears to
the right of the Apply and Undo buttons; the status may reflect Waiting, Not Ready, Ready or % Complete. It
takes approximately five minutes for the process to complete.
4. Click Export Transponder Information. This file will verify visibility of transponders on each applied
satellite feed. This file is updated when a satellite scan is run.
NOTES:
• RX Power indicates total satellite power — not individual transponders.
• The ideal signal range is between -20 dBm and -35 dBm, with each orbital being within ± 5 dBm of each other.
Larger dierences can result in intermittent performance. -62 dBm is the floor; if you see -62 dBm, there is no
signal being detected.
When deploying SMARTBOX at a customer’s site, take the following steps to ensure the orbital information is
correct.
1. Uncheck the satellite feeds then click Apply.
2. If the scan is stuck at “Waiting” or a specific percentage for more than 90 seconds, reboot the system.
a. If you have to reboot, when the system comes up you will see that the orbitals are still there, but
unchecked. Click Apply again.
3. Once all the feeds are unselected and no orbitals are listed, reselect the ones with connections then click
Apply.
4. Wait for that to complete, then confirm that all blades have tuner lock.