Before working on the controls disconnect the battery and connect the B+ and B- controller terminals via a 10 ohm 25
watt resistor to discharge the internal capacitors.
Never connect the controller to a battery with its vent caps removed as an arc may occur due to the controller’s internal
capacitance when it is first connected.
5.2 Mechanical installation and Cooling
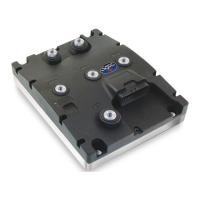
The controller should be bolted down to a flat (0.2mm max. Deviation) paint free surface, eventually lightly coated with
a thermal transfer compound, by the 4 fixing holes provided. Care should be taken not to trap any wires, etc., under the
controller. The mounting surface MUST be a substantial metal section of the vehicle for the full controller ratings to be
achieved. If there is no sufficient cooling surface available, then we advise to use a ripped aluminium heat sink
supported by a fan, or mount the heat sink in such a way that the driving wind cools the system.
5.3 Power wiring
Power connections should be made with flexible heat resisting cables of suitable cross-sectional area for the current to
be carried. These should be terminated in crimped lugs attached to controller and the contactors. Note that bolts and
washers are supplied for the connections on the controller. Be careful not to use to long bolts, as they can damage the
PCB. A battery-disconnect switch should be used (EC Directive).
Fixing torque for power connectors M8 terminals is 9,5Nm, for M6 power connectors 9,5Nm.
The controller wiring must be completely isolated from the chassis, NEVER CONNECT B- OR B+ TO THE CHASSIS OF THE
VEHICLE. On road vehicles with an 12 Volt on-board electrical system, the 12 Volt system MUST be galvanic separated
from the drive power system. This can be done via a DC-DC converter that charges the 12 Volt system from the drive
battery system. Always use a line contactor, controlled by the DMC controller, to enable the controller to switch off in
unsafe situations.
5.4 Light wiring
The controller may be supplied as a stand-alone unit or pre-wired onto a base-plate with contactors etc.
Control wiring connections should be made using 0.56mm² (AWG#20) or equivalent stranded wire. The correct pressure
release crimping tools MUST be used for long term connection reliability.
The main battery cable should be fused with a suitable air-break fuse. The key switch line must also be fused at a level
not exceeding 10 A when using the specified Ametek or Albright contactors.
The return wiring for the accelerators should be connected to pin A10 on the controller to guarantee wire off
detection..
5.5 Speed sensor cabling
Avoid routing the sensor cabling along with high power motor or battery cables.
Special care should be taken when connecting the screen of the motor speed sensor cable. Be sure only to connect the
screen on the controller side @ pin A31). When connected also to the motor side, current will flow over the screen,
disturbing the signal from the sensor to the controller, this can result in dangerous situations.