Installing the transmitter
10
Installing the docking station
— If the transmitter is to be installed in a Zone 2 explosion-hazard area, select a lo-
cation with low exposure to mechanical risk.
— Docking station is installed vertically (transmitter with sensor facing down) in an
area with low vibrations and stable temperatures – near the possible leak.
— A space of at least 15 cm (6") must be maintained above the transmitter for instal-
lation of the measuring unit.
— A space of at least 10 cm (4") – preferably 30 cm (12") – must be maintained be-
low the docking station to permit access for maintenance.
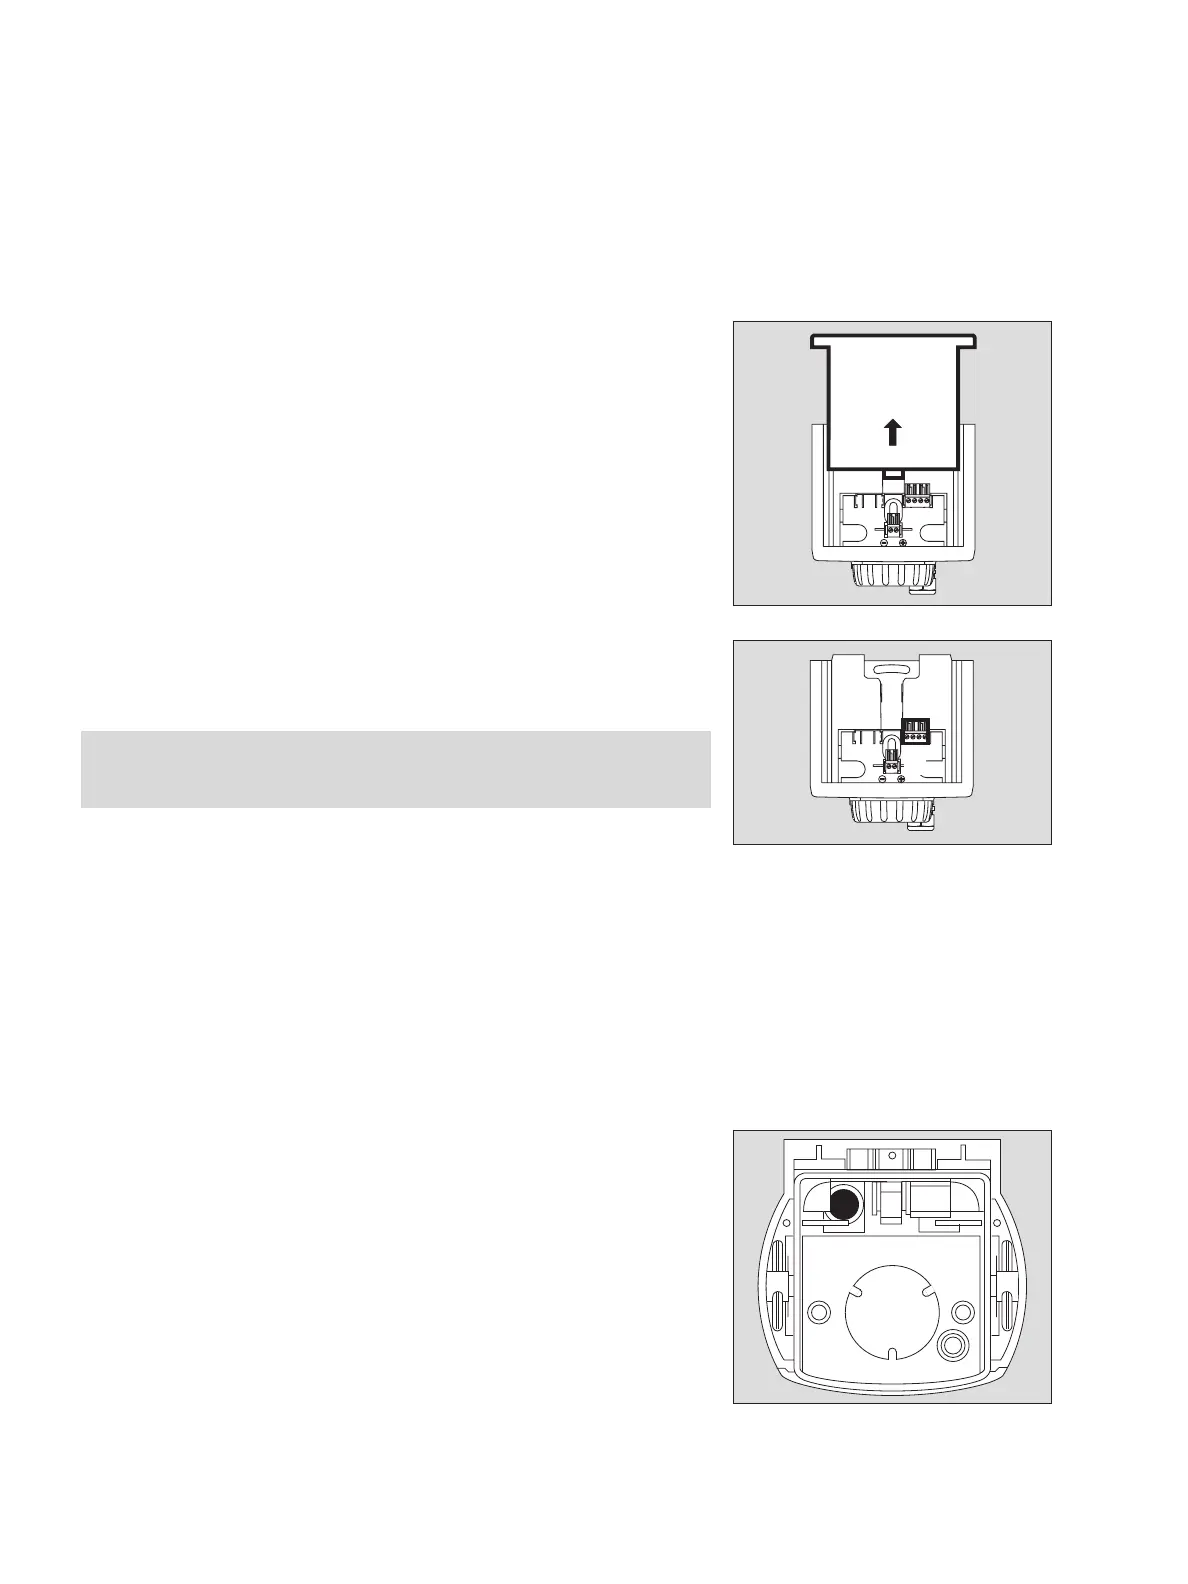
● Unpack the docking station.
1 Remove raincover (protection against dust and splashing water).
2 Remove the 4-pole terminal block (Part No. 83 16 268), keep it in a safe place and
insert it again after completion of the installation work.
● A drilling template is provided on page 135. The mounting holes are 66 ±4 mm
(2.6 ± 0.16") apart.
If the measuring unit is not to be mounted at this time:
● refit the raincover (protection against dust and splashing water).
For Multidrop installation only:
(see page 17)
Installing the Daisy Chain kit
Part No. 83 17 282
3 Break or drill out the prepared breakthrough for the second cable gland from the
inside of the docking station.
The hole should have a diameter of 20.5 mm.
● Check that the docking station has no loose parts, and clean it if necessary.
● Insert the nut of the cable gland into the docking station.
● Screw in the cable gland from the outside of the docking station and tighten it.
Attention:
Spacers (e.g. mounting bracket 68 09 772) must be used to prevent any
twisting of the housing when installed on uneven surfaces.
00423758_1.eps
1
00523758_1.eps
2
00623758_1.eps
3