Customer Support 800.537.6070 13
Scan Type
The default selection is always Pre-op (formerly Clone). The other available options depend on whether Bite
Registration or Buccal/Opposing was selected on the Setup tab.
Click the desired icon to select it.
Scanning with NEVO
The scanning pattern does not need to change.
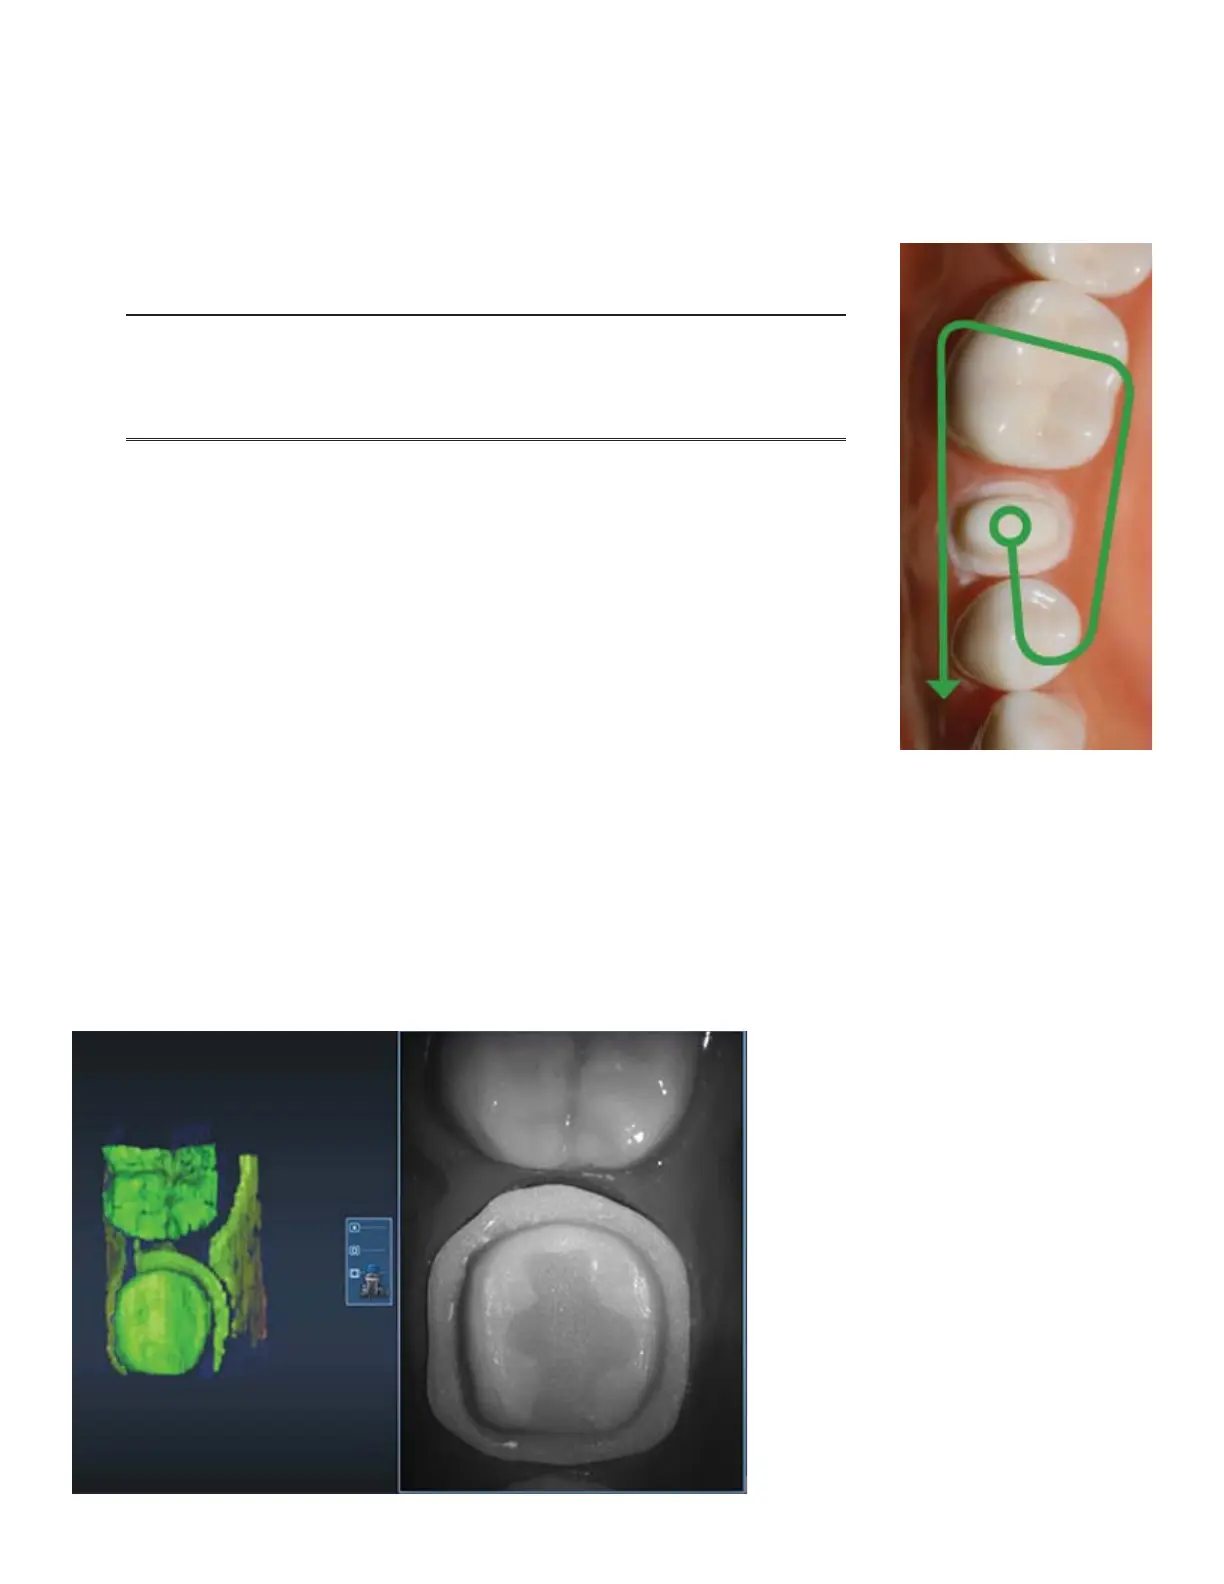
Note: For multiple anteriors and full arch cases, many operators use a
“saddle” pattern to roll back and forth over the straight and long anterior
teeth. This pattern can help avoid misalignments when dealing with such
similar teeth.
Goal:
• 100% of the prep and interprox. contact areas
• 90% of the proximal neighbors
• Good axial data for design
• 2-3 mm gingival tissue on buccal and lingual
1. Rest the tip of the scanner on the teeth to achieve the optimal focal distance.
2. Click the Power Button on the scanner or press the Spacebar on the
keyboard to activate the laser.
The Live View displays on the right side of the screen.
3. Start scanning with an occlusal view of the preparation or proximals. The rst scan still determines the
orientation of the model.
The system starts scanning as you get into place and stop moving. Once the rst scan is taken and the model
starts to build, move slowly in the scan pattern. You do not have to stop to take individual pictures. The
scanner picks up the data as you move. You can watch as the model builds on the left to see what data has
been captured and what is still needed.