DUS 60 Digital Ultrasonic Diagnostic Imaging System User Manual System Control
- 24 -
To restart the device
If there is any trouble described as below, please press the power on/off key to switch off the
device and then press it again to restart the device.
¾ The device displays wrong information and it lasts a long time.
¾ The device displays abnormally.
¾ The device can not execute an operation.
5.2. Examining
Apply an appropriate amount of coupling gel (medical ultrasound coupling agent) to the body
area to be examined, and then contact the area with the acoustic window of the probe firmly. A
cross-sectional image of tissues will be displayed on the screen. Adjust brightness, contrast,
gain, TGC, acoustic output, dynamic range, focus combination, etc properly. Adjusting the
monitor’s contrast and brightness is one of the most important factors for best image quality. If
theses controls are set incorrectly, the gain, TGC, dynamic range, focus combination and even
acoustic output may have to be changed more often than necessary to compensate. Meanwhile,
properly move the probe to obtain an optimal image of the target area. Or if necessary, adjust
sweeping speed to get satisfying images in the M mode, and adjust D gain, sample line, sample
volume, base line, PW angle, filter, steer, PRF, etc in the PW mode.
CAUTION
1. Please be gentle when contacting the target area with a probe. This is to avoid
making the probe damage or the patient disturbed.
2. Please choose a proper probe for the target area with an appropriate frequency to
begin the diagnostic operation.
3. Adjust the gain knob slowly.
DUS 60 Digital Ultrasonic Diagnostic Imaging System User Manual System Control
- 25 -
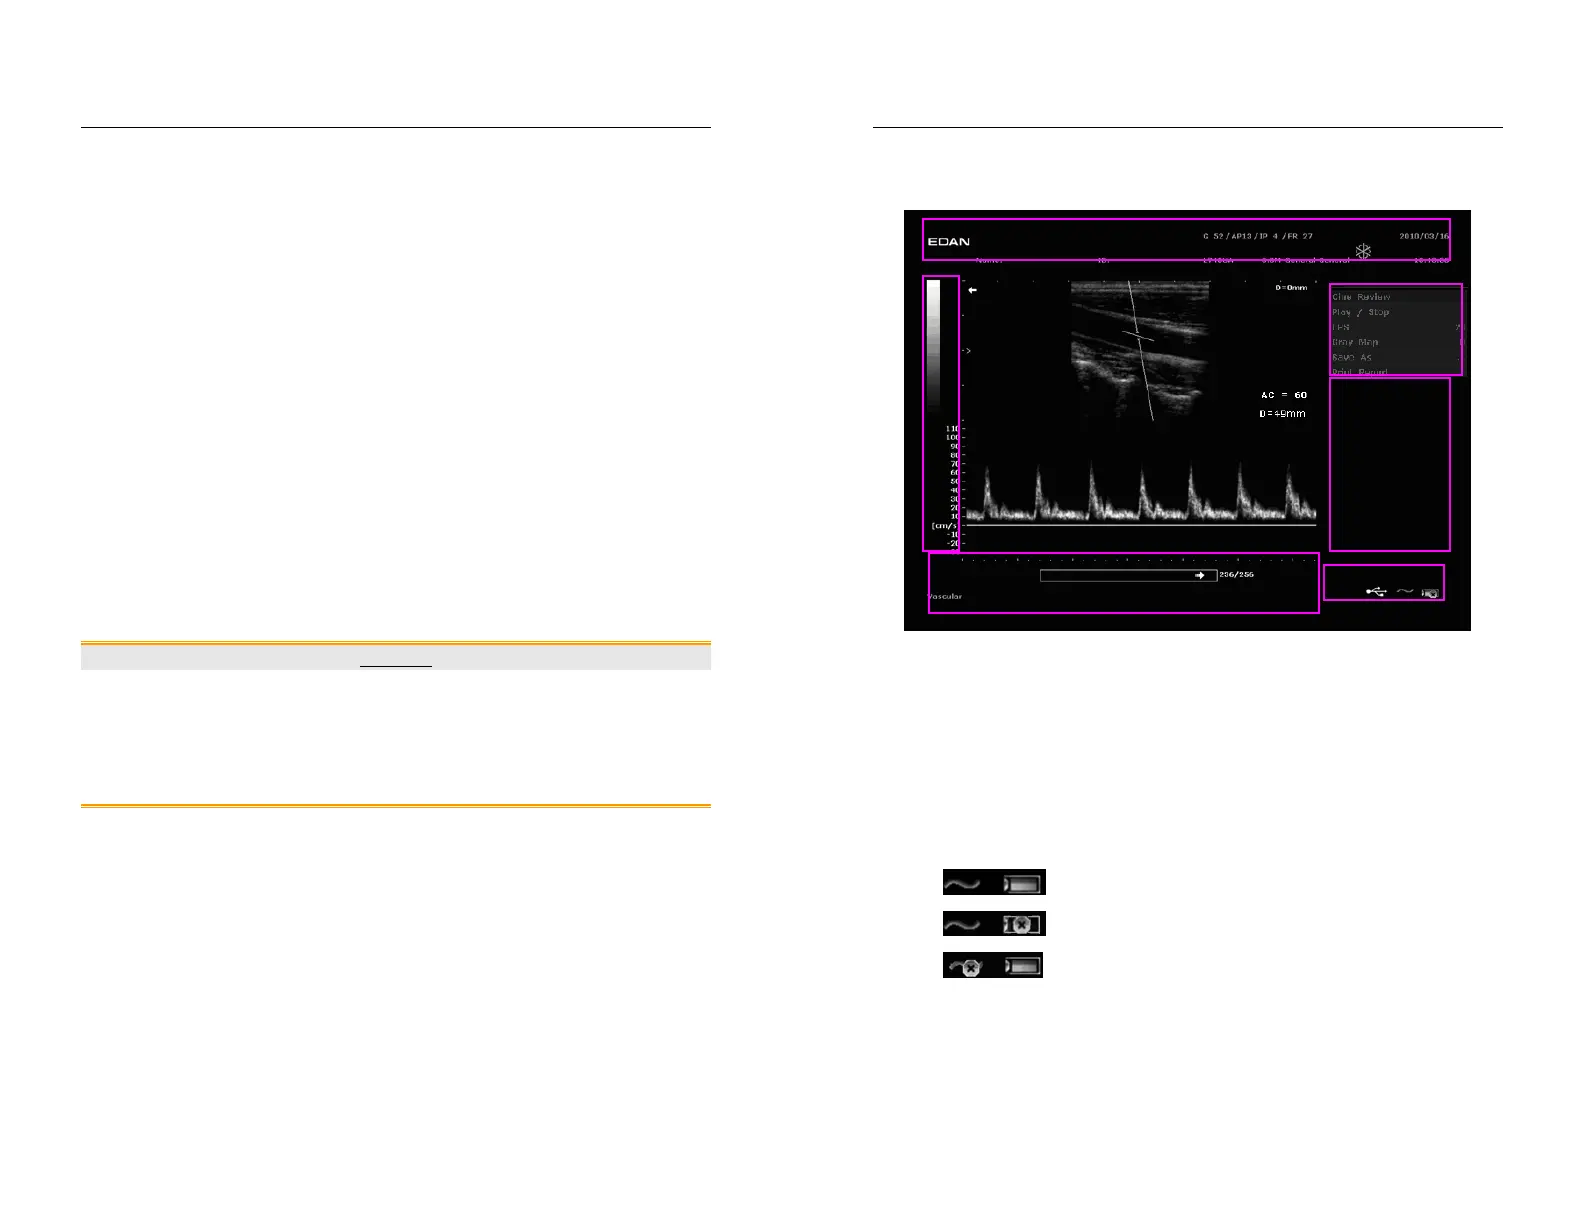
5.3. Screen Layout
Figure 5-1 Typical Image Screen
.① Top status bar: logo image, hospital name, patient name, patient ID, system date and time,
major parameter such as, probe name, probe frequency, THI, TSI, etc.
.② Gray map bar
.③ System menu
.④ Measurement result window
.⑤ Bottom status bar: examination type, operation prompt, etc.
.⑥ Bottom right corner: display the state of USB, input method, etc.
NOTE:
: AC power supply, with battery connected;
: AC power supply, without battery connected.
: Battery power supply;
②
①
③
④
⑤
⑥