DUS 60 Digital Ultrasonic Diagnostic Imaging System User Manual System Control
- 34 -
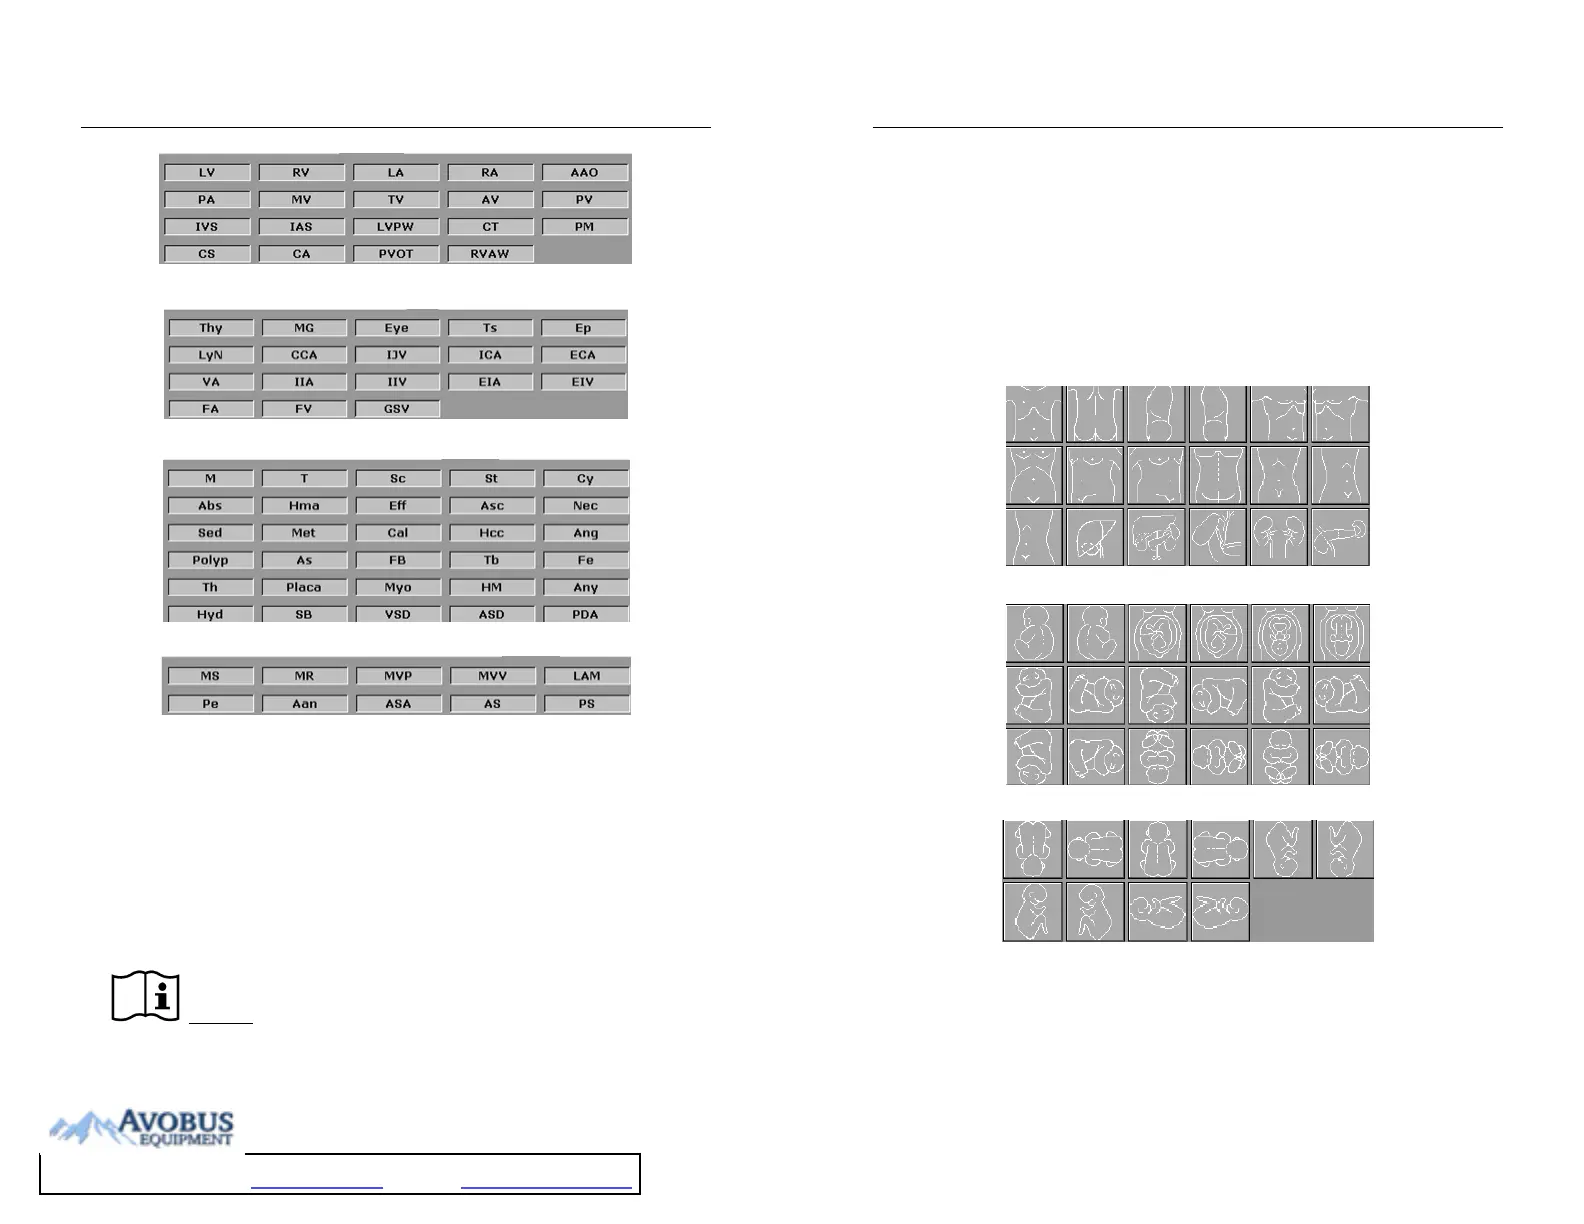
Cardiac
Sml
Lesion 1
Lesion 2
Figure 5-3 System-defined Comment Library
5.4.6. Body Mark Function
To add a body mark:
1. Press Body Mark, to display the body mark dialog box.
2. Highlight a body mark in the body mark dialog box, and press Set to confirm the choice to
add the body mark. The selected body marks are displayed in the bottom left corner of the
screen.
Reference Figure 5-1 Typical Image Screen.
3. After adding a body mark, use the trackball to move the position of the probe; and the
rotation function is automatically activated and the rotation light is on, you can rotate this
DUS 60 Digital Ultrasonic Diagnostic Imaging System User Manual System Control
- 35 -
button to adjust the probe scanning direction.
4. Press Set to complete adding the body mark.
To move a body mark:
1. Move the cursor to a body mark, and there is a pane around the body mark;
2. Press Set and move the cursor to a new position;
3. Press Set to confirm the new position.
There are more than 130 types of body marks, as shown below:
Abdomen
Obstetric 1
Obstetric 2