1-17
1-171-17
1-17
FIGURE 2FIGURE 2
FIGURE 2FIGURE 2
FIGURE 2
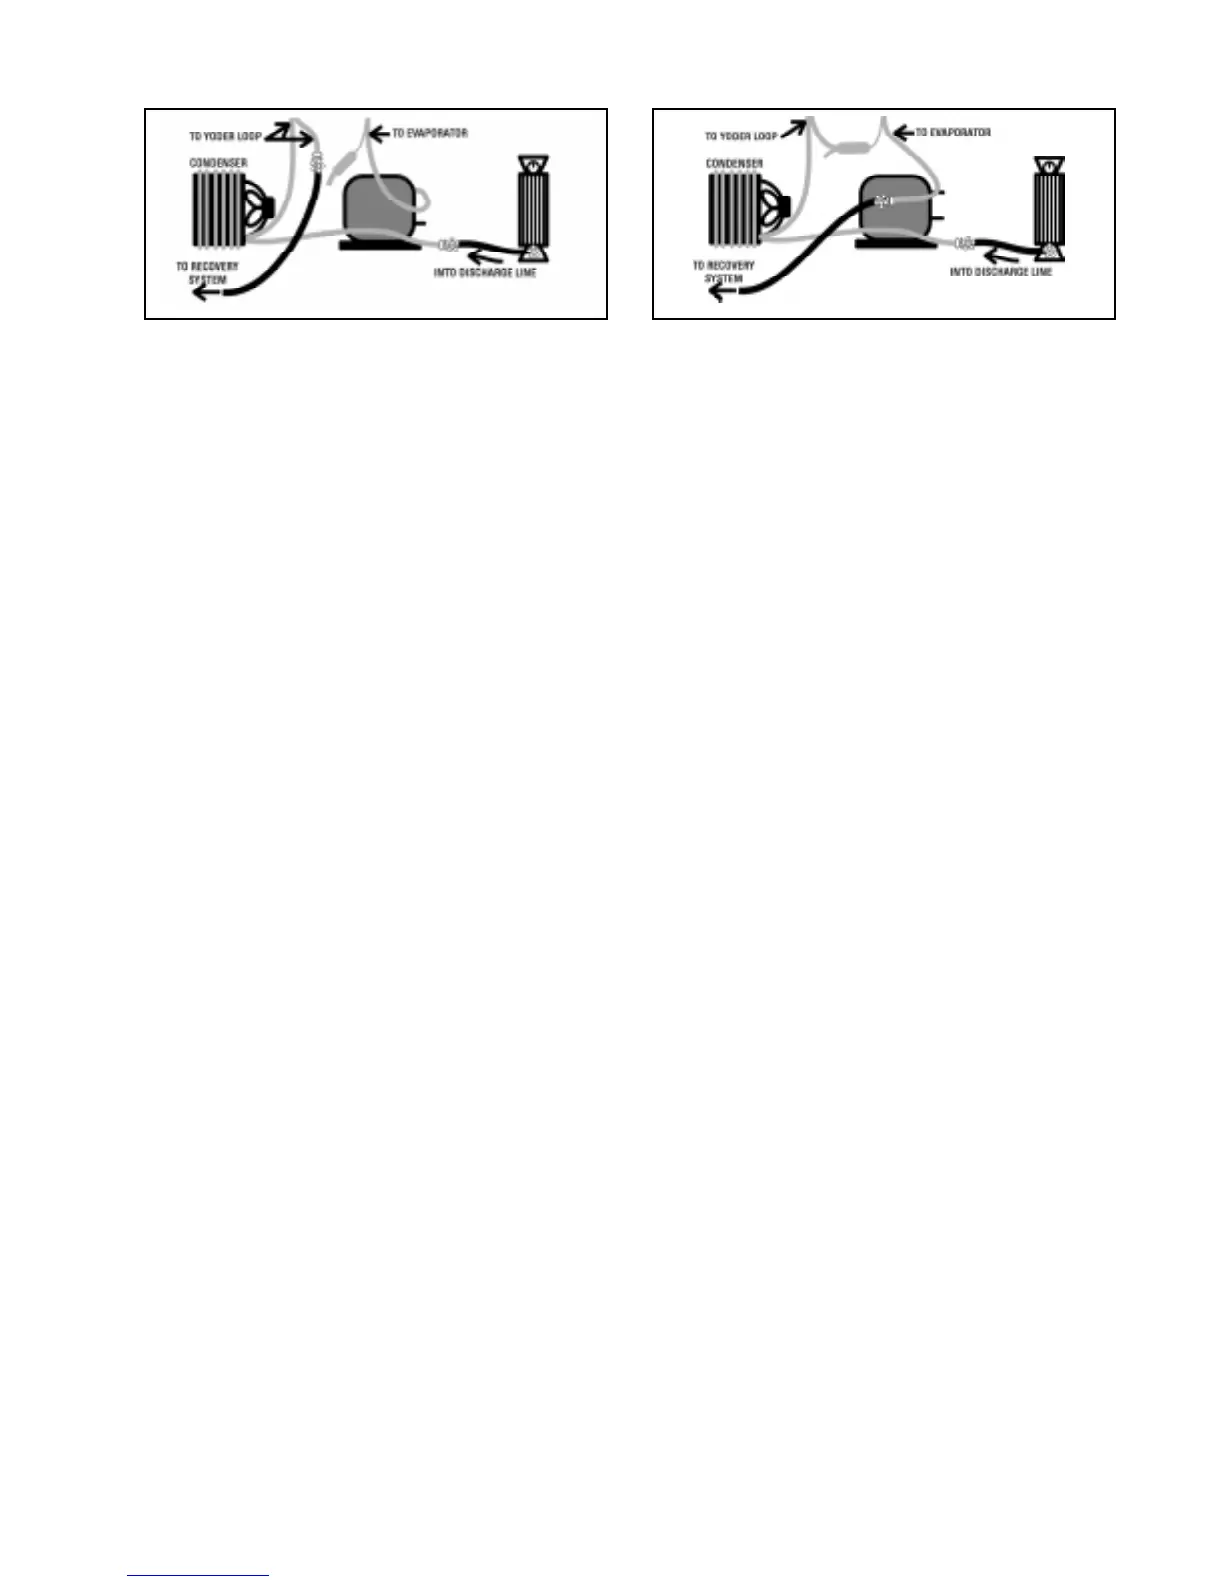
Flush the entire system (less compressor)
out the suction line.
Flush into discharge line, through hi-side
and out the yoder loop at drier inlet.
FIGURE 1FIGURE 1
FIGURE 1FIGURE 1
FIGURE 1
2. Replace the Drier2. Replace the Drier
2. Replace the Drier2. Replace the Drier
2. Replace the Drier
Score and break either one of the two inlet
lines on the new drier (the other line will
remain sealed until the sweep charge, at
which time it will be the process tube). Pre-
pare the drier outlet side for connection to
the capillary tube. The capillary tube should
be inserted about 3/4 inch into the drier to
prevent solder alloy from plugging the cap-
illary tube or the capillary tube extending
too far into the drier and contacting the
screen. To facilitate the installation, place a
slight bend in the capillary tube about 3/4
inch from the end and insert into the drier.
Remove the process tube adapter from the
yoder outlet and prepare the tube for con-
nection to the drier inlet. The drier inlet joint
will be the only copper-to-steel connection
which will require the silver solder and flux.
To help prevent flux from entering the sys-
tem, first insert the line from the yoder loop
into the drier inlet, then apply the flux. Braze
both the inlet and the outlet joints of the re-
placement drier.
3. Isolate and flush the remainder of3. Isolate and flush the remainder of
3. Isolate and flush the remainder of3. Isolate and flush the remainder of
3. Isolate and flush the remainder of
the systemthe system
the systemthe system
the system
Score and break the suction line close
enough to the old compressor to be able
to reconnect it to the replacement com-
pressor later. Attach a process tube adapter
to the evaporator side of the suction line.
Connect the hand valve and hose from the
recovery equipment to this adapter
(figure(figure
(figure(figure
(figure
2)2)
2)2)
2). Be certain that the pressure in the charg-
ing cylinder is about 30 p.s.i.g. above ambi-
ent temperature. Start the recovery unit and
open the hand valve to the suction line.
Release four (4) ounces of R134a from the
charging cylinder into the system. It will take
about 15 minutes for the refrigerant to pass
through the condenser, yoder loop, drier,
capillary tube, evaporator, suction line and
into the recovery system. This 15 minutes
time can be utilized to remove the old com-
pressor
(figure 3)(figure 3)
(figure 3)(figure 3)
(figure 3) and prepare the new com-
pressor by mounting into place and wiring
electrically. Remember to leave the plugs
in place until brazing
(refer to (refer to
(refer to (refer to
(refer to
figure 4).figure 4).
figure 4).figure 4).
figure 4).