3-12
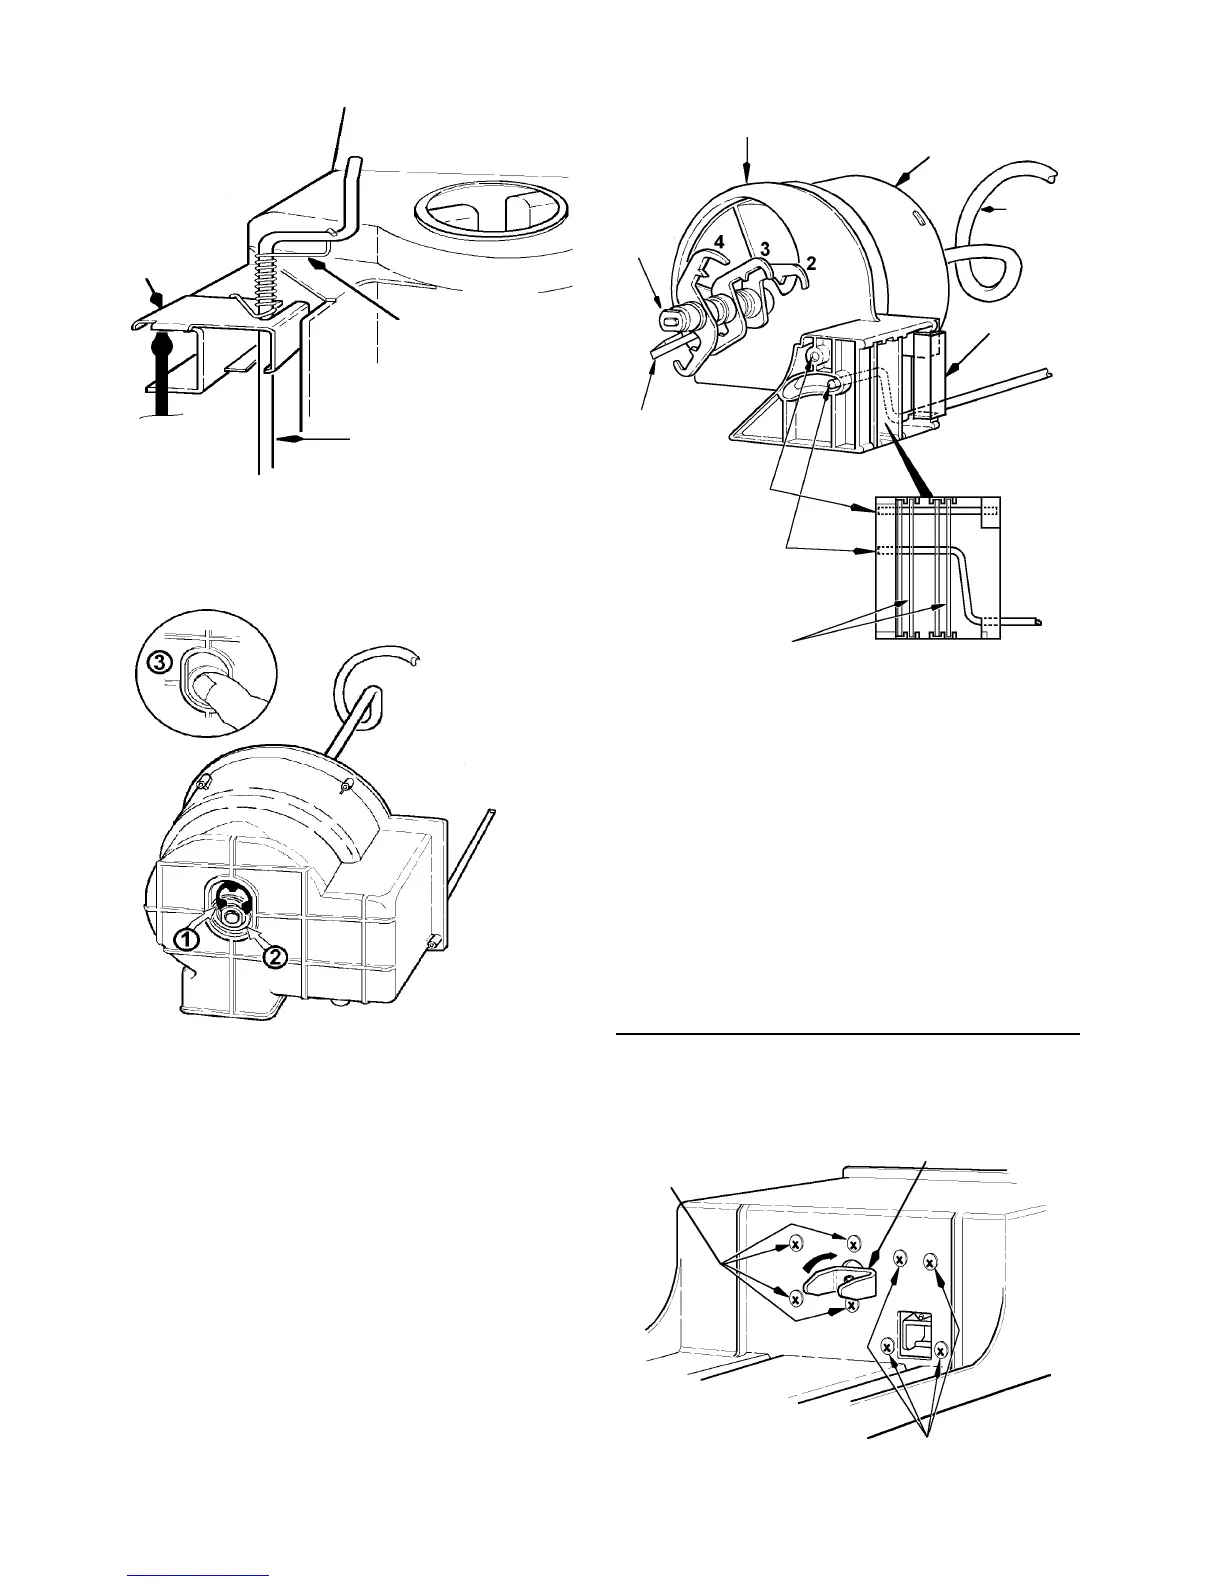
CRUSHER CONTROL ROD
CONTROL ROD
BRACKET
CONTROL ROD
SPRING
SCREW
DRIVER
5. When removing the control bracket,
hold the clip; this will prevent it from
being thrown off.
6. When removing the crusher housing,
position the snap ring (1) as shown in
the above drawing, then remove it and
the retainer washer (2).
7. Push the auger assembly away from the
crusher housing using your thumb (3).
8. To remove the auger nut turn it
clockwise.
IMPELLER
AUGER
AUGER
NUT
ICE DIVERTER
SNOW SHIELD
MANDIBALE PIN
CRUSHER
CONTROL
ROD
ACTUATED
BLADES
9. Replace the parts as required. The
number on the blades should face the
back of the auger nut. Blade number 4
should be nearest to the auger nut.
10. Make sure the ice diverter is aligned to
the boss on the dispenser mandiplate.
11. Reinstall all other components in the re-
verse order of removal.
ICE/CRUSHER BIN SHELF ENCLO-
SURE ASSEMBLY
SOLENOID YOKE ASSEMBLY
MOUNTING SCREWS
DISPENSER
MANDIPLATE
AUGER MOTOR
MOUNTING SCREWS
TURN CLOCKWISE TO
REMOVE DRIVE YOKE