3-9
The PC board uses this line to charge the
holding circuit. A low voltage condition
here may represent poor switch contacts.
(Low voltage may cause short delays.) If
low voltage conditions do not exist, replace
the PC board.
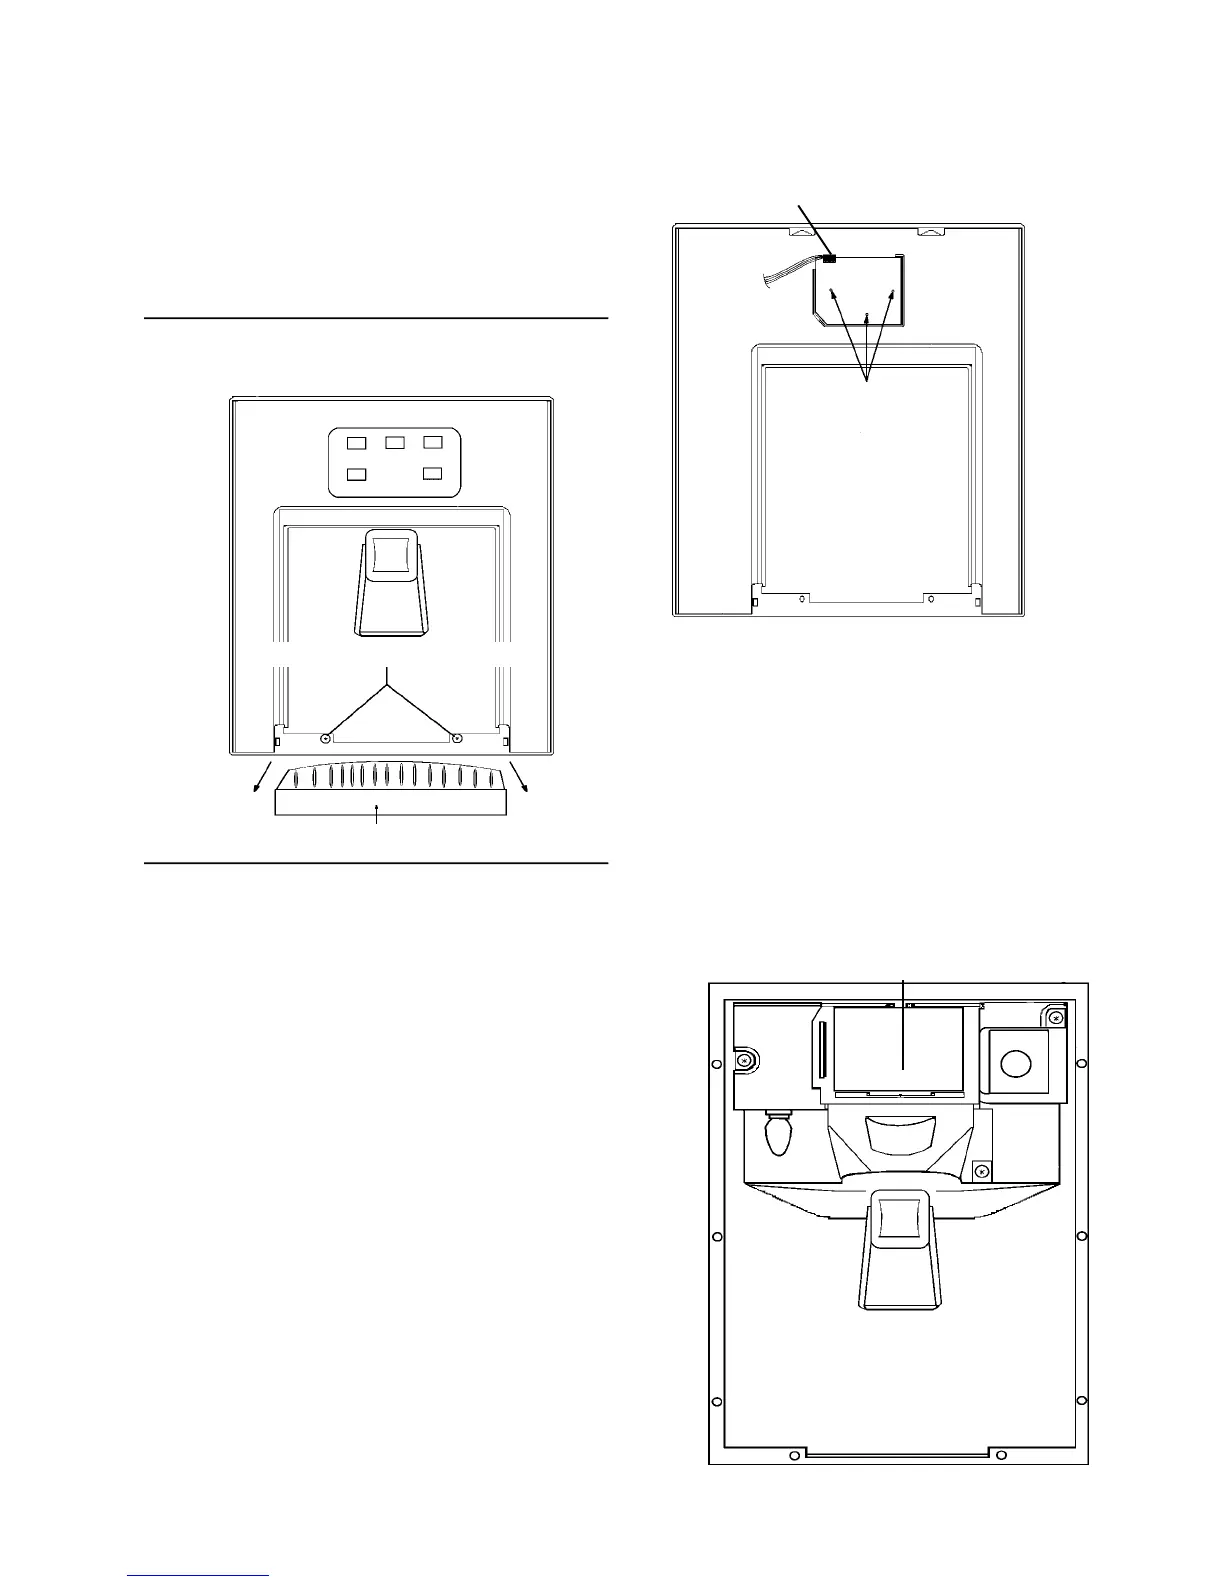
Ice & Water Fountain Bracket
Removal
1. Disconnect the unit from the power
source.
2. To remove the grill from the fountain
sump, pull straight out.
3. Remove the two escutcheon mounting
screws.
4. Carefully raise the escutcheon up and off
the fountain assembly.
5. Disconnect the quick disconnect edge
connector from the PC fountain switch
board.
6. Remove the three fountain bracket
mounting screws.
Quick disconnect
edge connector from
the PC fountain
control board
(Pull up to remove)
PC FOUNTAIN SWITCH
BOARD, MOUNTING
SCREWS
REAR VIEW FOUNTAIN ESCUTCHEON
7. Carefully pull the assembly out of the
fountain housing. You now have full ac-
cess to solenoid, dispenser mecha-
nism, PC fountain control board and
light socket.
8. To repair the assembly, disconnect
electrical quick disconnect.
GRILL
FOUNTAIN ASSEMBLY - Electronic
Control
PC FOUNTAIN
CONTROL BOARD
FOUNTAIN ASSEMBLY
(ESCUTCHEON REMOVED)
ESCUTCHEON MOUNTING SCREWS