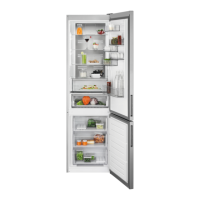
Do you have a question about the Electrolux Side-By-Side Refrigerator and is the answer not in the manual?
Procedures for removing refrigerator from shipping carton and initial handling.
Location of model and serial number plates for identification.
Importance of proper airflow around the refrigerator for efficient operation.
Requirements for connecting the refrigerator to a proper electrical outlet.
Instructions on how to properly level the refrigerator for stability and function.
Step-by-step guide for removing the refrigerator and freezer doors.
Procedures for adjusting doors to ensure proper closure and appearance.
Overview of the cabinet's structural components and materials.
Details on how the compressor is attached to the refrigerator base.
Description of the cabinet's insulation and inner liner construction.
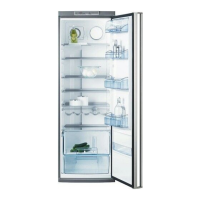
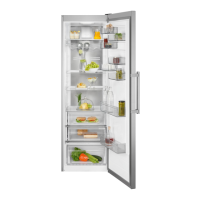
Information on the construction of cabinet doors and their sealing gaskets.
How to move and adjust door bins for personalized storage.
Instructions for removing and adjusting front and rear rollers for leveling.
Steps for refinishing minor scratches or damage to the cabinet's painted surface.
Importance and methods of proper electrical grounding for safety.
Overview of compressor and its electrical components like relays.
Explanation of the solid-state relay's function and operation.
Step-by-step procedure for testing and replacing the compressor relay.
Information about the overload protector's function and thermal operation.
Procedure for testing and replacing the overload protector.
Details about the run capacitor's role in compressor efficiency.
Steps for testing and replacing the run capacitor.
Explanation of how the compressor starts using the relay and windings.
How the run capacitor aids compressor efficiency during operation.
How the compressor circuit and overload protector function.
Troubleshooting steps for checking compressor voltage and operation.
Description of the hot tube's function in preventing condensation.
Location and function of the evaporator fan motor.
Step-by-step guide to remove and replace the evaporator fan motor.
Function and calibration of the defrost thermostat.
Procedure for testing the defrost thermostat's continuity.
Steps for removing and replacing the defrost thermostat.
Information about the defrost heater's wattage and function.
Step-by-step guide for removing and replacing the defrost heater.
Function of the motorized damper controlling airflow between compartments.
How the NTC thermistor monitors freezer temperature.
How the NTC thermistor monitors fresh food compartment temperature.
Function of the 450W heating element in the evaporator.
Function of the DTT in ending the defrost cycle.
Role of the compressor in creating pressures for heat exchange.
Function of the fan circulating air in freezer and fresh food compartments.
Function of the fan circulating air through condenser coils.
How the magnetic reed switch detects door state.
Function of the fan circulating air through a filter.
Details on NTC Thermistor sensor.
How interior lights are enabled/disabled by door sensor.
Description of the audible transducer (Piezo) for alarms.
Power supply details for the main control board.
Power supply details for the user interface.
Description of display types for versions A and B.
Feature to change temperature display units.
Description of active functions in showroom mode.
Overview of refrigerator alarms and indicator lights.
How the temperature alarm enables and indicates status.
Status of alarm when enabled and parameters are within tolerance.
Procedures for resetting or turning alarm functions on/off.
Indication for door ajar condition and reset.
Alarm condition for door open and exceeding temperature limits.
Indicator for power failure status.
Alarm condition for power failure and high temperature.
Indicator for temperatures exceeding recommended limits.
Indication when alarm has been turned off by the user.
Activation and deactivation of showroom mode.
Functions displayed in showroom mode.
How interior lights are enabled/disabled by door sensor.
How to switch temperature display units.
Procedure to manually initiate or deactivate defrost cycle.
Details on operating procedures for Revision L.
Details on the two-position readout for freezer and food compartments.
How to adjust freezer temperature using UP/DOWN keys.
How to adjust fresh food compartment temperature.
How to activate, deactivate, and reset alarms.
How to activate/deactivate air filter and monitor status.
How to activate fast freeze and fast ice modes.
Condition for compressor operation termination due to high ambient temp.
Details on the one-position readout for freezer and food compartments.
How to adjust freezer temperature using Colder/Warmer keys.
Conversion chart for freezer settings to actual temperatures.
How to adjust fresh food compartment temperature.
Conversion chart for fresh food settings to actual temperatures.
Wiring diagram for the refrigerator's control system.
Diagrams illustrating the controller and user interface boards.
Detailed wiring diagrams for the refrigerator's electrical components.
Table showing operating parameters at different ambient conditions.
Specifications for defrost thermostat and heater.
Performance data for the condenser fan motor.
Electrical and thermostat specifications for the ice maker.
Introduction to the diagnostic mode for viewing data and testing loads.
Capabilities within the diagnostic mode for viewing system data.
Capabilities within the diagnostic mode for testing components.
How to exit the service diagnostic mode.
Overview of the tests available in the diagnostic menu.
Test to display software versions of main board and user interface.
Test to check evaporator fan operation at high and low speeds.
Test to display min, max, and average freezer temperatures.
Test to display min, max, and average fresh food temperatures.
Test to check damper motor operation and position.
Test to check defrost cycle parameters, including heater activation.
Test to check compressor run time, cycles, and fan operation.
Test to reset to factory defaults or clear service data.
Procedure to manually activate or deactivate the defrost cycle.
Initiates a normal defrost cycle, disabling other functions.
Steps for removing and installing the refrigerator's control board.
Instructions for accessing and replacing the power board.
How to replace the 3-amp fuse on the control board.
Steps for removing and replacing the damper assembly.
Location and replacement of the food compartment temperature sensor.
Location and replacement of the freezer compartment temperature sensor.
Function and replacement of the magnetic reed switch for the interior light.
Exploded view illustrating the refrigerator's major components.
Explanation of how automatic defrost operates.
Core principles of moisture transfer to the evaporator.
Description of how air flows through freezer and fresh food compartments.
Definitions for refrigerant terms: Recovery, Recycling, Reclaim.
Crucial safety precautions for handling refrigeration systems.
Precautions and warnings for testing compressor terminals.
Dangers of overcharging and consequences like shell separation.
Safety warning related to soldering pressurized systems.
List of key components in a refrigerator's system.
Function and replacement of the perimeter hot tube for condensation control.
Explanation of the continuous refrigeration cycle.
Symptoms and consequences of low or high side refrigerant leaks.
Procedures for locating and repairing refrigerant leaks.
Method for confirming internal hot tube leaks.
Steps and cautions for replacing a compressor.
Procedure for flushing the system using dry nitrogen.
Procedure for flushing the system using refrigerant.
Step-by-step guide for installing a replacement compressor.
Procedures for replacing the refrigerator's condenser.
Steps for replacing the evaporator assembly.
Procedure to bypass and replace the internal heat exchanger.
Information on the kit to bypass a leaking perimeter hot tube.
First step in bypassing a leaking perimeter hot tube.
Second step in installing the heater wire for the perimeter hot tube.
Third step for installing the heater wire and connecting it.
Procedure for replacing the liquid line filter-drier.
Procedures for evacuating and recharging the refrigeration system.
List of tools and equipment required for evacuation and recharging.
Steps for setting up the evacuation and recharging equipment.
Procedure for evacuating the refrigeration system to remove air and moisture.
Steps for correctly charging the refrigeration system with refrigerant.
Steps for preparing the charging cylinder for refrigerant transfer.
Procedures for performing a final leak test after charging.
General service information specific to R-134a refrigerant.
Importance of verifying refrigerant type before service.
Requirements for dedicated equipment when working with R-134a.
Comparison of R-134a systems with R-12 systems.
Information on Ester oil used with R-134a and its properties.
Problems caused by water in the refrigeration system and evacuation requirements.
Essential procedures for maintaining vacuum pumps.
How R-134a leaks compare to R-12 and brazing practices.
Methods for detecting R-134a refrigerant leaks.
Comparison of R-134a and R-12 properties.
Chart showing pressure-temperature relationships for HFC-134a and CFC-12.
Health and safety information for handling R-134a.
Effects of inhaling HFC-134a vapor and exposure limits.
Risks of cardiac issues from high HFC-134a vapor concentrations.
Procedures for handling spills or large releases of R-134a vapor.
Precautions for skin and eye contact with liquid HFC-134a.
Information on the combustibility of HFC-134a under specific conditions.
Warning against using air/HFC-134a mixtures for leak testing.
Safe practices for bulk delivery and storage of refrigerants.
Recommended practices for filling and charging operations.
Procedures for efficient refrigerant recovery.
Risks and effects of thermal decomposition of HFC-134a vapors.
Overview of the ice maker's location and function.
Role of the decorative front cover protecting the ice maker mechanism.
Description of the die-cast aluminum ice mold and its features.
Details on the mold heater's rating and function.
Function of the ice stripper in preventing ice from falling back.
How ejector blades sweep ice sections out of the mold.
Operation of the water valves for filling the ice mold.
Function of the thermostat as a safety device against overheating.
How the sensing arm controls ice quantity and stops production.
Description of the three SPDT timing switches.
Function of the TCO as a one-time limit fuse.
Components of the timing cam and coupler.
Function of the gear driven by the motor to rotate cam and ejector.
Details about the low wattage motor driving the timing gear.
Function of the switch to turn the ice maker off or start harvest cycle.
Troubleshooting guide for common ice maker problems.
Troubleshooting steps for an ice maker that fails to start.
Troubleshooting steps for an ice maker not completing its cycle.
Troubleshooting steps for an ice maker that does not stop at cycle end.
Troubleshooting steps for continuous ejection when container is full.
Troubleshooting steps for undersized ice production.
Procedures for testing the ice maker's operation.
Considerations for the ice maker's water refilling and ice storage.
How to manually cycle the ice maker.
Wiring diagrams illustrating electrical operation of the ice maker.
Electrical wiring diagram for ice maker operation state.
Electrical wiring diagram for ice maker operation state.
Electrical wiring diagram for ice maker operation state.
Electrical wiring diagram for ice maker operation state.
Electrical wiring diagram for ice maker operation state.
Electrical wiring diagram for ice maker operation state.
Electrical wiring diagram for ice maker operation state.
Electrical wiring diagram for ice maker operation state.
Electrical wiring diagram for ice maker operation state.
Electrical wiring diagram for ice maker operation state.
Electrical wiring diagram for ice maker operation state.
Electrical wiring diagram for ice maker operation state.
Mechanical illustration of the ice maker's operating cycles.
Mechanical illustration of the ice maker's freezer cycle.
Mechanical illustration of the ice maker's start of harvest cycle.
Mechanical illustration of the ice maker's harvest cycle.
Mechanical illustration of the ice maker's harvest cycle.
Mechanical illustration of the ice maker's harvest cycle.
Mechanical illustration of the ice maker's harvest cycle.
Mechanical illustration of the ice maker's harvest cycle.
Mechanical illustration of the ice maker's end of harvest cycle.
Mechanical illustration of the ice maker's fill cycle.
Mechanical illustration of the ice maker's end of fill cycle.
Electrical wiring diagram for ice maker operation state.
Details on the ice dispenser container and its mounting.
Location of auger motor, solenoid, light socket, and bulb.
Steps for removing the dispenser auger motor.
Procedure for testing the auger motor's resistance.
Steps for removing the dispenser solenoid assembly.
Procedure for testing the solenoid assembly's resistance.
Steps for removing and replacing the dispenser lamp socket and bulb.
Components of the ice auger and crusher assembly.
Steps for removing the ice auger and crusher assembly.
Steps for replacing the crusher blades.
Overview of dispenser features and actuators.
Explanation of different feature layouts on the dispenser.
Description of the seven selection dispenser functions.
Description of the icon model dispenser functions.
Description of the six selection dispenser functions.
Description of the electrical mechanical dispenser functions.
Procedures for gaining access to the dispenser control area.
Accessing the selector switch on electrical mechanical models.
Testing dispenser switches for light and solenoids.
Gaining access to the electronic control board.
Steps for removing the dispenser housing and pulling it forward.
Procedure for removing the water line from the dispenser.
Servicing the ice door, actuator switches, and return springs.
Steps for replacing the door closer mechanism.
How the door closer works to slow door closing.
How to select and activate Fast Freeze and Fast Ice modes.
Procedures for testing the electronic dispenser controls.
Details on the door wiring harness connector and main harness connections.
Labeling of connectors on the control board.
Identification of relays on the control board.
Power supply and voltage conversion details for the control board.
Servicing the control board by removing the front face.
Checking the ribbon cable connecting power and control boards.
Procedures for testing and replacing the ribbon cable.
Details on lighted paddles and their replacement.
Overview of water control for ice maker and dispenser.
Description of dual and single coil water valves.
Information on front and rear water filter types and replacement.
Description of the refrigerator's water tank assembly.
Diagram of the front filter water system.
Diagram of the rear filter water system.
Procedures for testing the water fill system and diodes.
Method for testing diodes using an ohmmeter.
Procedure for checking voltage to the water valve coils.
Expected readings with a digital meter and open diodes.
How heater resistance affects voltage readings.
Normal voltage differences between primary and secondary valve coils.
Troubleshooting no water at the door, including diode and board checks.
Part number for the diode replacement kit.
Steps to check if valves are letting water through.
Procedure to test and replace the ice maker water valve.
Procedure to test and replace the chilled water valve.
Checking connections for low or no voltage at coils.
Expected voltage readings for the secondary valve coil when ice maker fills.
Expected voltage readings for the secondary valve coil when filling glass.
Expected voltage readings for the primary valve coil.
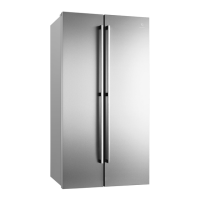
| Type | Side-by-Side |
|---|---|
| Energy Star Certified | Yes |
| Door Finish | Stainless Steel |
| Temperature Control | Electronic |
| Ice Maker | Yes |
| Water Dispenser | Yes |
| Defrost System | Frost-Free |