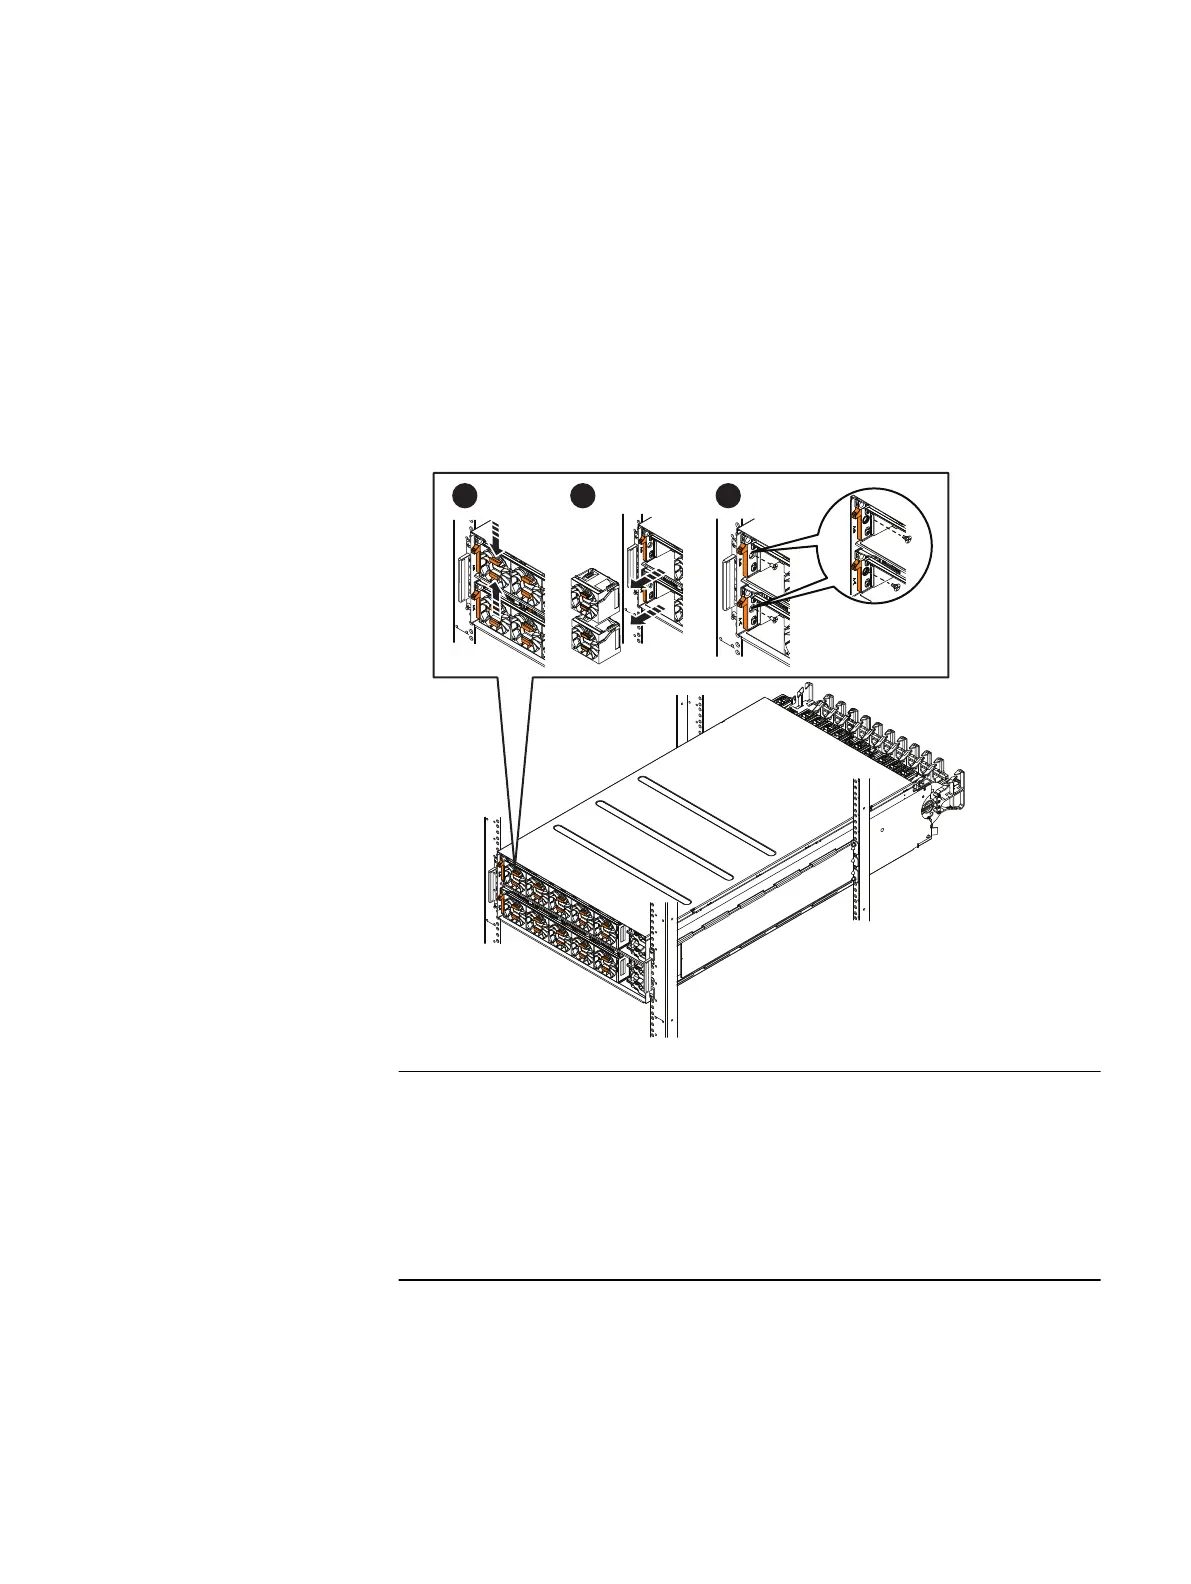
Installing the stabilizing screws
Procedure
1. At the front of the enclosure, install the two screws that secure the left side of the
enclosure to the left rail (Figure 17 on page 32):
a. Remove both fans from the left front side of the enclosure:
To remove a fan, pinch the two orange tabs on the front of the fan together and
pull the fan from the chassis.
b. Install the two screws to secure the left side of the enclosure to the rail.
Figure 17 Installing the left stabilizing screws
If the two holes in the side of the enclosure do not line up with the holes in the left
rail, the back of the enclosure is not fully connected to the back of the rail. In this
situation, you must push the enclosure further into the cabinet so that the curved
tab on the bottom back of the left rail hooks over the bottom of the enclosure and
the tab on the back of the rail hooks into the slot on the rear side of the enclosure
(Figure 18 on page 33).
Assemble components in your cabinet
32 EMC VNX Series VNX8000 Block Installation Guide
 Loading...