4.2 Connecting the transmitter
Warning!
• Risk of electric shock! Switch off the power supply before opening the instrument.
Do not install or wire the unit while connected to the power supply. Failure to comply
may also result in damage of electronic components.
• Connect the protective conductor to the ground terminal on the housing before the
power supply is switched on.
• Check that local power supply and frequency agree with the information on the
nameplate. All relevant national regulations for mounting must also be observed.
1. Loosen the Allen screw of the safety
grip using an 3 mm Allen key.
2. Unscrew the wiring compartment cover.
3. Feed the power and signal cables
into the appropriate cable glands.
4. Wire up according to the wiring
diagrams:
→ see Fig. 22, 23 or
→ Wiring diagram in the screw cover
• Power supply is connected
to terminal 1 (L1, L+), terminal 2
(N, L–) and the ground terminal (3).
• Fine-wire leads: max. 4 mm
2
;
put sleeve on the end of the cores.
Single-core lead: max. 6 mm
2
.
5. Having made the connection,
screw the cover tightly again on the
transmitter housing.
6. Tighten the Allen screw of the safety
grip securely.
Note!
For instruments fitted with an “EEx i” communications module, the electrical
connection is described in separate Ex documentation.
Warning!
Note!
ANSCHLUSSKLEMMEN - FIELD TE RMINALS
3
28
+
+
-
-
+
-
+
-
+
-
20
21
23
24
25
26
27
1
2
22
3
28
+
+
-
-
+
-
+
-
+
-
20
21
23
24
25
26
27
1
2
22
ANSCHLUSSKLEMMEN - FIELD TE RMINALS
Supply cable
ba009y30
Signal cable
➊
➋
➌
➌
➍
➎
➏
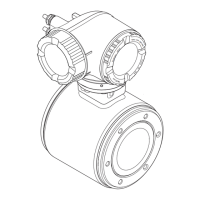
Fig. 21
Connecting the transmitter
4 Electrical Connection Promag 33
22 Endress+Hauser

 Loading...