7
IOM, VS/VT Models, Rev A Enertech Global
Section 2: Installation Introduction
Introduction
This geothermal heat pump provides heating and
cooling as well as optional domestic water heating
capability. Engineering and quality control is built
into every geothermal unit. Good performance
depends on proper application and correct
installation.
Notices, Cautions, Warnings, & Dangers
“NOTICE” Notication of installation, operation or
maintenance information which is important, but
which is NOT hazard-related.
“CAUTION” Indicates a potentially hazardous
situation or an unsafe practice which, if not
avoided, COULD result in minor or moderate injury or
product or property damage.
“WARNING” Indicates potentially hazardous situation
which, if not avoided, COULD result in death or
serious injury.
“DANGER” Indicates an immediate hazardous
situation which, if not avoided, WILL result in death
or serious injury.
Inspection
Upon receipt of any geothermal equipment,
carefully check the shipment against the packing
slip and the freight company bill of lading. Verify
that all units and packages have been received.
Inspect the packaging of each package and each
unit for damages. Insure that the carrier makes
proper notation of all damages or shortage on all
bill of lading papers. Concealed damage should
be reported to the freight company within 15 days.
If not led within 15 days the freight company can
deny all claims.
Note: Notify Enertech Global’s shipping department
of all damages within 15 days. It is the responsibility
of the purchaser to le all necessary claims with the
freight company.
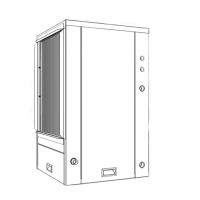
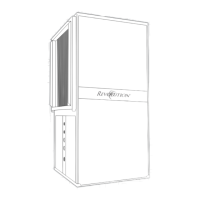
Un-packaging
Enertech units are mounted to wooden pallets for
easy handling during shipment and installation.
Units are protected during shipment with durable
cardboard corner posts, top and air coil panels.
Shrink wrap is applied covering the entire unit and
attachment to the pallet.
Upon receipt of the unit carefully remove the shrink
wrap. Using a box cutter slit the shrink wrap on the
cardboard top and corner posts. Use caution to not
damaged the nished surface of the unit.
(Keep all cardboard or other packaging material
for safe storage and transport to the job site prior to
installation) Remove appropriate unit service panels
to locate technical documents and accessory items
prior to installation.
Unit Protection
Protect units from damage and contamination
due to plastering (spraying), painting and all other
foreign materials that may be used at the job site.
Keep all units covered on the job site with either
the original packaging or equivalent protective
covering. Cap or recap unit connections and all
piping until unit is installed. Precautions must be
taken to avoid physical damage and contamination
which may prevent proper start-up and may result in
costly equipment repair.
Storage
All geothermal units should be stored inside in the
original packaging in a clean, dry location. Units
should be stored in an upright position at all times.
Units should not be stacked unless specially noted on
the packaging.
Removal and Disposal
Geothermal units removed from service should have
all components, oils, antifreeze and refrigerants
properly disposed of according to local and
national environmental recycling codes, regulations,
standards and rules.
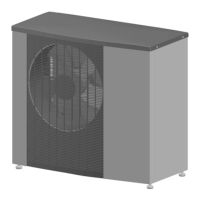
Pre-Installation
Special care should be taken in locating the
geothermal unit. Installation location chosen should
include adequate service clearance around
the unit. All vertical units should be placed on a
formed plastic air pad, or a high density, closed
cell polystyrene pad
slightly larger than the base of
the unit. Flex connectors should also be installed in
between the ductwork and the unit. All units should
be located in an indoor area where the ambient
temperature will remain above 55°F and should be
located in a way that piping and ductwork or other
permanently installed xtures do not have to be
removed for servicing.
Pre-Installation Steps
1. Compare the electrical data on the unit
nameplate with packing slip and ordering
information to verify that the correct unit has
been shipped.
2. Remove any packaging used to support or
hold the blower during shipping. Remove
and discard the blower motor armature shaft
shipping bracket from the rear of the blower.
3. Inspect all electrical connections