❏ Photos smaller than 25.4×25.4 mm (2×2 in).
How to Scan Photos
Follow the three steps below to scan your photos.
Related Information
& “Step 1: Organizing Photos” on page 20
Organize the photos before placing them into the scanner.
& “Step 2: Placing Photos into the Scanner” on page 20
Aer organizing your photos, place them into the scanner.
& “Step 3: Scanning and Saving Photos” on page 24
Epson FastFoto automatically saves your scanned images on your computer in the folder you specify.
Step 1: Organizing Photos
Organize the photos before placing them into the scanner.
1. Prepare the photos you want to scan.
2. Use a so, dry cloth (like the microber cloth that came with your scanner) to wipe the front and back of your
photos to remove dust, dirt, or other particles that could potentially scratch your photos.
!
Caution:
Because of the speed at which photos are scanned, dust particles on your photos can cause straight lines to
appear in scanned images, and in extreme cases can lightly scratch the protective nish on your photos. We
recommend to clean the scanner rollers
aer
every 300 scans, or even before each scanning session.
3. Organize your photos by date or subject.
When scanning, you can name the images using the year, month or season, and subject, such as
"1970_Summer_Vacation".
4. Check the following if you are scanning various sizes of photos:
❏ If you have both landscape and portrait photos of the same size, you can stack them together and scan them
in one batch. You can rotate the images as necessary
aer
scanning by clicking Edit > Rotate
Le
or Rotate
Right.
❏ You can scan 4×6" and 5×7" photos in the same batch when the photos are grouped by size, with the larger
photos at the back.
Next, place the organized photos into the scanner.
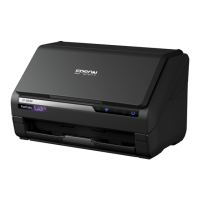
Step 2: Placing Photos into the Scanner
Aer organizing your photos, place them into the scanner.
User's Guide
Scanning Photos
20