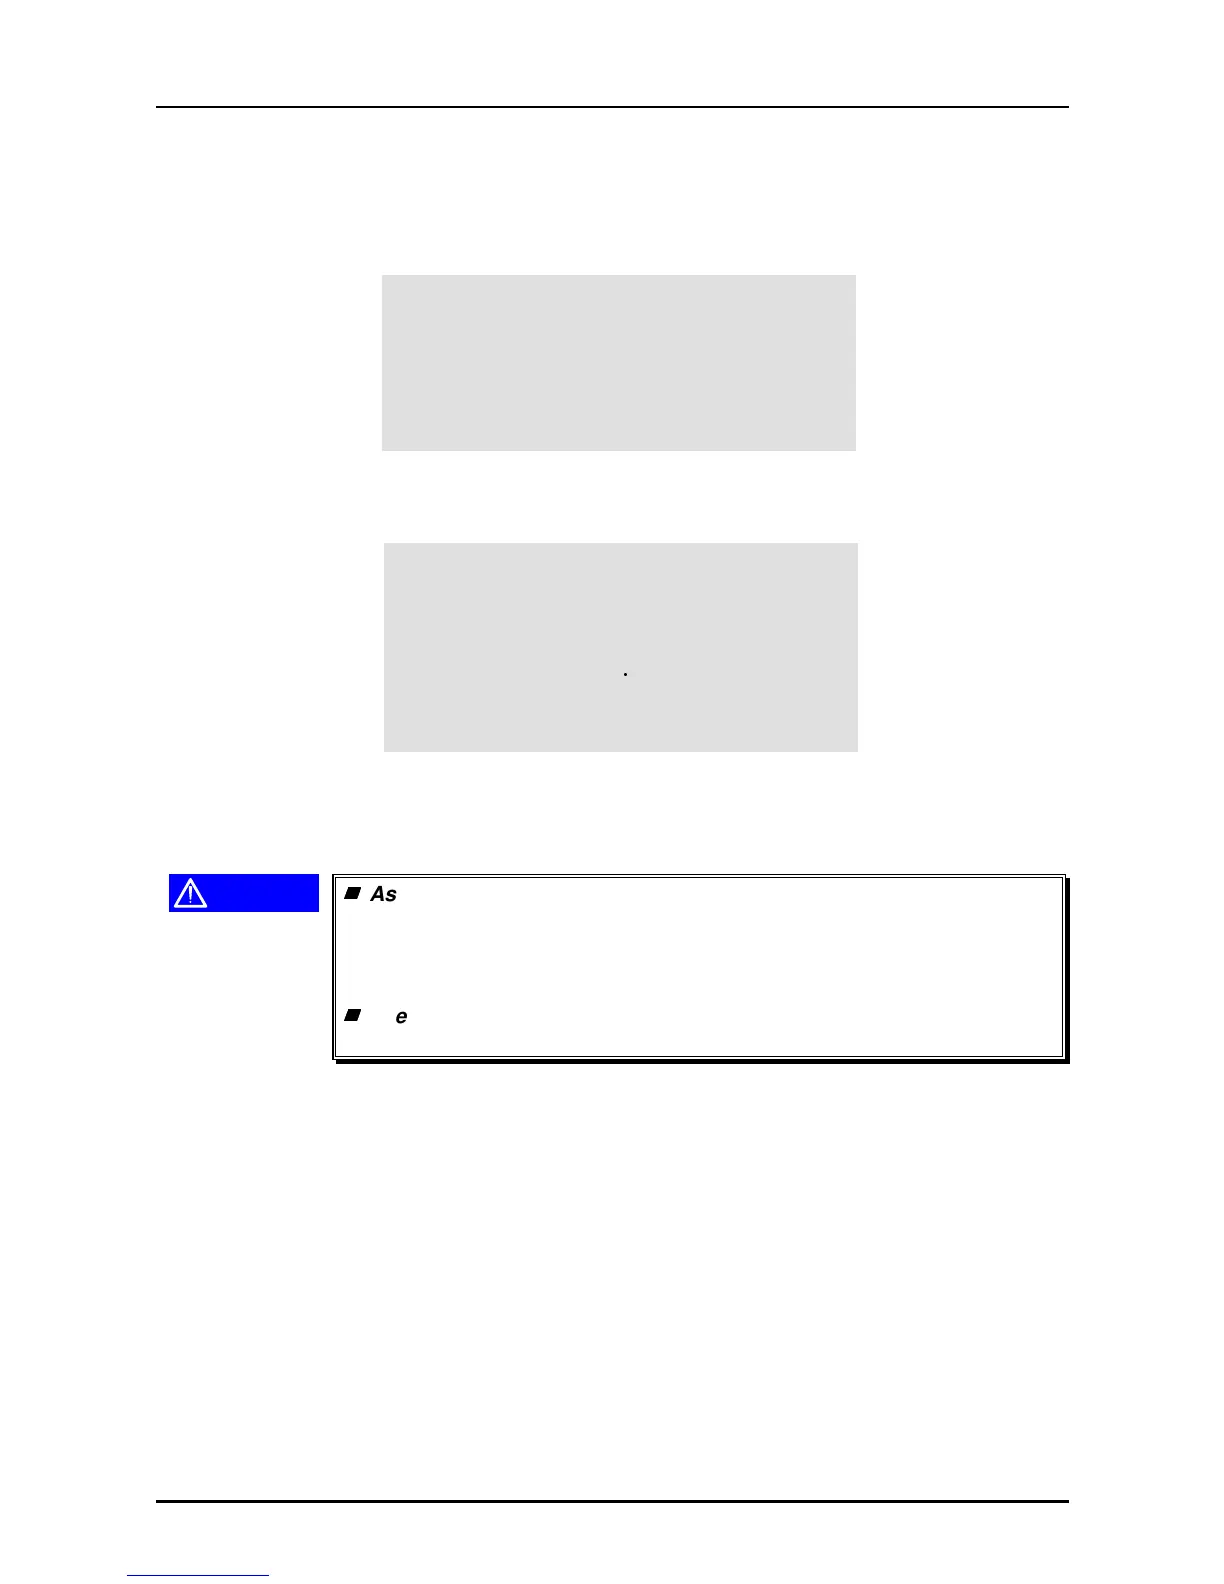
7. The carriage width select menu appears. Move the cursor using “↑” or “↓” key to select the
carriage width and press “Return” key.
The carriage width to be selected is as follows:
FX-1180: (3) 136 columns
FX-880: (1) 80 columns
8. The main menu appears. Move the cursor using “↑” or “↓” key to select “(2) FF paper” from
the list and press “Return” key, and the test pattern printing starts.
9. After the test pattern is printed out, turn the printer off once to write the factory setting into the
EEPROM.
10. Press “ESC” key several times to quite the program.
CAUTION
As this adjustment program is same as the check program in the
factory and includes many other check items which are not needed
for service, you should not perform any items which are not
described in this manual. Otherwise, the printer functions are not
guaranteed.
The factory setting value is not written into the EEPROM without this
FF paper printing.
Program : xxxxx Setting:
9 pins VR 0 = x VR 1 = x VR 2 = x
** In line**
[ Carriage Width ]
>(1) 80 column
(2) 106 column
(3) 136 column
Program : xxxxx Setting:
9 pins VR 0 = x VR 1 = x VR 2 = x
** In line**
[ Main Menu ]
(1) Bi-D Adjust (6) Envelope
>(2)FF paper (7)
SUB MENU
(3) ---- N/A ----