EasyManuals Logo

Epson LX-300+ User Manual

Epson LX-300+
138 pages
To Next Page IconTo Next Page
To Previous Page IconTo Previous Page
Page #28 background imageLoading...
Page #28 background image
1
Setting Up the Printer 1-15
R4C4610
Rev. C
A5 size SETUP.FM
6/28/00 Pass 3
R
Proof Sign-off:
SEI Y.Ohkawara K.Kono
K.Kono
SEI M.Kauppi
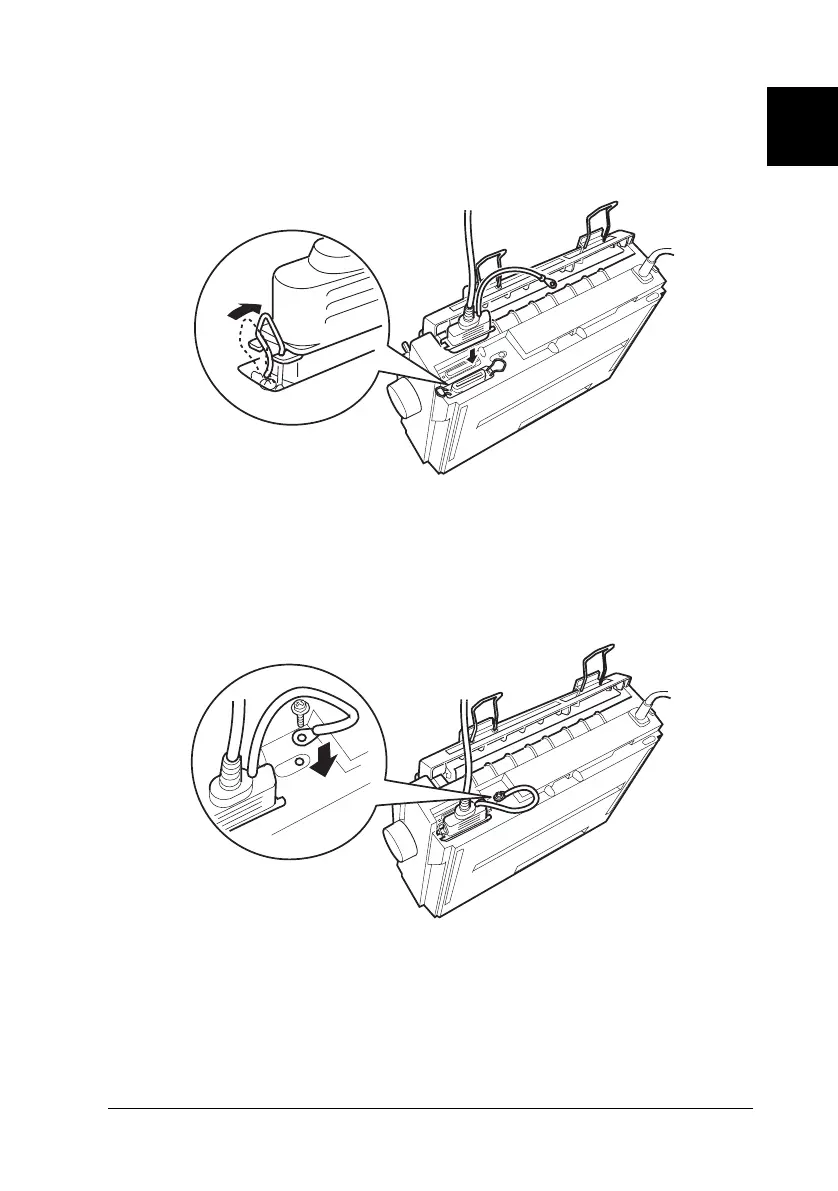
2. Plug the parallel cable connector securely into the printer’s
parallel interface. Squeeze the wire clips together until they
lock in place on either side of the connector.
Note:
If there is a ground wire at the end of the cable, attach it to the ground
connector at the right of the interface.
3. Plug the other end of the cable into the computer’s parallel
interface. (If there is a ground wire at the end of the cable,
attach it to the ground connector at the back of the computer.)

Table of Contents

Other manuals for Epson LX-300+

Questions and Answers:

Question and Answer IconNeed help?

Do you have a question about the Epson LX-300+ and is the answer not in the manual?

Epson LX-300+ Specifications

General IconGeneral
EmulationEpson ESC/P, IBM PPDS
Print Method9-pin, impact dot matrix
InterfaceParallel
Paper HandlingFriction feed
Dimensions366 x 275 x 159 mm
Paper Width4 - 10 inches

Related product manuals