Maintenance 4. Joint #1 (Replacing the Motor)
98 S5 Rev.5
Remove the manipulator installation bolts and put the manipulator
on its side.
Before removing the installation bolts, position the manipulator to make sure you can
put
the manipulator back in the installation position.
If the manipulator installation
position changes after the motor replacement, you need to adjust the points already
taught.
Remove the bolts and remove the bottom cover.
Button bolt: 6-M4×10
Connect the backup battery to the Joint #1 motor cables.
Remove the Joint #1 motor cables from the cables inside the manipulator.
the hexagon socket head cap bolts.
a: 2-M4×25 (with disc spring)
b: 2-M4×14 (with disc spring)
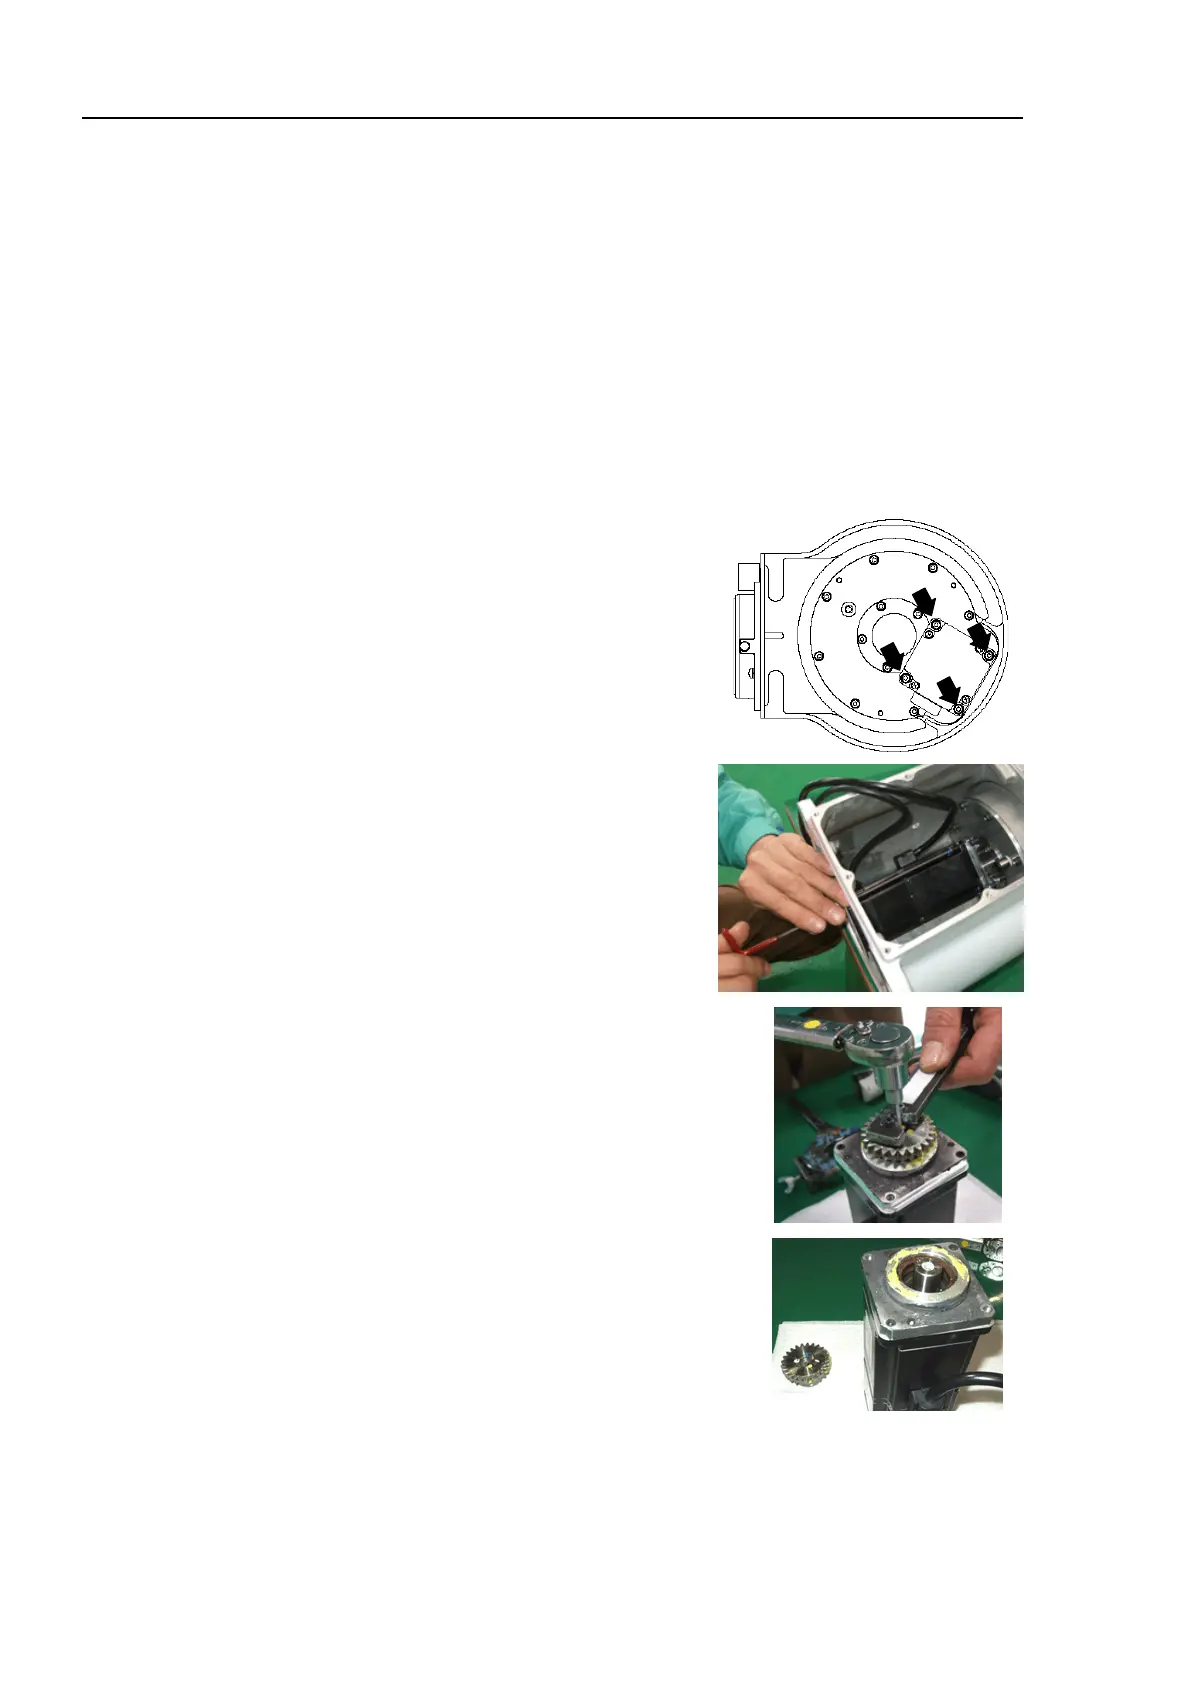
Remove the Joint #1 motor with the motor
plate.
Use the hexagon socket head cap bolts as a
removal tap.
emove the Joint #1 input gear from the Joint #1
otor.
Hexagon socket head cap bolt
: 1-M5×16 (with disc spring)
- Hold the Joint #1 input gear as shown in the
picture while removing the bolt to prevent the
gear from turning.
- There is a gasket between the Joint #1 input
gear and the motor shaft. Be sure to keep the
gasket.

 Loading...


