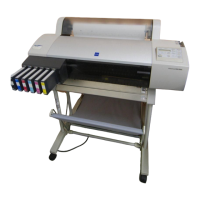
EPSON Stylus Pro 7500 Revision A
Disassembly & Assembly Disassembly Flow 147
4.2.4.5 Conversion Kit Assembly Procedure
PREPARATION BEFORE ASSEMBLY
1. Open the Conversion Kit case and check if all the parts have been packed. See table 4-
6.
2. Remove the roll paper currently set in the Stylus Pro 7000 the user is using. Install the
24-inch thick mat roll paper packed with the conversion kit in the printer.
3. By switching the power ON while pressing the following buttons, enter the self-
diagnostic mode.
n
Paper Feed – Button + Paper Feed + Button + Enter Button
4. Press the SelecType button to select the “Check: Print” item, then press the Enter (Cut/
Eject) button. (This is, after all, a confirmation operation for the sake of reference.)
5. Press the Paper Source button to select “Print: Nozzle Check”, then press the Enter
(Cut/Eject) button and the nozzle check pattern will be printed. (The nozzle check
pattern, Bi-D, Gap pattern and each type of counter value are printed.)
NOTE: The nozzle check pattern is used in the final confirmation of this
operation, so after printing, keep this printout as a treasure until the
operation is completed.
6. Check the printed nozzle check pattern, and if there is any skipping of dots, select
“Check: Cleaning” and carry out manual cleaning. If the printer does not recover from
the problem with skipping of dots, replace the affected head with the previously
provided light color head. See Page118.
7. Set the paper set lever so it is toward the back of the printer and roll up the paper. After
that, the paper set lever should be set so it is toward the front of the printer.
INK DISCHARGE PROCEDURE
1. Enter the Self-diagnostic mode by turning the printer’s power switch ON while
pressing the following buttons.
n
Paper Feed – Button + Paper Feed + Button + Enter Button
2. Select “Check: Adjustment” by pressing the SelecType button, then press the Enter
button. After that, press the Paper Source button to select “Adj: Clean Head,” then
press the Enter button.
3. In accordance with the instruction “Please remove ink” displayed in the LCD panel,
remove all the ink cartridges.
4. Press the Enter button to start the ink discharge sequence. This operation ends in
approximately 2 minutes.
5. After the ink discharge sequence is completed, the message “Set Cleaning Jig” will be
displayed in the LCD panel. remove the 6 cartridges of the S46 transport liquid
cartridges form the Conversion Kit and set them in the I/H assembly.
6. Press the Enter button to start the cleaning sequence. While this sequence is running,
the message “ Head cleaning” will be displayed in the LCD. This sequence is a process
of cleaning the ink supply system, such as the heads and ink tubes, and ends in
approximately 2.5 minutes.
7. After the cleaning sequence is completed, the message “Remove cleaning jig” will be
displayed in the LCD, so remove the 6 cartridges of S46 transport liquid cartridges
from the I/H assembly.
8. Press the Enter button to start the transport liquid discharge sequence. during execution
of this sequence, the message “ Head cleaning” is displayed in the LCD. This sequence
ends in approximately 2.3 minutes.
CAUTION
If you are carrying out manual cleaning by selecting “Ad: Clean
Head,” the printer will not function unless the paper set lever is in the
paper set position and the front cover is closed.

 Loading...


