WF-C20590 Installation Guide
Setting Up the Printer 29
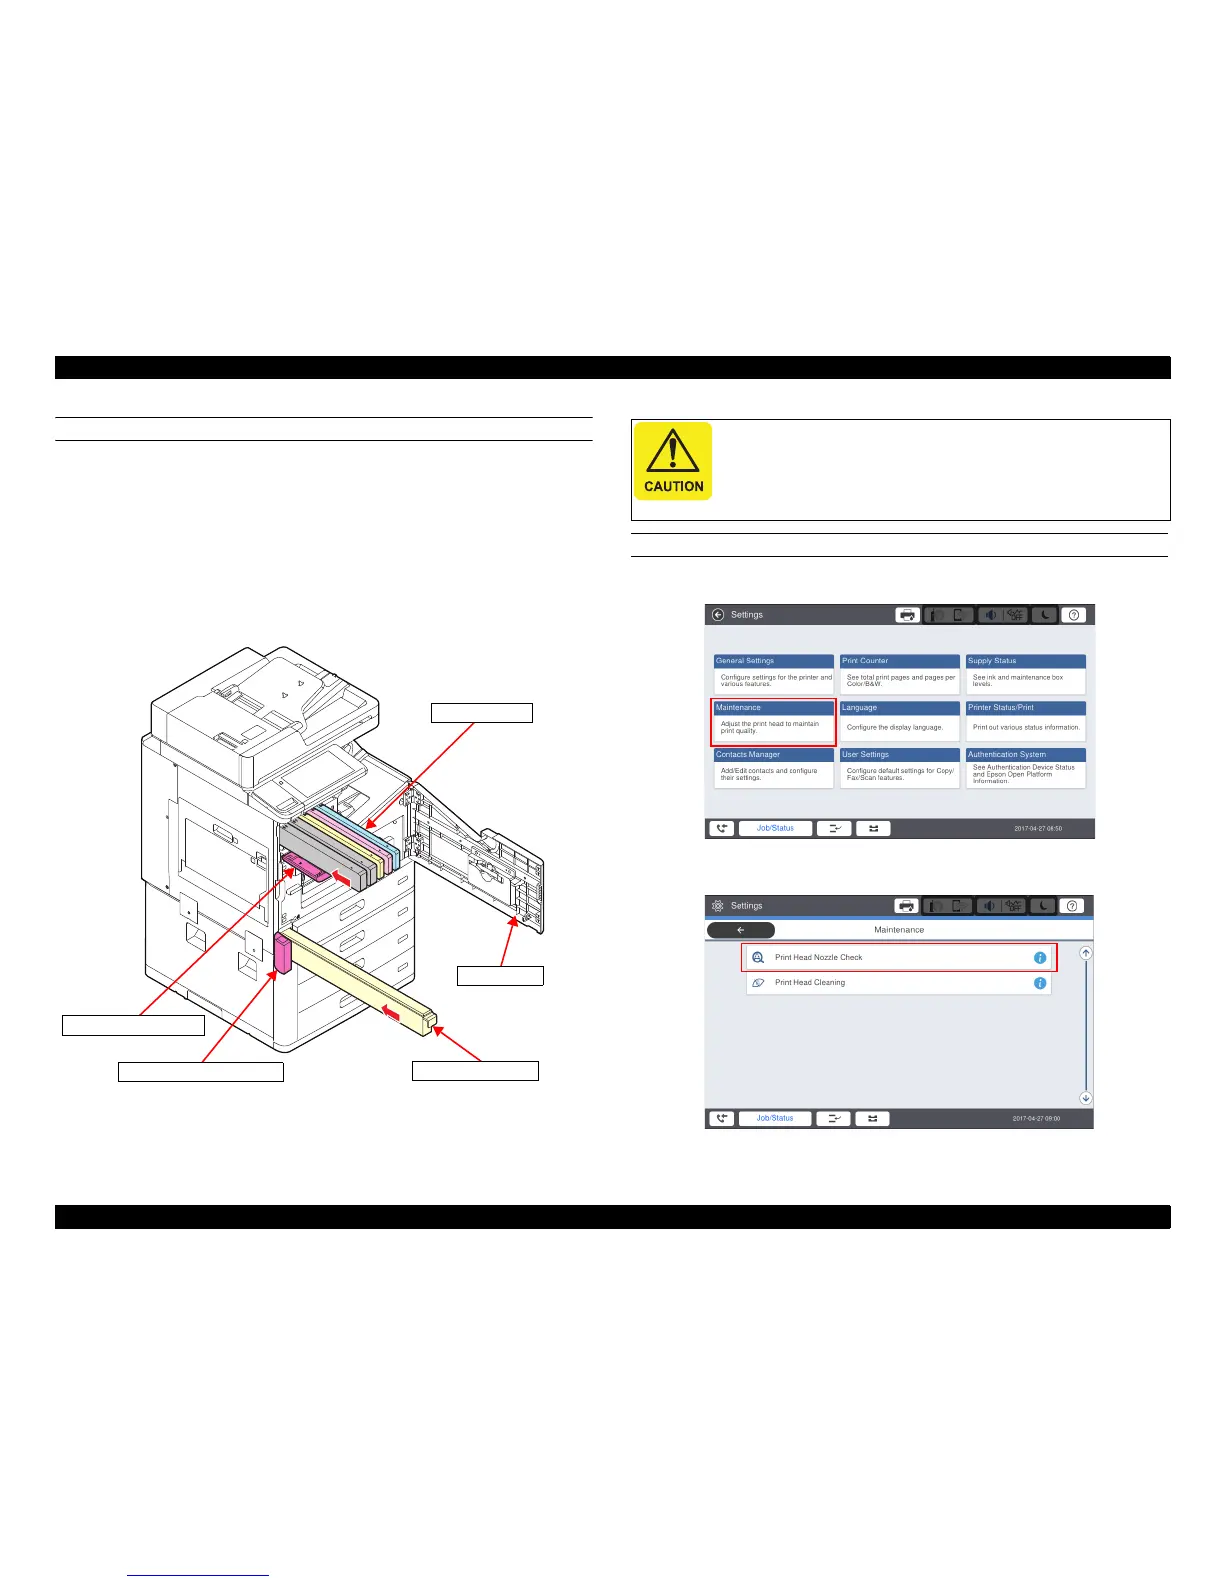
INSTALLING INK CARTRIDGES AND THE MAINTENANCE BOX
9. After setting the date and time, a message appears on the LCD screen prompting
you to install the Ink Cartridges.
10. Unpack and open the Ink Cartridges and Maintenance Box. Do not touch the green
chips or ink nozzle points.
11. Open the Ink Cartridge Cover and insert all five Ink Cartridges one at a time. Close
the Ink Cartridge Cover.
12. Open the Front Cover and the Maintenance Box Cover, then install the
Maintenance Box.
13. Close the Maintenance Box Cover and the Front Cover.
14. After setting the time and date, ink charging starts automatically and takes about
20 minutes. A message appears on the LCD screen when ink charging is complete.
OPERATION/PRINT QUALITY CHECK
15. Select Maintenance.
16. Select Print Head Nozzle Check.
During Initial Ink Charge, note the following:
DO NOT turn the printer off.
DO NOT open any covers.
DO NOT remove any ink cartridge.

 Loading...


