WF-C20590 Installation Guide
Installing the Optional Units 53
Installing the High-Capacity Input Tray
Minimum workers
1 person
Items needed
Phillips screwdriver
Flathead screwdriver
Wrench (included in the High-Capacity Input Tray box)
Joint parts (included in the High-Capacity Input Tray box)
1. Turn off the printer and unplug the power cable.
2. Remove the covers on the right side of the printer.
Be sure to check the following notes before the installation:
All workers must read the installation procedure together
before starting work.
Wear easy-to-move clothing, gloves, and safety shoes.
Work with care to avoid injuries.
Work with sufficient working space.
Never attempt to install the product alone.
Use proper lifting techniques, and stop working
immediately if you feel that the load is too bulky or heavy.
Figure
Number
Name
Figure
Number
Name
1
Switch lever
4
Drawer rail
2
Front lock support plate
5
Drawer rail guide
3
Back lock support plate
6
Countersunk screws M4×8
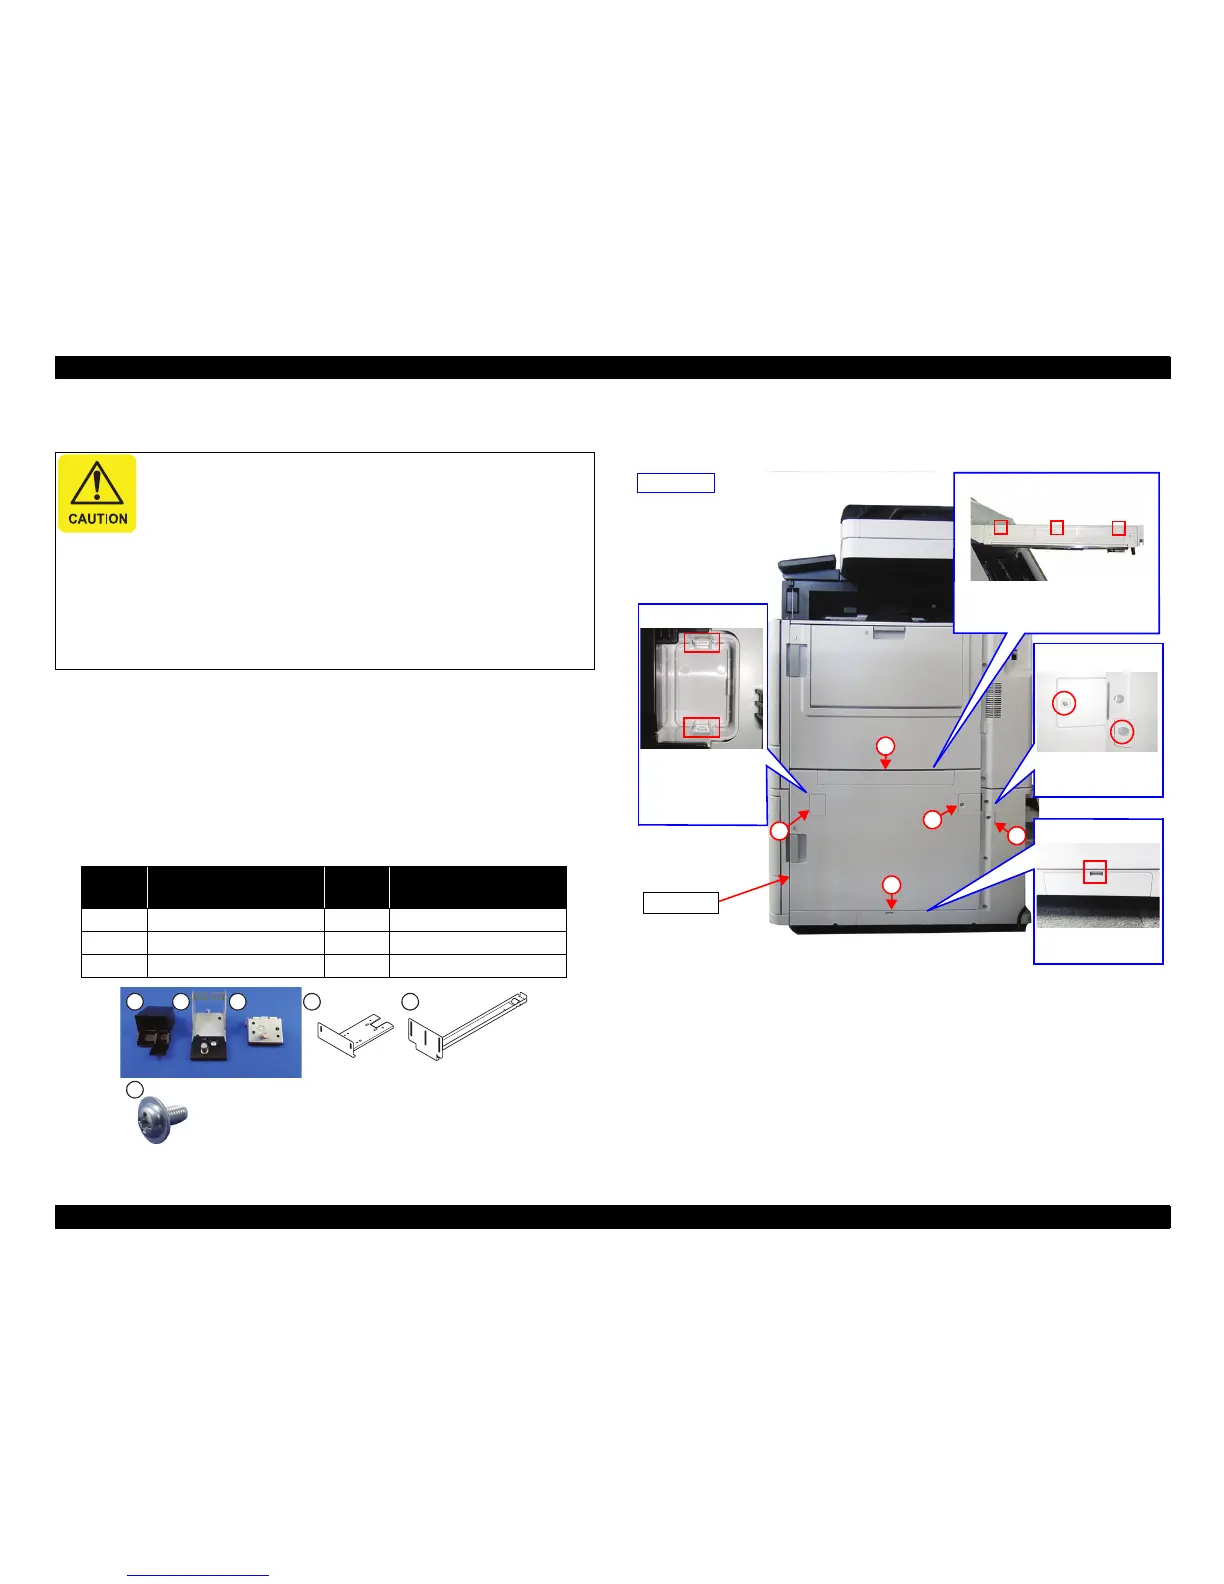
E Door
Right side
Open the E Door, then
remove the cover by
disengaging the two
hooks from the back
side of the cover.
Cover 1
Cover 2
Open the E Door, then remove the
cover by disengaging the three tabs on
the top of the door.
Cover 3/4
Remove the cover fixing
screw to remove the
cover.
Cover 5
Remove the cover by
disengaging the hook.
1
2
3
4
5

 Loading...


