EasyManuals Logo
Home>Epson>All in One Printer>WF-C20590

Epson WF-C20590 Installation Guide

Epson WF-C20590
60 pages
To Next Page IconTo Next Page
To Previous Page IconTo Previous Page
Page #45 background imageLoading...
Page #45 background image
WF-C20590 Installation Guide
Installing the Optional Units 43
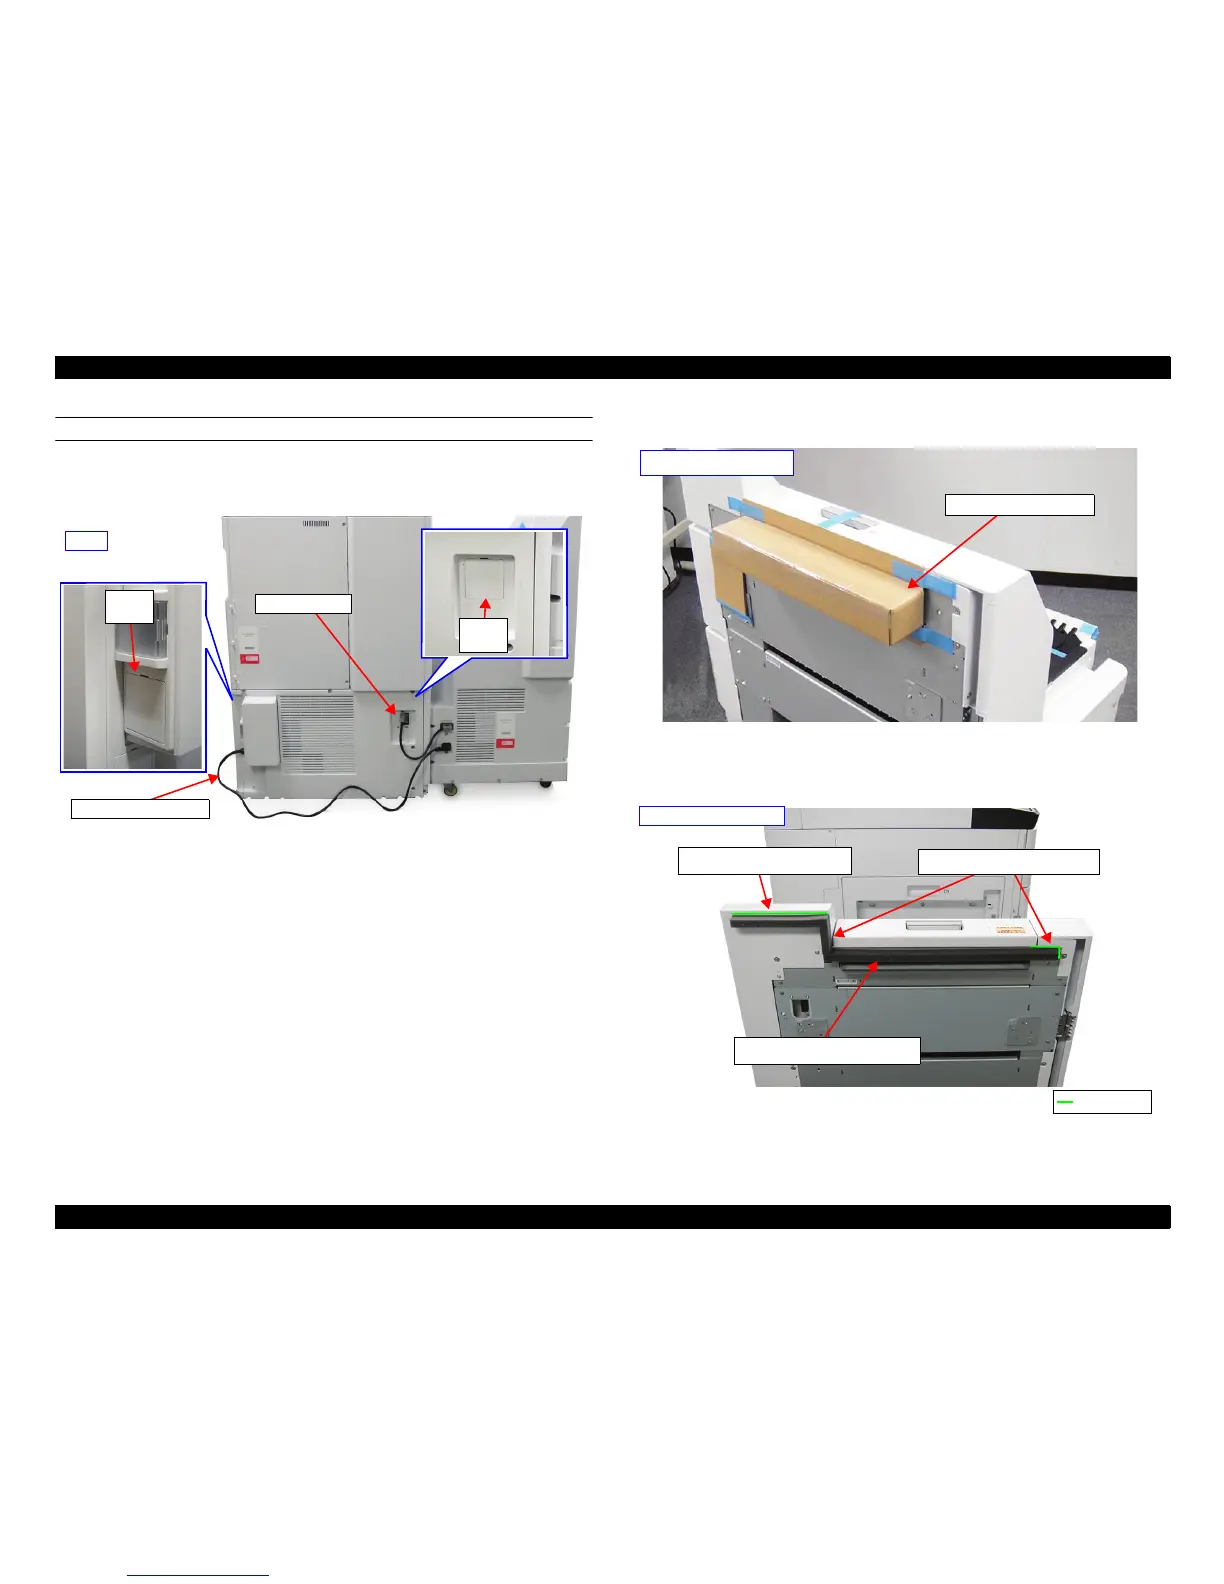
CABLE CONNECTION AND SPONGE ATTACHMENT
42. On the printer, remove the Small Cover located under the circuit breaker and the
Small Cover located on the right rear side. Connect the Power Supply Cable and
the Control Cable of the Bridge Unit to the printer.
43. Remove the protective materials from the paper ejection slot on the Bridge Unit.
44. Attach the Cushion Sponges to the left side of the Bridge Unit and the right side of
the Finisher Unit, aligning them with the guide lines as shown. The sponges are for
preventing foreign materials from entering into the unit.
Small
Cover
Small
Cover
Power Supply Cable
Control Cable
Back
Protective materials
Bridge Unit left side
Guide line
Cushion Sponge (375 mm)
Cushion Sponge (170 mm)
Cushion Sponge (42.5 mm)
PRELIMINARY

Table of Contents

Other manuals for Epson WF-C20590

Questions and Answers:

Question and Answer IconNeed help?

Do you have a question about the Epson WF-C20590 and is the answer not in the manual?

Epson WF-C20590 Specifications

General IconGeneral
BrandEpson
ModelWF-C20590
CategoryAll in One Printer
LanguageEnglish

Related product manuals