WF-C20590 Installation Guide
Service Support Mode 57
Service Support Mode
After the optional units are installed and connected to the printer, you must
enter Service Support Mode to continue setup and allow the units to
communicate with the printer.
1. Make sure the printer is turned off.
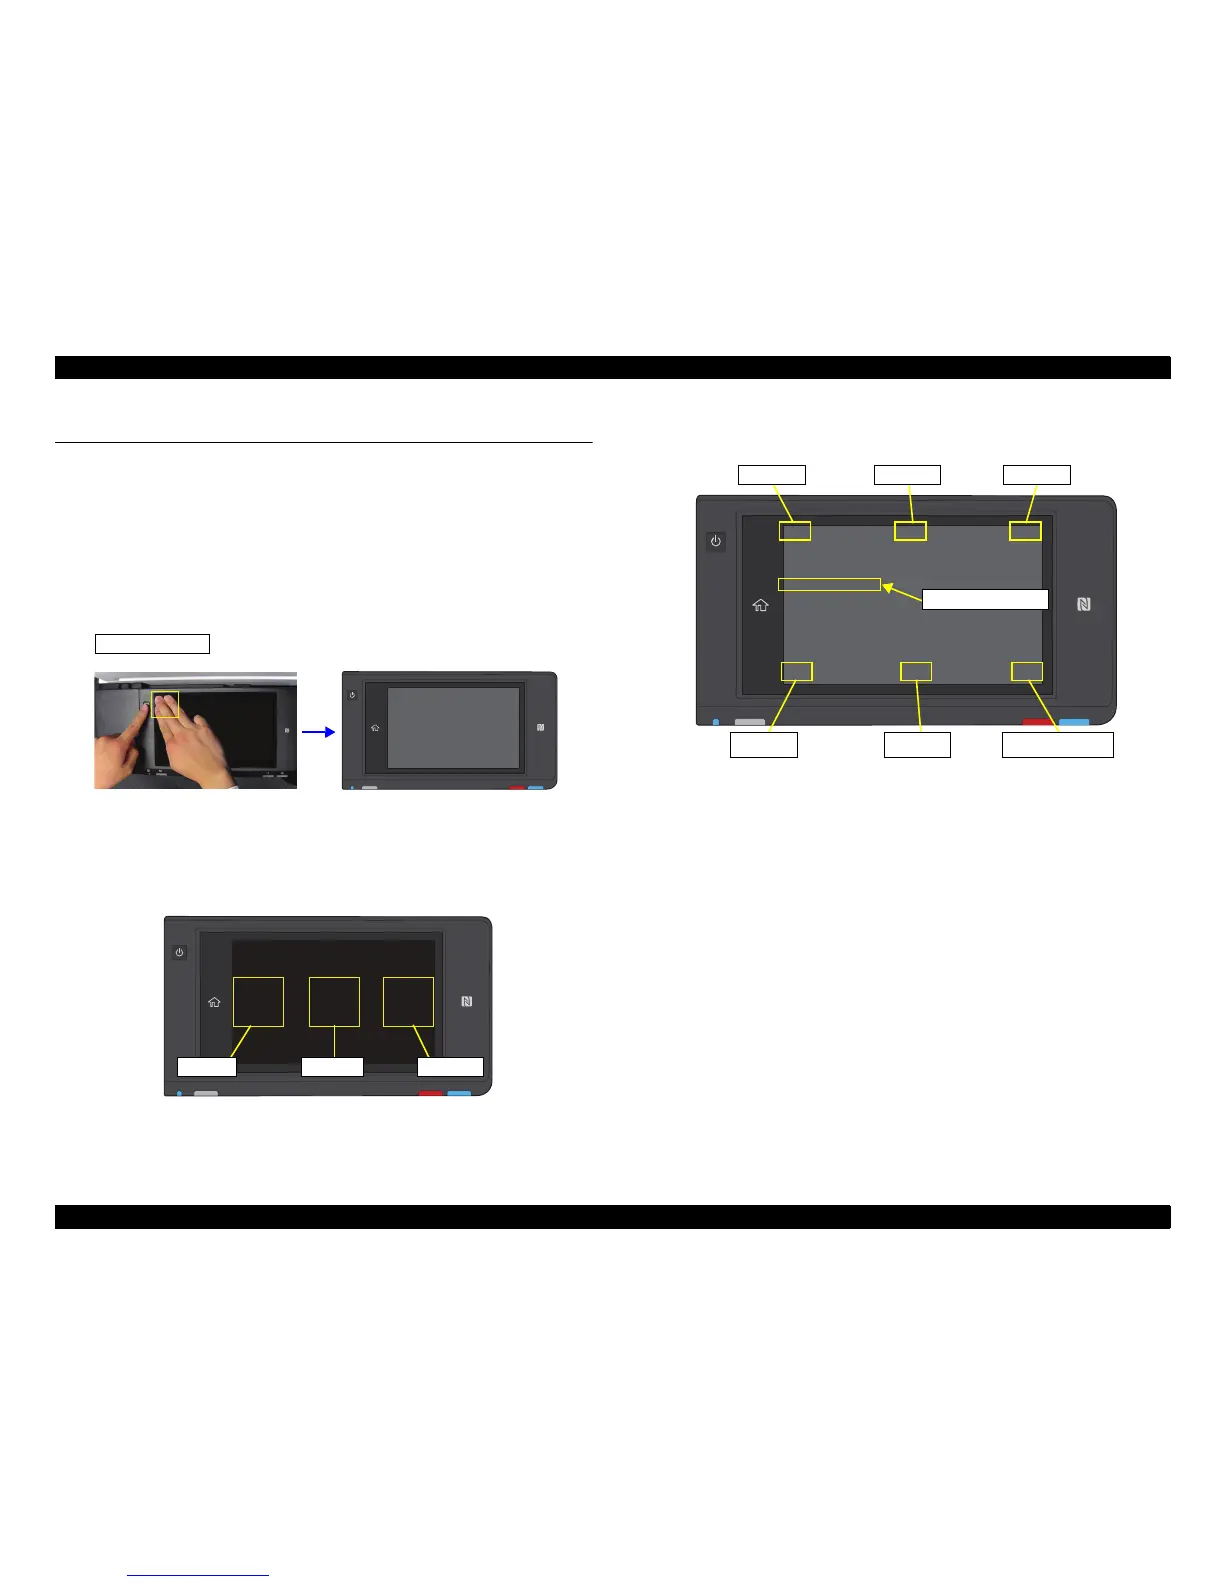
2. Press and hold the area in the yellow box indicated below, then press and hold the
power button for about 10 seconds until a white screen appears followed by a
black service mode screen shown below.
3. On the LCD screen, enter the service support mode ID: 49515
Press the right area (number input) repeatedly until 4 appears, then press the left
area (shift input) to go to the next number. Repeat until all five digits are entered,
then press the center area (enter input). Press the center area again to enter the
service support menu.
4. The main menu appears. Press the commands on the top and bottom of the screen
to make and enter selections.
5. Select and enter the Installation Menu.
6. Select and enter Bridge Unit > Input Serial No.
7. Press Input Value, and enter the serial number (from the rear of the Bridge Unit)
using the keypad. Press OK when complete.
8. Press BACK to return to the previous menu.
9. Select and enter Hi-Capacity Unit > Paper Size Setting.
10. Press DOWN to select Letter, then press OK.
11. Press BACK to return to the previous menus.
12. Press the Power Button to turn the printer off, then turn it back on again.
Installation is complete.
[]LEFT______________________________[]UP_____________________________RIGHT[]
1. Maintenance: MENU
2. Individual Acon Check: MENU
3. Before Repair Operaon: MENU
4. Adjustment - Main/Opon Unit: MENU
5. Adjustment - SCN/ADF: MENU
6. Ink Charge/ Discharge: MENU
7. Installaon: MENU
8. User Log Get Mode
9. USB Memory FW Update
10. Swap Mech Unit: MENU
[]BACK_____________________________[]DOWN___________________________RUN[]

 Loading...


