EasyManuals Logo

Epson WF-C20590 Installation Guide

Epson WF-C20590
60 pages
To Next Page IconTo Next Page
To Previous Page IconTo Previous Page
Page #58 background imageLoading...
Page #58 background image
WF-C20590 Installation Guide
Installing the Optional Units 56
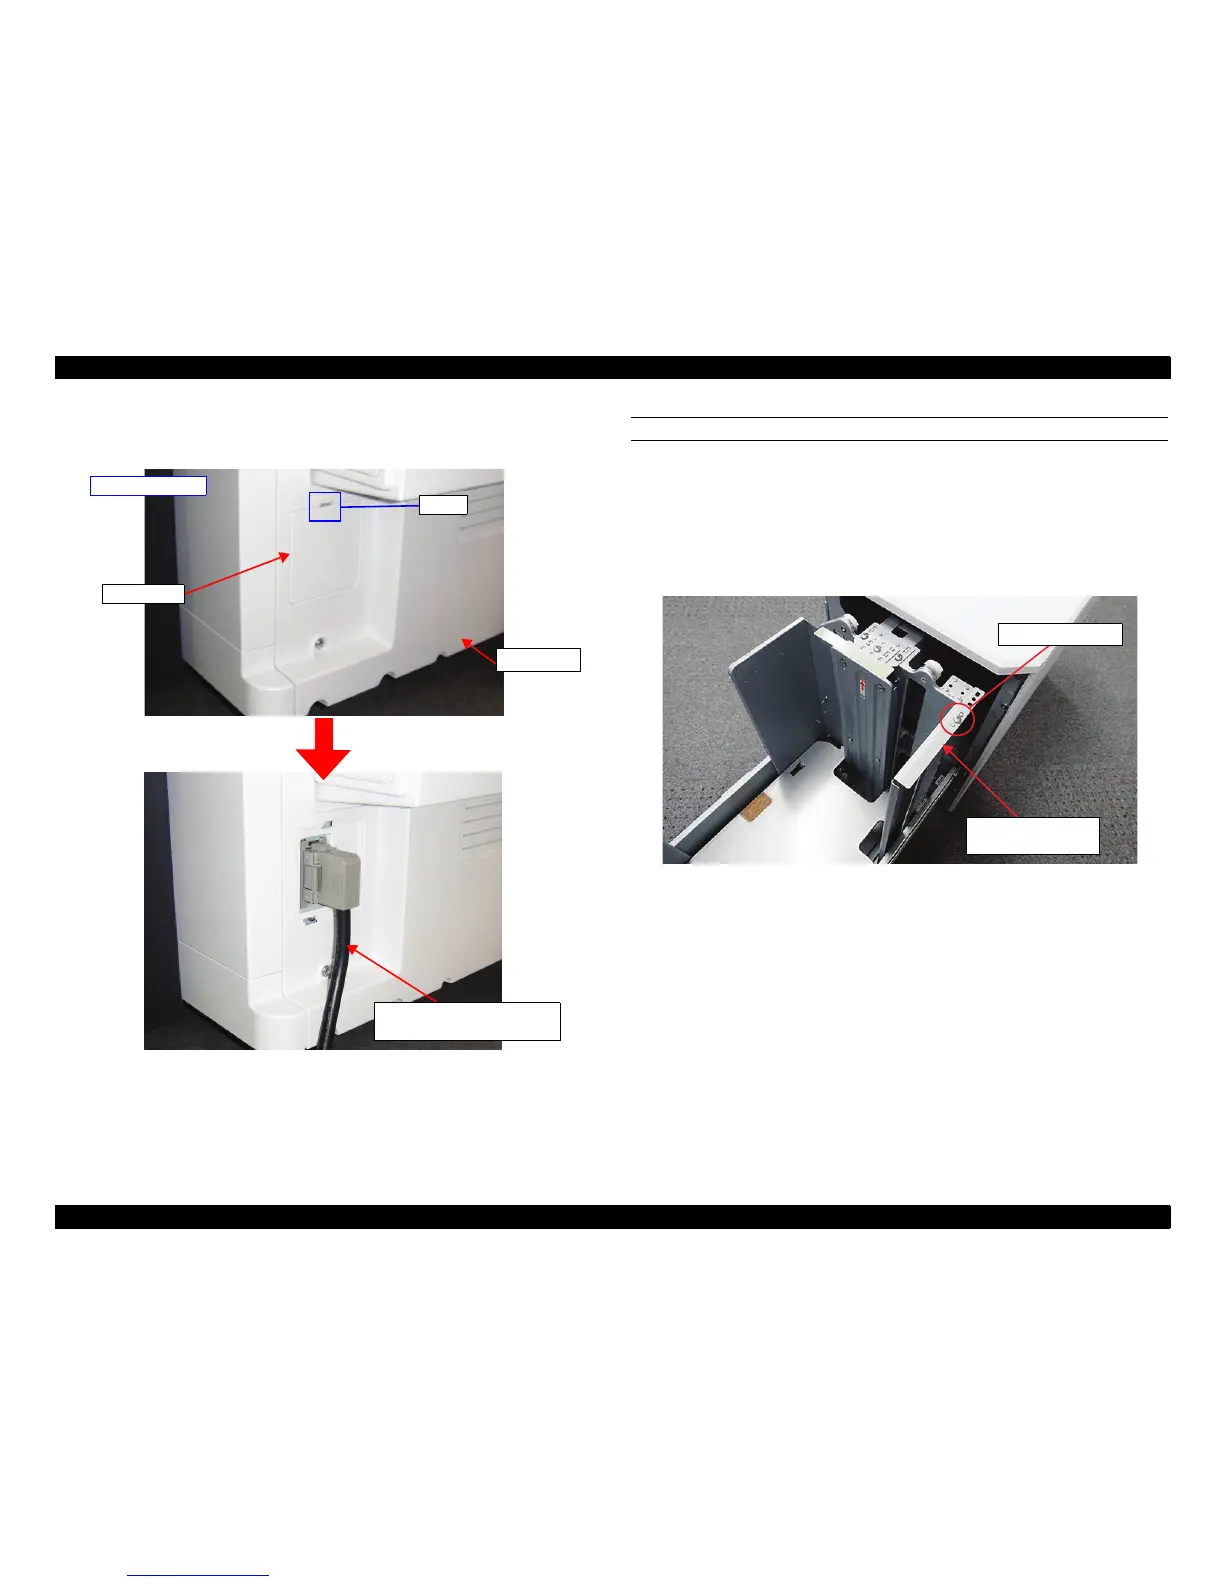
12. Release the hook to remove the small cover on the back of the printer.
13. Connect the High-Capacity Input Tray Cable Connector to the printer.
ADJUSTING THE HIGH-CAPACITY INPUT TRAY FOR LETTER SIZE
After installing the High-Capacity Input Tray, you must adjust the unit to
support letter-size paper instead of A4-size paper. Keep the removed parts if
you want to switch back to A4 size.
1. Open the unit.
2. Remove one screw, then remove the Paper Rear Edge Regulation Board.
Small cover
Hook
Lower back right
Printer
High-Capacity Input Tray
Cable Connector
Remove the screw
Paper Rear Edge
Regulation Board
PRELIMINARY

Table of Contents

Other manuals for Epson WF-C20590

Questions and Answers:

Question and Answer IconNeed help?

Do you have a question about the Epson WF-C20590 and is the answer not in the manual?

Epson WF-C20590 Specifications

General IconGeneral
ConnectivityUSB, Ethernet, Wi-Fi, Wi-Fi Direct
ADF Capacity150 sheets
Monthly Duty CycleUp to 400, 000 pages
CategoryAll in One Printer
FunctionsPrint, Copy, Scan, Fax
Duplex PrintingYes
Print TechnologyPrecisionCore
Print SpeedUp to 100 ppm (black/color)
Print Resolution600 x 2400 dpi
Scanner TypeColor flatbed/ADF
Scan Resolution600 dpi
Ink CartridgesBlack, Cyan, Magenta, Yellow
Display9-inch touchscreen

Related product manuals