EasyManuals Logo

Epson WF-C20590 Installation Guide

Epson WF-C20590
60 pages
To Next Page IconTo Next Page
To Previous Page IconTo Previous Page
Page #57 background imageLoading...
Page #57 background image
WF-C20590 Installation Guide
Installing the Optional Units 55
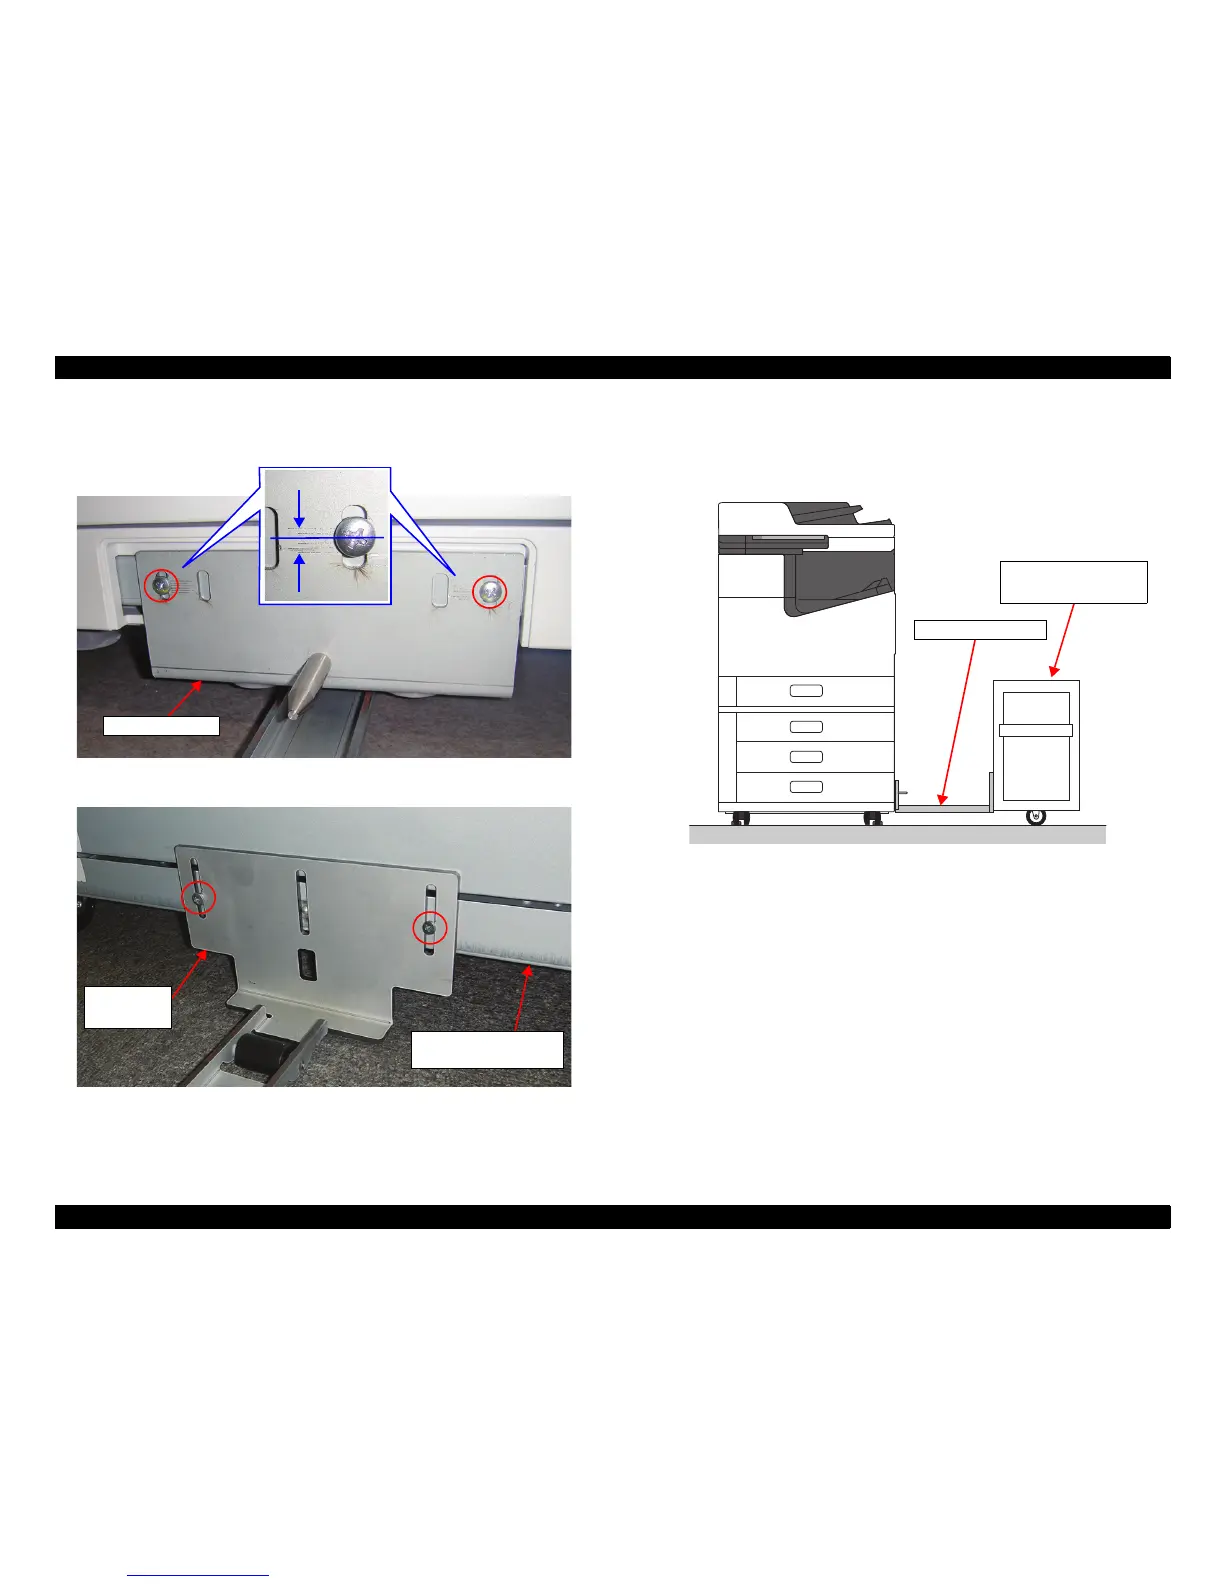
9. Align the position of the screw hole with the center of the marking line of the
drawer rail, and attach the drawer rail with two screws.
10. Move the High-Capacity Input Tray to the right side of the printer. Attach the
Drawer Rail Guide to the High-Capacity Input Tray with the two screws.
11. Confirm that the Drawer Rail Guide is horizontal. If it is not horizontal, correct it
by adjusting the screws you attached in Step 9/Step 10. You should now be able to
slide the High-Capacity Input Tray against the printer.
Drawer Rail
High-Capacity Input
Tray
Drawer Rail
Guide
High-Capacity Input
Tray
Drawer Rail Guide
PRELIMINARY

Table of Contents

Other manuals for Epson WF-C20590

Questions and Answers:

Question and Answer IconNeed help?

Do you have a question about the Epson WF-C20590 and is the answer not in the manual?

Epson WF-C20590 Specifications

General IconGeneral
ConnectivityUSB, Ethernet, Wi-Fi, Wi-Fi Direct
ADF Capacity150 sheets
Monthly Duty CycleUp to 400, 000 pages
CategoryAll in One Printer
FunctionsPrint, Copy, Scan, Fax
Duplex PrintingYes
Print TechnologyPrecisionCore
Print SpeedUp to 100 ppm (black/color)
Print Resolution600 x 2400 dpi
Scanner TypeColor flatbed/ADF
Scan Resolution600 dpi
Ink CartridgesBlack, Cyan, Magenta, Yellow
Display9-inch touchscreen

Related product manuals