WF-C20590 Installation Guide
Installing the Optional Units 32
PREPARATION OF PRINTER
1. Make sure the printer is turned off and the power cord is unplugged.
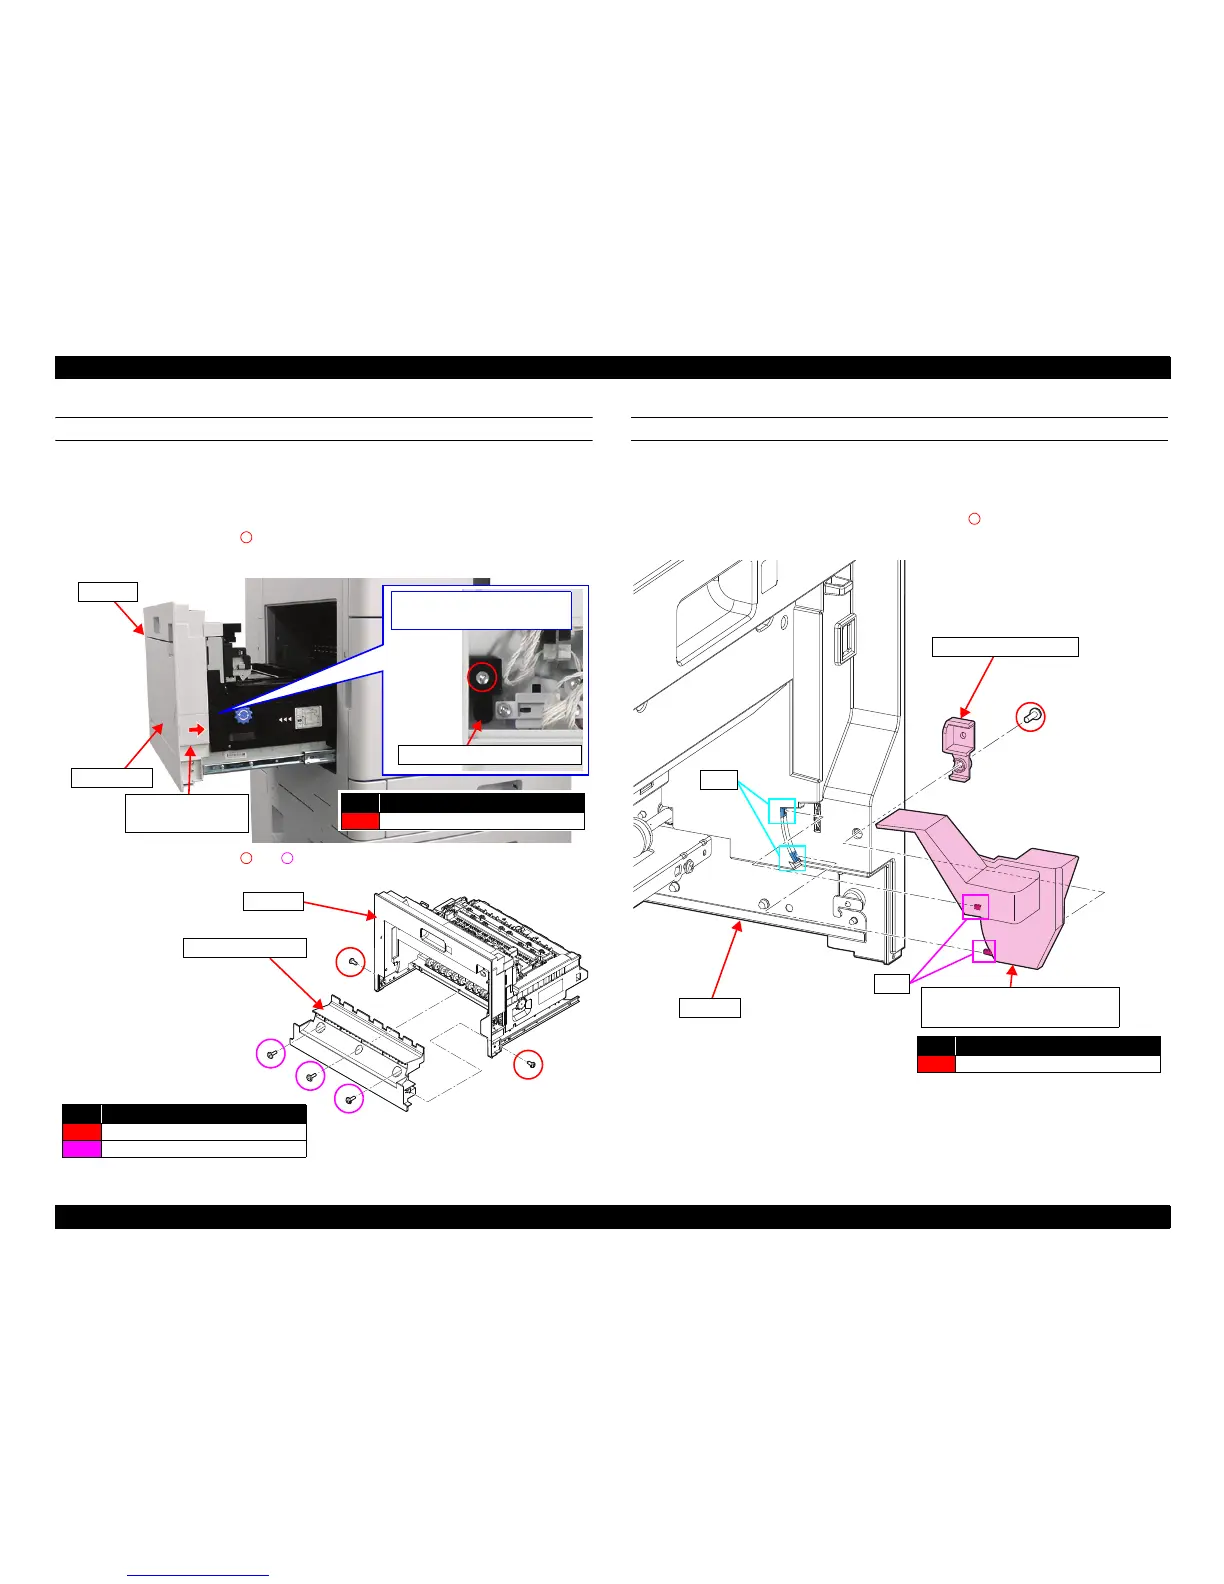
2. Pull out the EJ Unit from the printer.
3. Slide the Small EJ Cover, Right toward the direction of the arrow to remove it.
4. Remove one screw (S19: ) to remove the EJ Stacker Shaft, then remove the EJ
Stacker from the EJ Unit.
5. Remove five screws (S1: /S7: ), and remove the EJ Cover, Lower from the EJ
Unit.
CONNECTION OF PRINTER AND BRIDGE UNIT
6. Insert the ribs of the Bridge Unit Joint Stacker Stopper into the holes of the EJ
unit. Attach the Bridge Unit Joint Stacker Stopper to the hole of the EJ Cover,
Lower removed in Step 5.
7. Use the Stopper Fixing Plate and one screw (S19: ) to attach the Bridge Unit
Joint Stacker Stopper to the EJ Unit.
No. Screw types
S19
C.B.P-TITE, SCREW, 3X10, F/ZN-3C
EJ Cover, Lower
EJ Unit
No. Screw types
S1
C.B.S-TITE R, SCREW, 3X8, F/ZN-3C
S7
C.B.S-TITE(P4), SCREW, 3X10, F/ZN-3C
EJ Unit
Stopper Fixing Plate
Bridge Unit Joint Stacker
Stopper
No. Screw types
S19
C.B.P-TITE, SCREW, 3X10, F/ZN-3C
Rib
Hole

 Loading...


