WF-C20590 Installation Guide
Installing the Optional Units 41
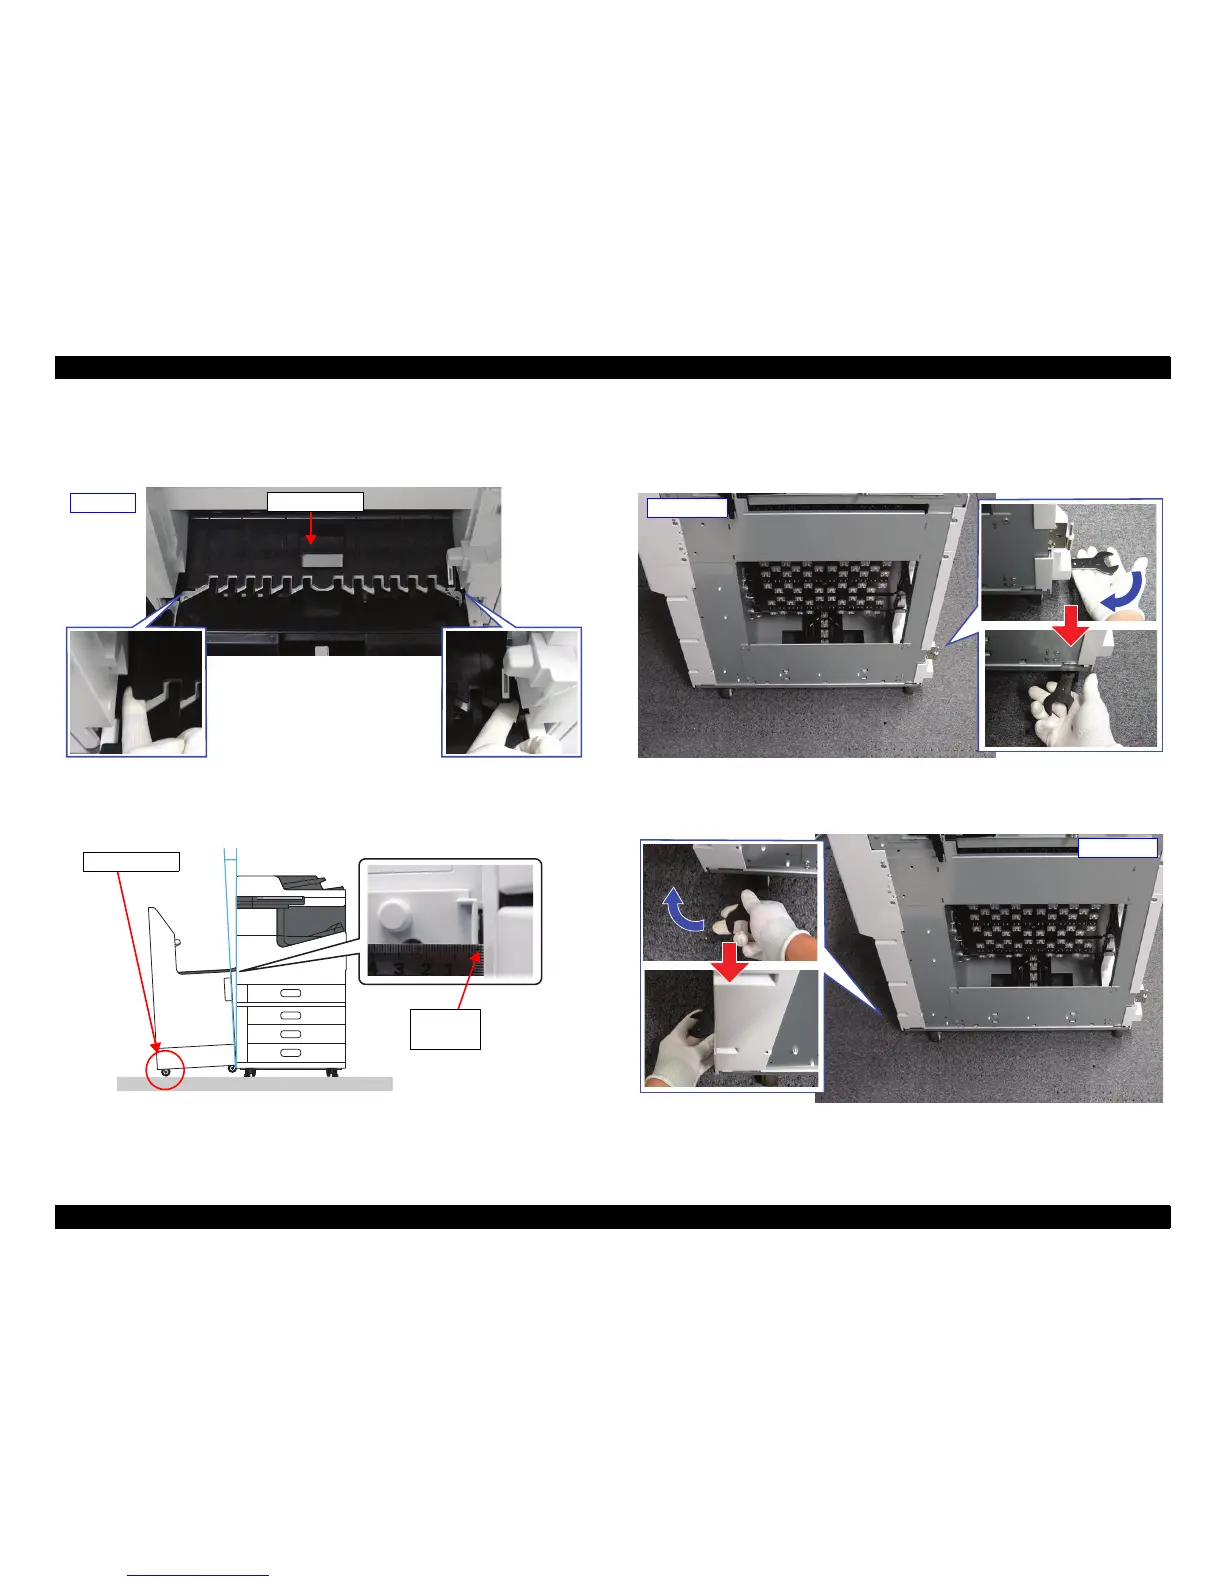
33. With the EJ Cover lowered, adjust the height of the casters on the left side until the
magnets on both ends of the cover stick to the plate under the cover. Touch the
magnets to check if they are attached.
34. Measure the gap between the left side of the printer and the right side of the Bridge
Unit. Subtract 1 mm from the measured gap width, and raise the height of the
casters on the left (Finisher Unit side) by that value.
35. Turn the Fixing Nut of the casters on the left clockwise to loosen it.
36. Insert the wrench from the front side, then turn the Adjustment Nut for the front
caster 1/4 turn to raise the caster by 0.44 mm.
37. Insert the wrench from the left side, then turn the Adjustment Nut for the front
caster 1/4 turn to raise the caster by 0.44 mm.

 Loading...


