30
7. Unscrew the 1/4 turn fasteners and allow the panel to lean forward so you may lift the panel out.
Note: if needed, you can relocate the diagnostic bracket as shown in step 3 of section E4.
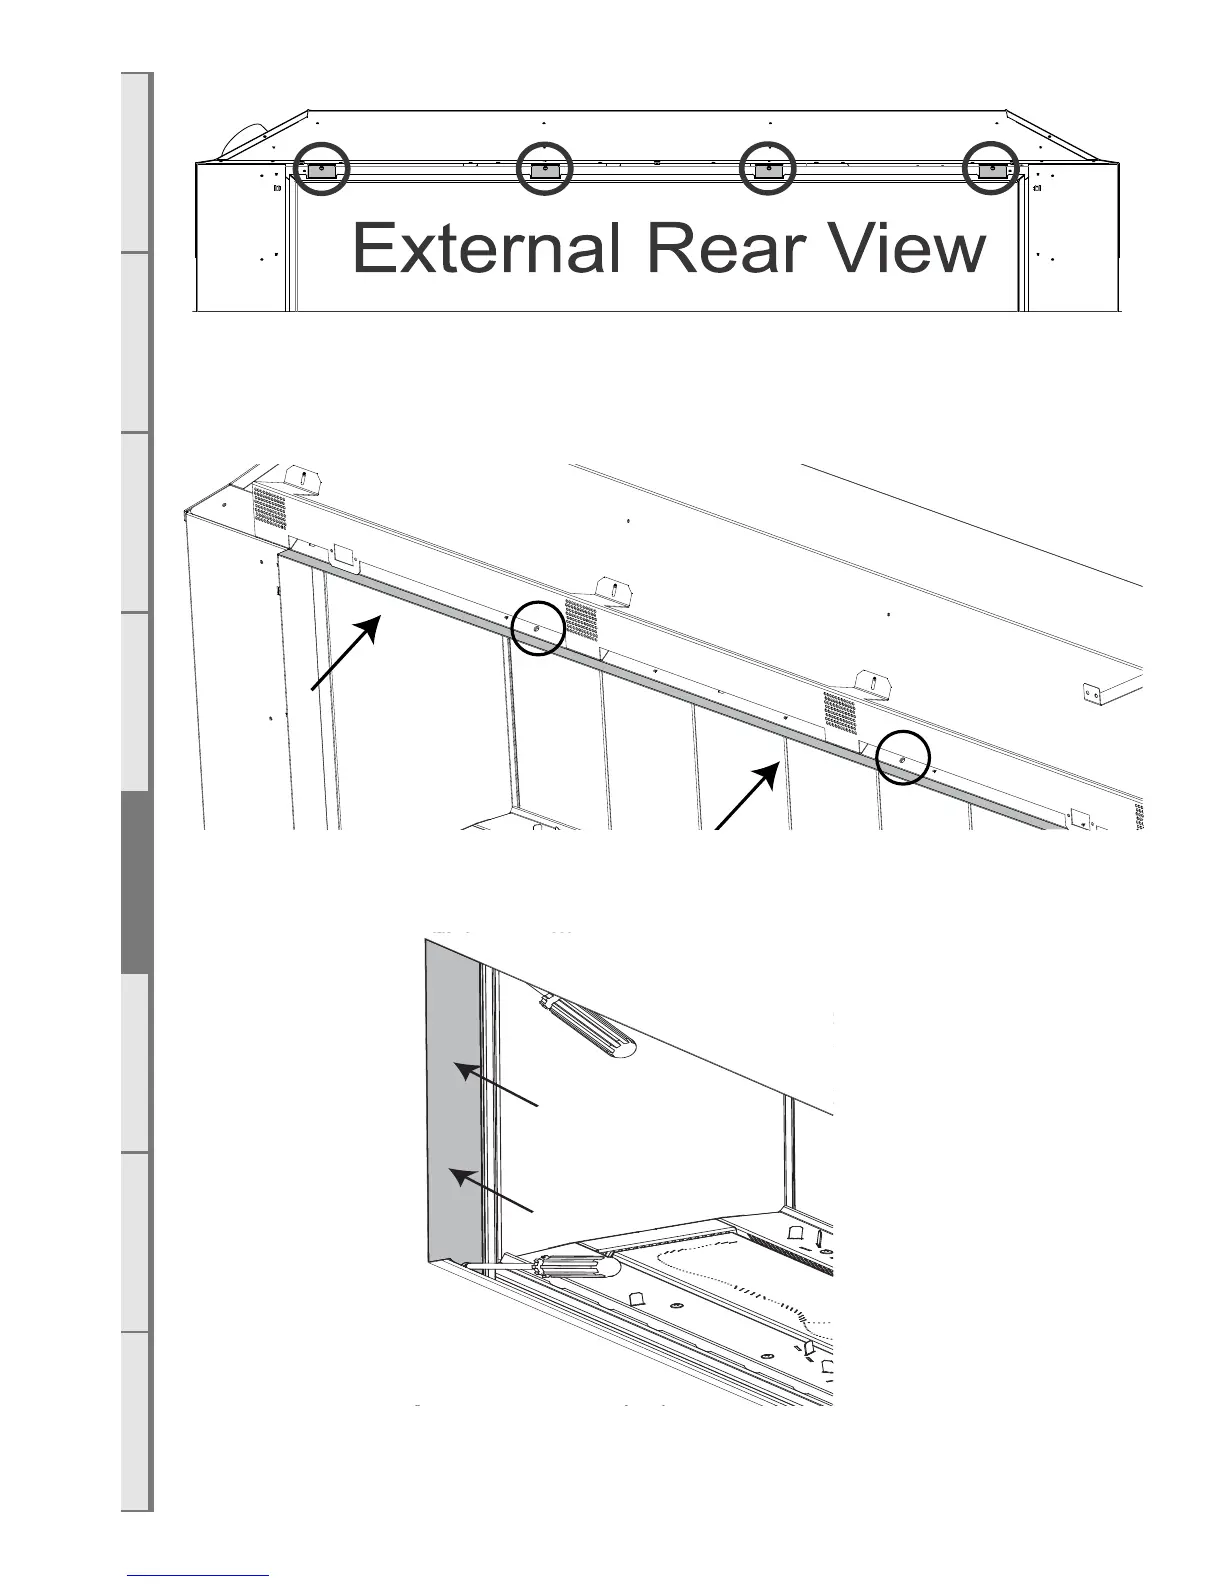
9. After Removing inner panels and rear firebox panel. Fix the top trim in place with the two black
machine screws provided (black circles - see below).
10. Once the top trim is in place, fit the side trims. These are fixed top and bottom with the low profile
black self tapper screws. (see below)
11. Install the fuelbed media and 2nd piece of glass. Finish the conversion by installing the rear glass
back in place followed by the bottom trim bracket.