Do you have a question about the FAAC A952 and is the answer not in the manual?
Provides essential safety precautions for individuals installing the A952 unit.
Explains the various symbols and notes used throughout the manual for clarity.
Details safety measures and standards to prevent hazards related to automated door movement.
Guidelines for storing the product correctly to maintain its condition.
Instructions for safely unpacking and handling the product components.
Details on identifying the product and understanding its warning labels.
Specifies the intended applications and purpose of the A952 operator.
Outlines the limitations and restrictions for installing and using the A952.
Defines prohibited uses and actions that are not permitted with the automation system.
Procedures and guidelines for operating the system during emergencies or faults.
Instructions on how to operate the door manually when the automation is inactive.
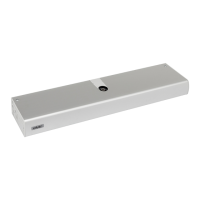
Provides detailed technical specifications and features of the A952 operator.
Details the maximum weight and width capacities for door leaves based on installation type.
Explains how to determine and set the maximum speed based on door inertia.
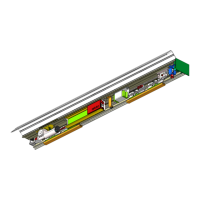
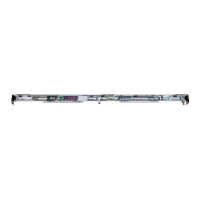
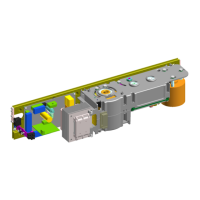
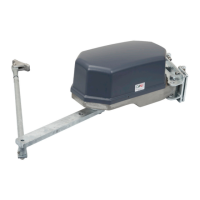
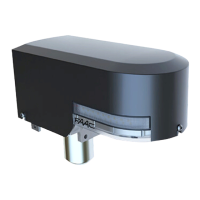
Identifies all the components of the A952 operator with a detailed diagram.
Lists and illustrates the various components required for installation.
Lists all necessary tools and equipment for performing the mechanical installation.
Covers substrate requirements, condition checks, and anchor types for installation.
Detailed steps for securely mounting the support plate.
Describes different installation options and their corresponding diagrams.
Step-by-step guide for mounting the gearmotor onto the support plate.
Instructions for routing cables from the electronic board side.
Instructions for routing cables from the motor side.
Guide for correctly mounting and securing the electronics assembly.
Procedure for installing the shoe arm, including spring preloading.
Procedure for installing the articulated arm, including spring preloading.
Instructions on how to remove and re-use the spring preload screw.
Details on how to adjust the spring preload for optimal door movement.
Guides adjustment of spring speed and functions like Soft Draw/Kick Lock.
Procedure for setting the mechanical stop to limit the opening stroke.
Instructions for fitting the side covers to the operator.
Guide for installing the side-mounted functions selector.
Steps for preparing cable entry points on the side covers.
Instructions for safely connecting the mains power cable to the terminal board.
Overview of the electronic assembly and its main connectors.
Detailed guide on connecting inputs, outputs, and control devices.
Describes the fully automatic operation where the door opens and closes automatically.
Details how to operate the door manually without any automated commands.
Explains the mode where the door opens and remains in the open position.
Defines the mode where the door remains closed, restricting external openings.
Describes the mode where one door's opening is dependent on another's closing.
Details inputs that trigger automatic opening and closing sequences.
Explains the input that opens the door and closes it upon activation.
Describes inputs that have priority for safety actions like emergency open/close.
Details the safety function configurations for the E952CL board.
Instructions for adjusting the display orientation using jumper J25.
Overview of programming methods and parameter availability.
Details on accessing and performing programming directly from the board.
Steps for performing the setup procedure to acquire door parameters.
Methods for resetting the A952 to restore normal operation.
Procedure to delete all data and reload default programming values.
Guide for filling out the classification label based on DIN standards.
Essential checks to perform after installation to ensure correct operation.
Concluding steps including applying labels, signs, and documentation handover.
Information on connecting and configuring FAAC BUS 2easy control devices.
Instructions for installing the optional battery kit for backup power.
Details on connecting and configuring safety sensors for primary/secondary use.
Guidelines for connecting and using the lock function.
Information on enabling remote communication via the Simply Connect platform.
Details on the accessory casing for double leaf automation setups.
Steps for installing and connecting the LK EVO device.
How to select operating modes and use special functions with LK EVO.
Information on error codes indicated by LEDs on the LK EVO.
Table showing error codes and corresponding LED indications.
Table indicating warning codes and their corresponding LED patterns.
Table mapping firmware versions to LED indications.
Steps for installing and connecting the KS EVO device.
How to select operating modes using the KS EVO key.
Information on error codes indicated by LEDs on the KS EVO.
Features of the KP EVO's safety lock device and password protection.
Steps for installing and connecting the KP EVO device.
Describes the initial boot-up sequence and displayed screens of the KP EVO.
Explains the KP EVO's home page and associated button functions.
Details on how to lock/unlock the keypad and perform a reset.
Instructions for entering and changing user and technician passwords.
Guide to accessing and using additional operating modes via the MODFUN function.
Navigation guide for accessing and using the KP EVO's menu system.
Allows selection of the display language from a provided list.
Details on programming inputs, outputs, motion, timing, lock kit, installation, and intercom.
Provides access to view error codes for troubleshooting.
Allows viewing of active alerts and warning messages.
Access to functions for counting cycles, safe flow, and people management.
Options for setting the date, time, and daylight saving time.
Configuration for activating operating modes based on programmed time bands.
Access to modify user and technician passwords.
Displays firmware versions for the KP EVO and the control board.
Procedure for automatically updating firmware from a USB device.
Interface for uploading configurations or downloading data to/from USB.
Guide to interpreting LED status on the E952IO and E952CL boards.
How to check the logic status of inputs and outputs on the board or via KP EVO.
Methods to check the current operating status of the automation.
Information on parameters like input voltage, accessory voltage, and motor current.
How to view firmware versions of the control board and KP EVO.
Information on error codes, warnings, and troubleshooting alerts.
Scheduled maintenance tasks to ensure reliable and safe operation.
| Operating temperature | -20°C to +55°C |
|---|---|
| Hold-open time | adjustable |
| Power supply | 230 VAC ±10%, 50/60 Hz |
| Opening speed | 0.15 - 0.5 m/s |
| Closing speed | 0.15 - 0.5 m/s |
| Speed | 0.15 - 0.5 m/s |