A952 70 532310 - Rev.A
2
1
1
3
3
3
4
5
2
56
U/UTP CAT.5
4x2xAWG24
V
RX TX
G
V
RX TX
G
V RX TX G G K
BOOTLOADER x.x
KP EVO
VERSION x.x
KP EVO
14:30
7 8 9
10 11 12 13 14 15 16 17 18 19
1
2 3 4 5 6
20212223242526
RX
TX V
G
V RX TX G G K
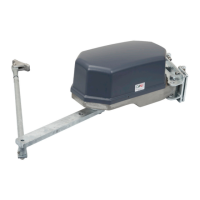
13. KP EVO
The KP EVO allows you to select the operating mode of
the automation using buttons and menus. The active
operating mode is indicated on the display.
The KP EVO allows the automation to be programmed
with wider number of options compared to program-
ming via the board.
KP EVO LOCK DEVICE
KP EVO has a safety feature that protects the buttons
via a PASSWORD. Alternatively, it is possible to con-
nect a key command with an NC contact to terminals
G and K.
The lock device is optional. The operation of the lock
device can be programmed.
INSTALLATION AND CONNECTION
1. To separate the parts, remove the 2 screws (1).
2. Break the cable knockout (2).
3. Mark the points (3) on the wall and fasten the
support using suitable screws.
4. Connect to the KEEPER connector on the E952IO
board:
G Power supply negative
TX Data transmission
RX Data reception
V +24 V
“
- use a 4 twisted pair U/UTP AWG24 cable with a
maximum length of 50 m
5. Assemble the parts and fix in place with the
screws (1).
6. Fasten the display using the screw (4) and insert
the screw cover (5).
SWITCHING ON
Turn power on to the automation board. The device
turns on and displays a series of screens:
- Power-on screen
- Bootloader: displays the Bootloader version (x.x)
- Firmware: displays the FW version (x.x)
HOME PAGE: ready
Note: if no buttons are pressed, after 2 minutes the
display reverts to the HOME PAGE.
Assembling the KP EVO
KP EVO connection Connect to the terminals as shown.
Screen sequence when switched on
HOME PAGE
KP EVO BOOTLOADER
version
KP EVO FW version
KP EVO
A952
THU 20/03/20
AUTO BIDIR
E952IO board