2. Introduction to Basic Operation
2.1 Equipment Calibration
Upon the first startup, please follow the on-screen instructions to perform automatic
Z-axis calibration and platform leveling. Then, there is no need for calibration during
regular printing. However, it is recommended to perform Z-axis calibration and platform
leveling after the nozzle or platform is replaced.
Follow these steps:
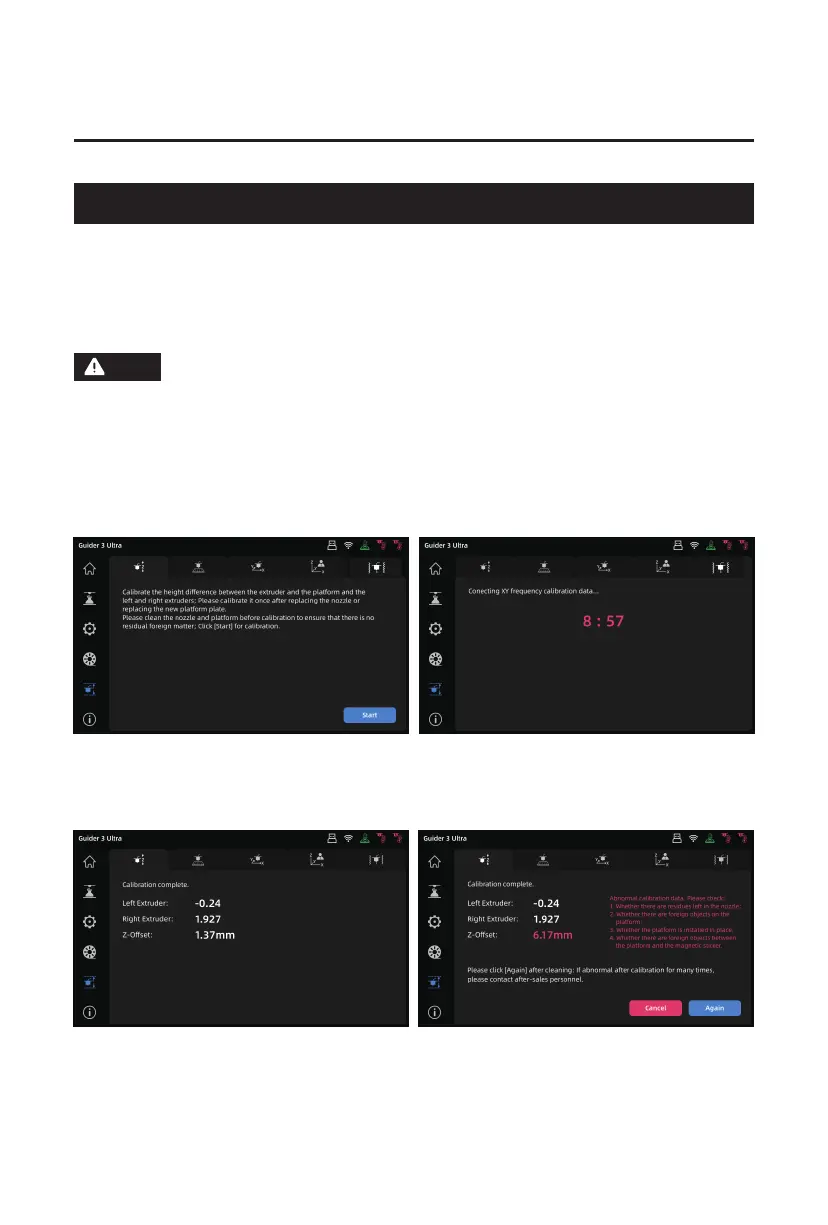
1. Upon entering the calibration interface, click the icon to access "Auto Z-axis Calibration".
Click [Start], and it will automatically calibrate the Z-axis gap between the extruder and
platform, as well as the height difference between the left and right nozzles.
2. After automatic calibration, the printer will automatically save the calibration data.
If there is any abnormal data, it will prompt you to recheck it. After confirming, click
[Recalibration] for another automatic Z-axis calibration.
Before calibration and leveling, please clean the nozzle and platform to
ensure there are no filament residues or foreign objects. Do not move or
collide with the machine during calibration and leveling.
Note
09