You can contact Flashforge's customer support for remote calibration
assistance.
Users typically do not need to perform this operation. When various calibrations or
automatic leveling compensation are ineffective, it may be that the previously
installed platform flatness has been destroyed. In this case, initial platform leveling
is required.
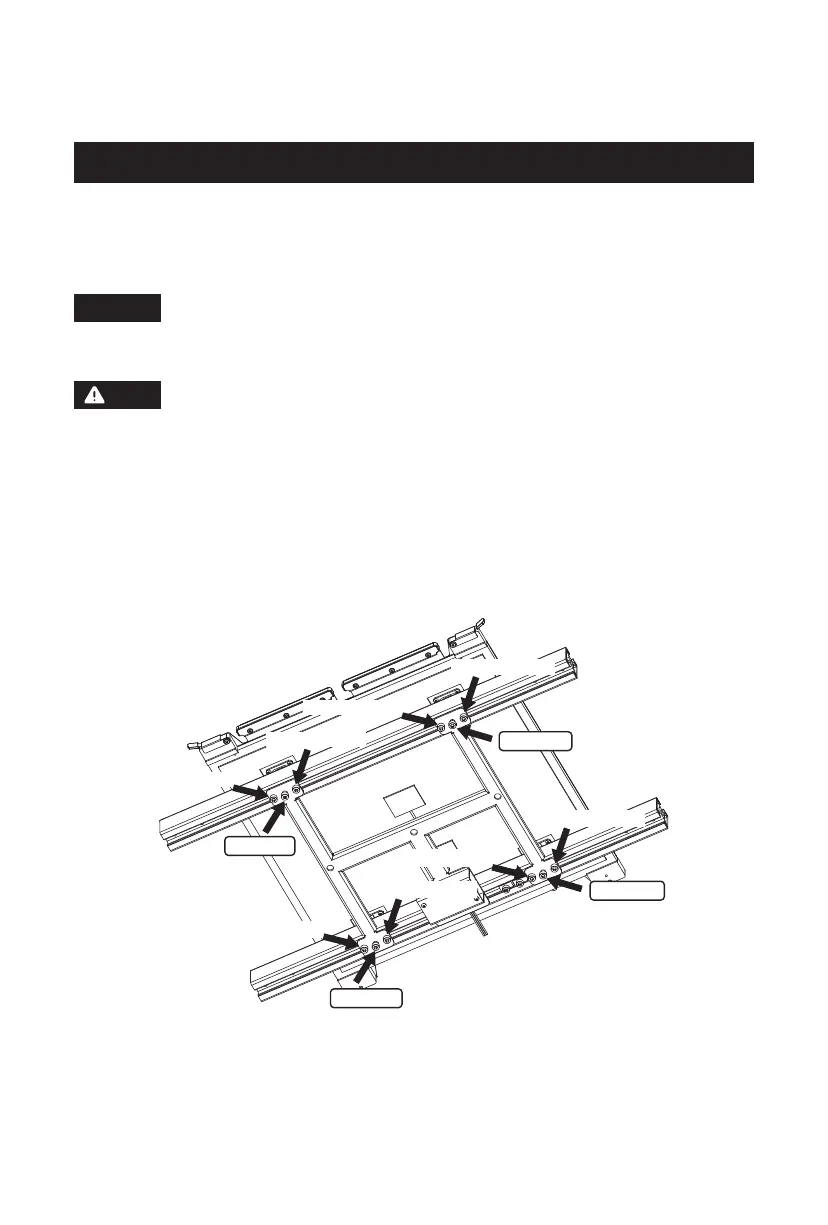
Please operate as follows: There are four leveling points in total.
Please proceed with caution or consult a professional engineer for
guidance.
After placing the platform plate and setting the 16mm distance, adjust the platform
flatness by turning the four screws in the middle. Once the flatness is adjusted, lock
it in place by tightening the locking screws next to the middle set screws. While
tightening the locking screws, make sure to turn both sides simultaneously and
avoid tightening one side before the other.
1. Adjust the platform height for the appropriate viewing position.
2. Ensure that the strain gauge wires at the bottom of the platform are not pressed
too tight.
3. Tighten the M5 screws next to the four set screws (during tightening, make sure
to tighten both sides simultaneously; do not tighten one side completely before
tightening the other).
4. Ensure that the distance between the flexible steel plate sticker surface and the
profile surface is 16mm (by manually turning the four set screws at the bottom),
ensuring consistency at all four corners.
5.2 Platform Flatness Calibration
Locking screw
Locking screw
Locking screw
Locking screw
Locking screw
Locking screw
Locking screw
Locking screw
Set screw
Set screw
Set screw
Set screw
Note
Note
34