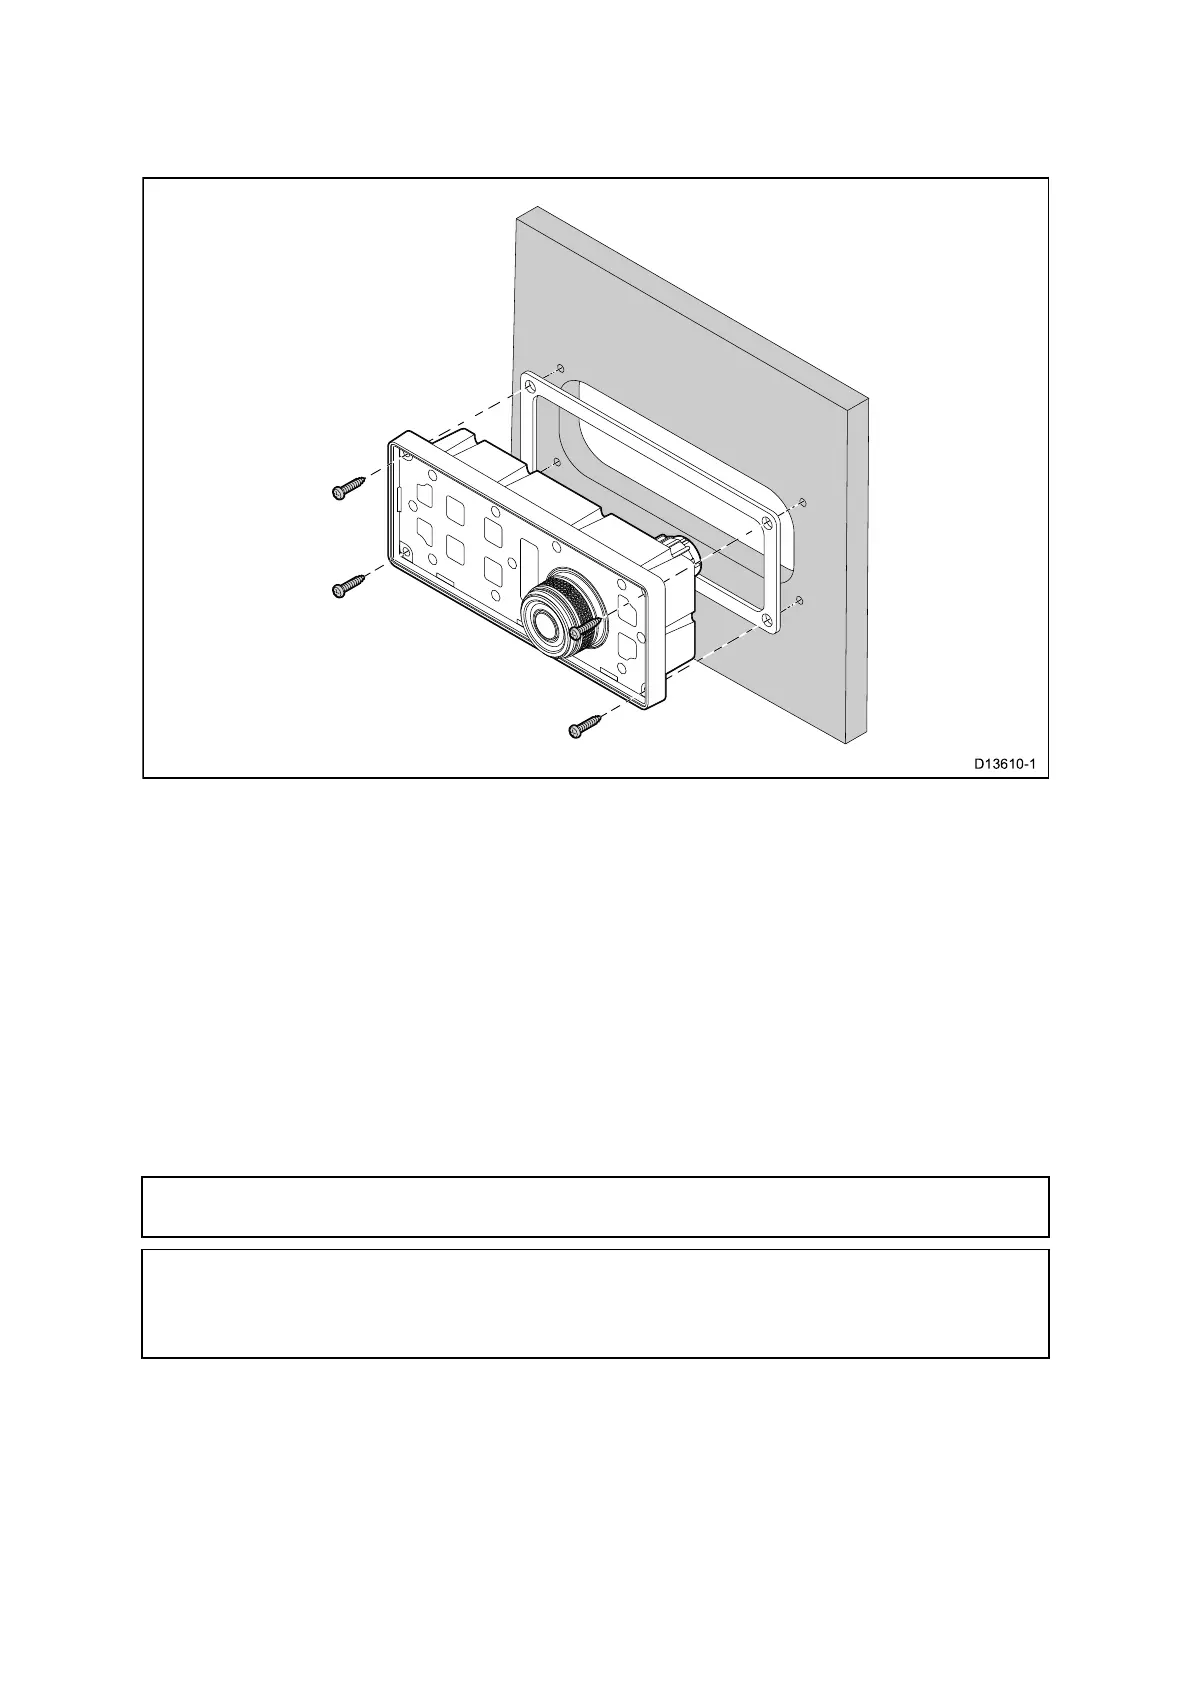
Surfacemountingthekeypad
Surfacemountingprovidesauniforminstallationwheretheproductsprotrude,usuallyby
thethicknessofthebezel,fromthemountingsurface.
1.Checktheselectedlocationfortheunit.Aclear,atareawithsuitableclearance
behindthepanelisrequired.
2.Beforemodifyingthemountingsurface,refertothedimensionssuppliedinthis
documenttoensurethereisenoughspacefortheunitandallcables.
3.Fixthesuppliedmountingtemplatetotheselectedlocation,usingmaskingorself
adhesivetape.
4.Drill4holesasindicatedonthemountingtemplatetoacceptthexings.
5.Usingasuitableholesaw,makeaholeineachcornerofthecut-outarea.
6.Usingasuitablesaw,cutalongtheinsideedgeofthecut-outline.
7.Ensurethattheunittsintotheremovedareaandthenremoveroughedges.
8.Placethesuppliedgasketontotherearofthekeypad,ensuringthemounting
holesarealigned.
9.Connecttherelevantcablestotheunit.
10.Secureusingthexingsprovided.
Note:Theappropriatetighteningtorqueanddrillbitsizetousedependsonthe
thicknessofthemountingsurfaceandthetypeofmaterialitismadefrom.
Note:Thesuppliedgasketprovidesasealbetweentheunitandasuitablyatand
stiffmountingsurfaceorbinnacle.Thegasketshouldbeusedinallinstallations.It
mayalsobenecessarytouseamarine-gradesealantifthemountingsurfaceor
binnacleisnotentirelyatandstifforhasaroughsurfacenish.
Fittingthekeypadmat
Y ourkeypadcanbeinstalledinportraitorlandscapeorientation.keypadmatsare
availableforeachorientation.
•Y oushouldtthekeypadmatthatmatchesyourchosenmountingorientation.
•Y oushouldonlytthekeypadmataftertheunithasbeensecuredtothemounting
surface.
1.Ensurethekeypadmatisorientatedcorrectly.
Mounting
61
 Loading...