EasyManuals Logo

Fluke 5700A Series User Manual

Fluke 5700A Series
576 pages
To Next Page IconTo Next Page
To Previous Page IconTo Previous Page
Page #225 background imageLoading...
Page #225 background image
Calibration and Verification
Range Calibration 3
3-15
PREV
MENU
IF3-2.EPS
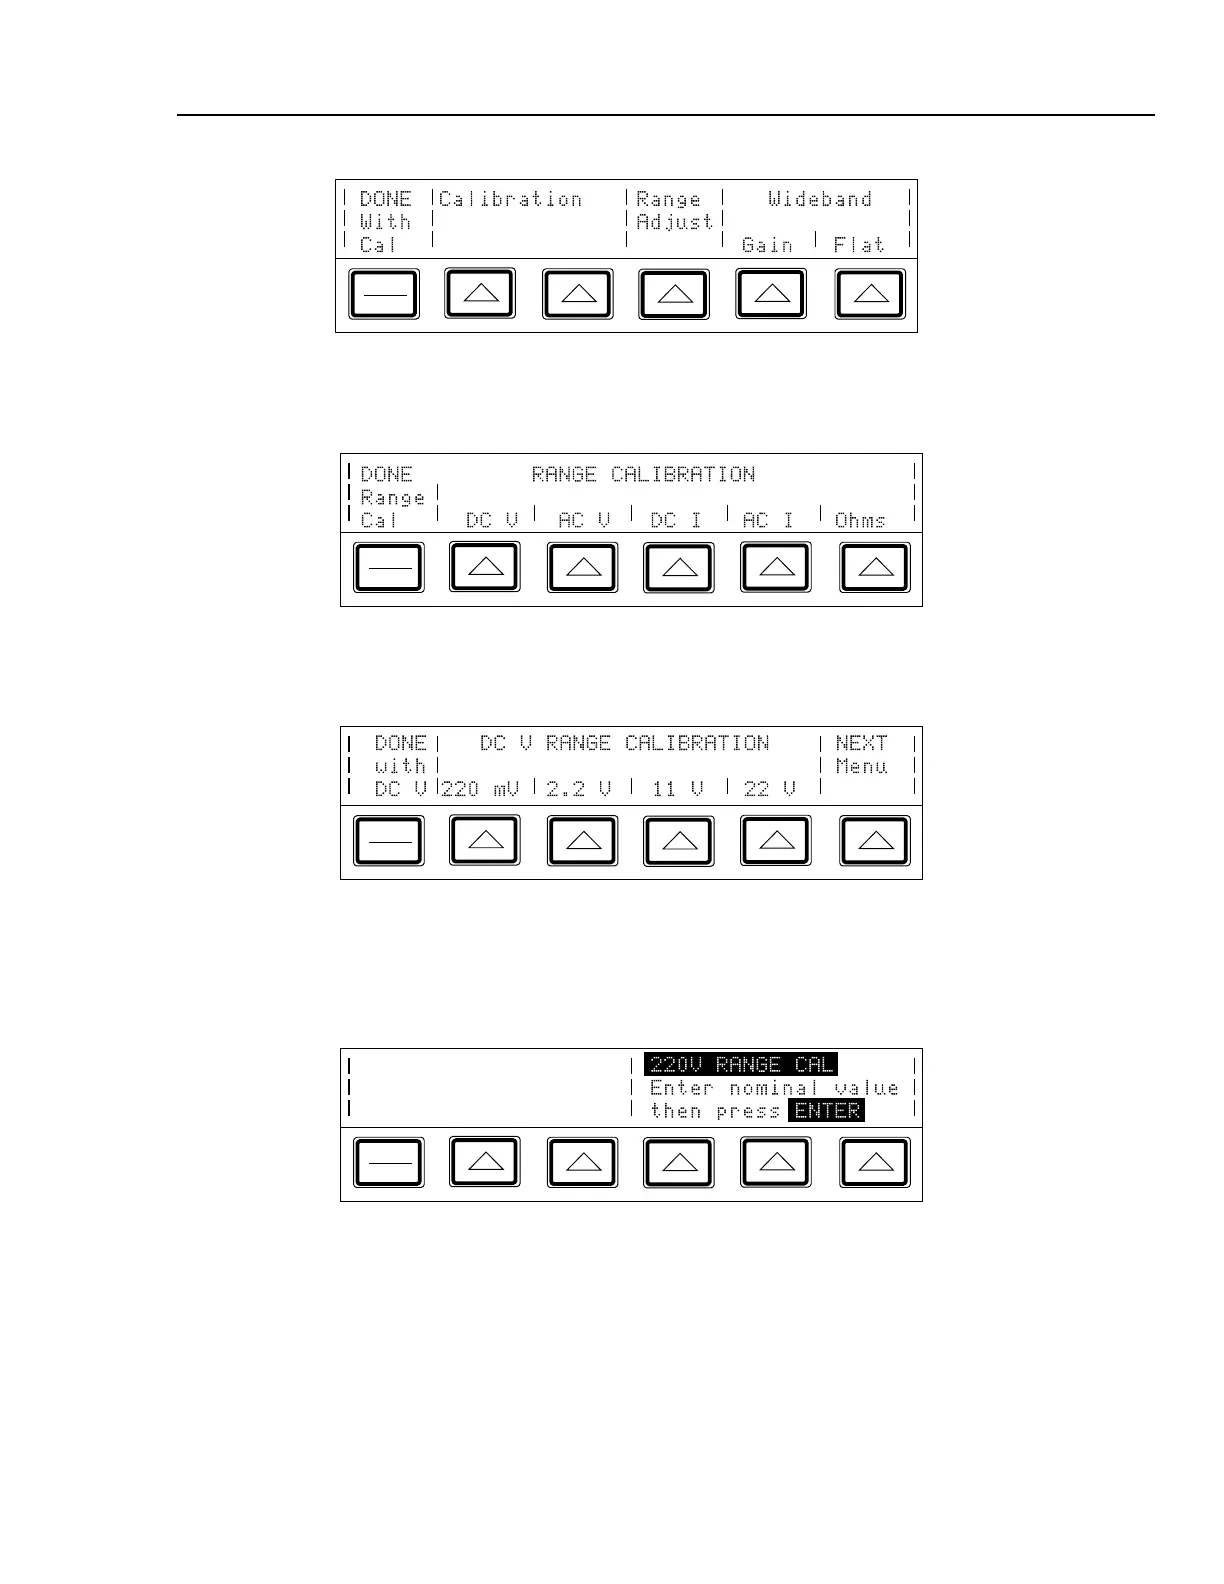
3. Press the “Range Adjust” softkey to bring up the next menu shown below:
PREV
MENU
IF3-18.EPS
4. Press the “DC V” softkey to bring up the next menu shown below:
PREV
MENU
IF3-19.EPS
5. Press the “NEXT Menu” softkey, which scrolls through all the available dc voltage
ranges, until 220V appears. Then press that selection’s softkey to open a display
similar to the following:
PREV
MENU
IF3-20.EPS
6. Connect the 732B, null detector, and 752A in a 10:1 configuration, as shown in
Figure 3-5.
7. Multiply the 732B’s value by 10, and enter this new value. (This value is the output
of the 752A, to which you will null the calibrator’s output.) Then press E to
bring up the following display.

Table of Contents

Questions and Answers:

Question and Answer IconNeed help?

Do you have a question about the Fluke 5700A Series and is the answer not in the manual?

Fluke 5700A Series Specifications

General IconGeneral
TypeMultifunction Calibrator
Operating Temperature0°C to 50°C
Storage Temperature-40°C to 70°C
Humidity10% to 90% non-condensing
Frequency Range10 Hz to 1 MHz
AccuracyVaries by function and range. See manufacturer's specifications for details.
Output StabilityVaries by function and range. See manufacturer's specifications for details.
Power Requirements50 Hz to 60 Hz

Related product manuals