104
14 ADDITIONAL TOPICS
UNDERSTANDING VIEWS
This layout uses four different views, each set up like a self-contained mini layout.
Views are detailed on p. 74 but here’s a simple summary.
The FM3 is based on “Layouts”, each containing programming for twelve footswitches.
Unlike the larger FC-12 controller, the FM3 can only show three of these “Switch Denitions” at once.
The view determines WHICH three switches are shown on the FM3.
Continued on next page.
View 1
View 3
View 2
View 4
ABOUT LAYOUT 7: PERFORM
Layout 7 is designed as a “minimal” performance controller. Each view has its own purpose:
View 1 selects three scenes. Our example preset contains Clean/Crunch/Lead.
View 2 allows you to change presets. (The idea is that you might use one preset per song.)
View 3 contains Tap Tempo and Tuner.
View 4 is set to toggle three different effects on or off.By default, these are Drive 1, Delay 1 and Reverb
CHANGING VIEWS
View 1 changes the Scene. This layout is based on the idea that you might rely mostly on scene changes for
different sound settings within a song. Here, three switches are forced to Green, Yellow, and Red, making it
easy to recognize this layout. (See also “LED Ring Colors” on p. 9).
View 1
Select Scenes
View 2
Change Presets
View 3
Tap/Tune
aka “UTILS”
View 4
Toggle FX
View 1
Select Scenes
View 2
Change Presets
View 3
Tap/Tune
View 4
Toggle Effects
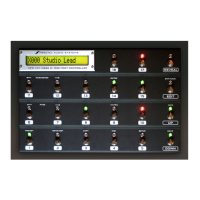
From within View 1, you can
Press and Hold any switch to
change the view as shown.
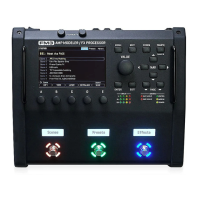
In FM3-Edit, switches are shown in two rows of
six. Views are arranged as shown.
Try using FM3-Edit to change the view now.
From any other view, Press
and Hold the middle switch
to go back to View 1
(“Home”).
Try changing views with your feet now.