15
1 INTRODUCTION
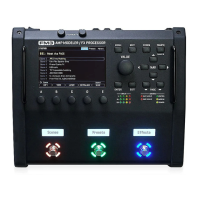
Imagine a professional rackmount system rig like the ones used by guitar heroes for decades. In such a rig, the
various components — pedals, guitar amp, rack units — are usually connected to a central switching unit so they
can be switched in groups without “tap dancing.” Some components may also have settings that the switcher can
change, like the channel of an amp, or the MIDI program of a delay unit. As described on the previous page, an
FM3 preset is like this rig: it consists of “blocks” (amp, cab, effects) all connected together in a certain way.
In the traditional rig, you can set up and save different combinations and channels: Clean, Rhythm, Lead, etc.
Scenes on the FM3 allow you to easily create these saved combinations within a preset. Scenes don’t rewire
the rig or change what gear it contains. Instead, they switch blocks on or off, and set which “Channel” each
component is set to. Each preset contains eight scenes and like presets, FM3 Scenes also have their own names.
Scenes can also offer an advantage over presets in terms of sound changes. When you change scenes, the FM3
doesn’t need to reload the entire “rig.” Instead, it just sets the blocks and channels as needed for the new scene.
This is not only faster, but also allows easy “spillover” of delay and reverb tails.
Channels on the FM3 make blocks extremely flexible. Each channel contains a fully independent set of
parameters for the entire block. For example, Channel A of a Drive block might be a clean boost, B could be an
overdrive, C could be a distortion, and D could be a Fuzz. That’s four completely different drive sounds from just
block. This can be used to conserve CPU power when compared to single-use blocks used one at a time.
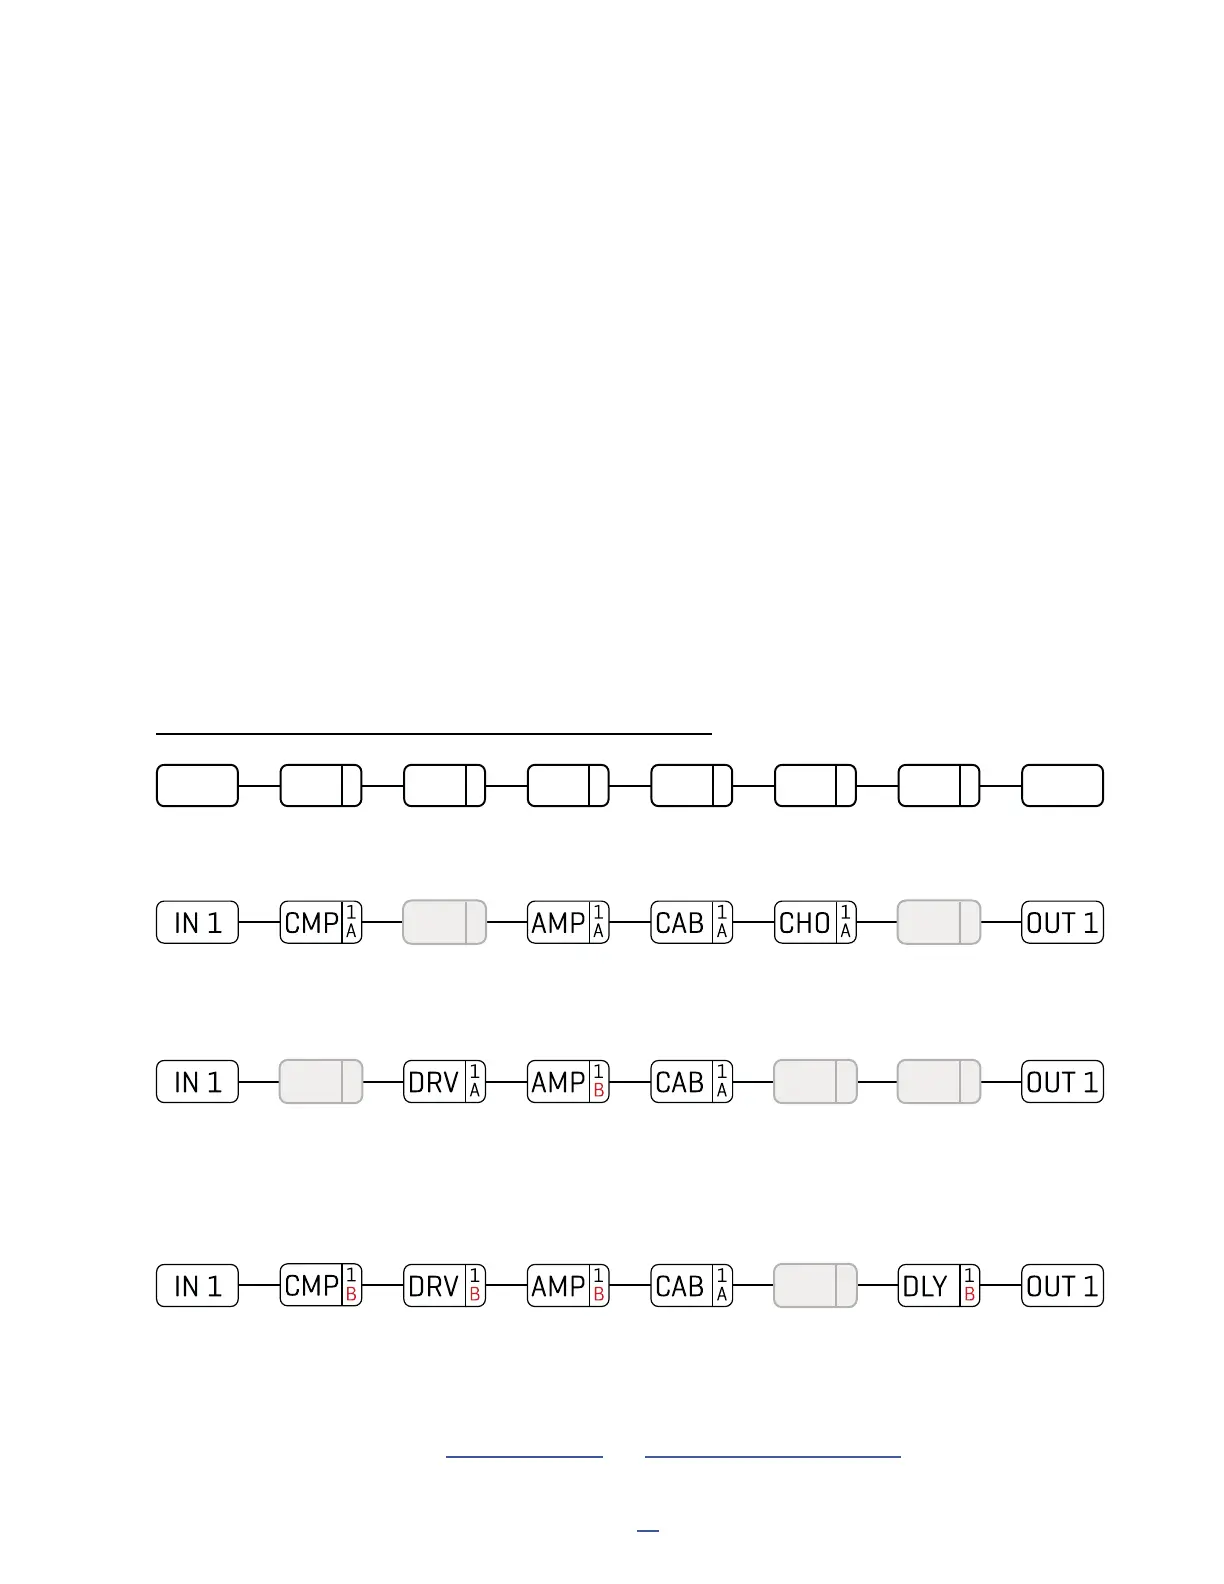
INTRO TO SCENES AND CHANNELS
IN 1 CMP
1
A
DRV
1
A
AMP
1
A
CAB
1
A
CHO
1
A
DLY
1
A
OUT 1
Here is our preset. The Input 1 block feeds a Compressor, which is connected to a Drive, then an Amp and Cab,
then Chorus, Delay, and nally the Output 1 block.
SCENE 1 – “Clean”: For scene 1, the Drive and Delay blocks are bypassed. We dial in the Compressor, Amp,
Cab, and Chorus for a classic clean tone. Notice that the amp says “1A”. This means we are using Amp 1, set
to channel A. Let’s imagine it as the “ODS-100 Clean” model. We name this scene “Clean”.
SCENE 2 – “Crunch”: To create scene 2, we bypass the Compressor, Chorus, and Delay and engage the Drive.
The Channel of the Amp block is changed from “A” to “B”, which we dial in as a “Euro Blue” model. Remember,
each channel has a totally independent set of settings, so we can dial in every amp parameter exactly as we
want it: Drive, Treble, Mid, Bass, Master, and many more. We then dial in Channel “A” on the drive block with a
good “screamer” sound by selecting the “TS808 OD” type. Let’s name this scene “Crunch”.
SCENE 3 – “Lead”: Here’s our soaring lead. The Chorus is bypassed. We’ve changed the compressor to
Channel “B” and dialed it in for sustain. The amp is the same as the “Crunch” scene but the Drive changes to
“B”, which we’ll make a “Ruckus LED”. The Delay is on channel “B” set for ping-pong echoes with higher mix
and feedback. We name this scene “Lead”.
Learn more about these topics in Section 5: Presets and Section 6: Scenes & Channels.
DRV
1
A
DLY
1
A
CMP
1
A
CHO
1
A
DLY
1
A
CHO
1
A
SCENES AND CHANNELS: A VISUAL EXAMPLE