106
14 ADDITIONAL TOPICS
CONCLUSION
In this tutorial, you learned about Layout 7: Perform. We covered how it
uses VIEWS to create different sets of controls on the FM3.
You learned to change the view in an “out and back” arrangement.
You used EZ Mode to make a change on the FM3 itself, followed by a similar change through FM3-Edit.
NEXT STEPS...
Once you have completed this tutorial, we recommend that you explore the
other topics presented in Section 10: Layouts & Switches.
The “The Footswitch Functions Guide” is an essential companion to making the most of the FM3.
As you learn more, use your imagination to decide how you want the FM3 to work for you.
If you need help, our forum is a great resource. Fractal Audio staff members participate in the
conversation, and response times can be very fast. Find it at https://forum.fractalaudio.com
You can also get support directly from Fractal Audio Systems at: https://support.fractalaudio.com
or internationally via our dealers listed at https://www.fractalaudio.com/international-ordering
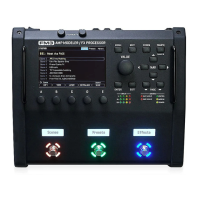
ABOUT THE TUTORIAL PRESET
The tutorial preset is set up with three scenes: 1: Clean, 2: Crunch, and 3: Lead
These scenes are set up in such a way that you can dial in the amp, cab and drive pedal sounds
fully independently. This provides one possible model for designing your own FM3 presets.
Scene 1 uses Amp Channel A, Cab Channel A and Drive Channel A.
Scene 2 uses Amp Channel B, Cab Channel B and Drive Channel B.
Scene 3 uses Amp Channel C, Cab Channel C and Drive Channel C.
Delay and Reverb are set so that the tail will spill over between
scenes, or when you turn these effects on or off.
The Lead sound uses Delay Channel C, which is a copy of channel A with different mix levels.
Differences across channels can sometimes alter spillover — changing the Delay Type or the Reverb Size,
for example. See “Spillover” on p. 112.
Other blocks and settings in this preset are shared across all scenes. This replicates
the way real pedals work. A phaser, for instance, will be either on or off and any change
to its knobs will be heard no matter which amp channel you are using.
A nice “Clyde” Wah pedal is included. It uses External 1 as described in “Global Expression Setup” on p. 11.
The LOOPER is included in this preset so that you can try it out. Just remember that the
Performance layout does not include an “Exit” to the Master Layout Menu, so you will
need to press HOME and then change the layout Manually to operate the looper.
If you wanted to add a switch in Layout 7 to show the Master Layout Menu, you could place it
on the un-used Tap function of the middle switch in View 2 or View 3. Follow the steps on the
previous page of this tutorial, choosing Category: Layout, Function: Select, Layout: 9.