#
To remove: unscrew screws 3 and remove
trim 2.
#
Remove floor covering 1.
#
To install: insertfloor covering 1 and align
it at thebase of thedriver's seat and at the
door sill.
#
Put trim 2 in place and screw screws 3
backin.
Disconnecting thestarterbattery
*
NOTE Damage to electrical assemblies
Electrical assemblies could be damaged if the
starterbatteryisdisconnected whilethe
engine is running.
#
Switchoff theengine. Then, release the
batteryclamps of thestarter battery.
#
Alwaysdisconnect thestarterbatteryin
thebatterycase in theleftfootwell first.
Otherwise, electricalassemblies, e.g.
thealternator,could be damaged.
*
NOTE Damage to thevehicle's electron‐
ics
If youdonot disconnectthe batteryasdescri‐
bed here, thevehicle's electronics could be
damaged.
#
Alwaysdisconnect thestarterbatteryin
following thesequence, and do not
reversethe batteryterminals under any
circumstances. Otherwise, thevehicle's
electronics could be damaged.
Vehicles withrear wheel drive
%
If thevehicle is expected to be parkedfor an
extendedperiod or outofuse forlonger than
four weeks, observe theinformation on park‐
ing thevehicle foranextendedperiod
(/ page 141).
#
Vehicles with abatterymain switch:
remove themain switchofthe battery
(/ page118).
#
Vehicles without abatterymain switch:
switchoff all electrical consumers.
#
Switchoff theengine and thepower supply.
#
Remove thefloor covering (/ page 201).
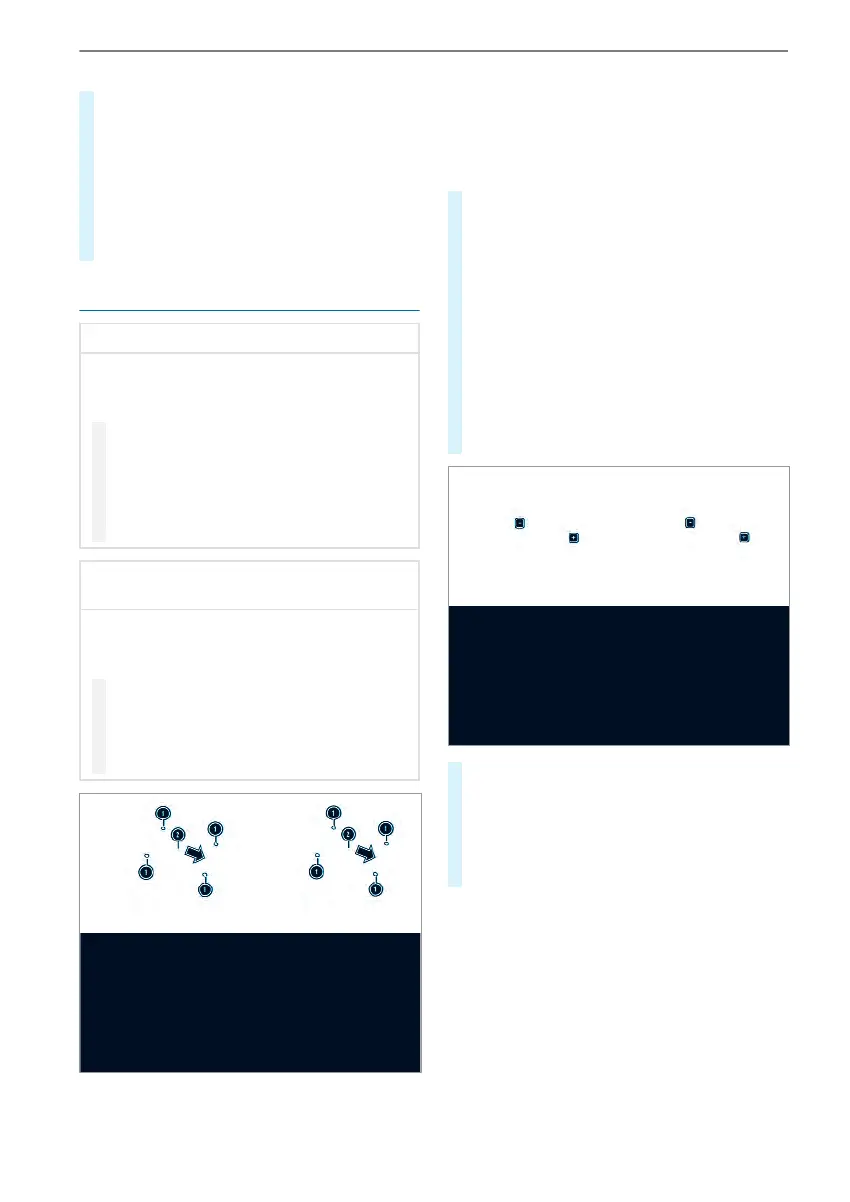
#
Remove screws 1 and slide batterycover
2 in thedirection of thearrow.
The screwsmustprotrudeoverthe larger
recesses.
#
Remove batterycover 2 upwards.
#
First loosen and remove thenegativeterminal
clamponthe batterysothat theclampisno
longer in contact withthe terminal.
#
Remove thepositiveterminal clampcover.
#
Loosenthe positiveterminal clampand fold it
up to theside, together withthe prefuse box.
202
Breakdown assistance