Address: Room 1705,Block A1, Longyuan Plaza, Longkouxi Road, Guangzhou, China, 510640 Website: http://www.arm9.net
Sales: +86-20-85201025 Tech Support: +86-13719442657 Fax: +86-20-85261505
Email for Business and Cooperation: capbily@163.com Email for Tech Support: dev_friendlyarm@163.com
androidboot.console=s3c2410_serial0
Android-RootFs-InstallImage = Android2.3.1/rootfs_android.img
(Note: in “Android-CommandLine” the “lcd” parameter specifies the LCD type which
currently has: H43, W50, A56, S70, A70, L80 and G10)
Step2: make sure your card has the following files (actually you can copy the whole
image directory to your SD card’s root directory)
Bootloader. It can boot Android and other
OS such as Linux and WinCE. It can be
run from an SD card.
images\Android2.3.1\zImage
Android kernel. It can automatically detect
LCD types
images\Android2.3.1\rootfs_android.img
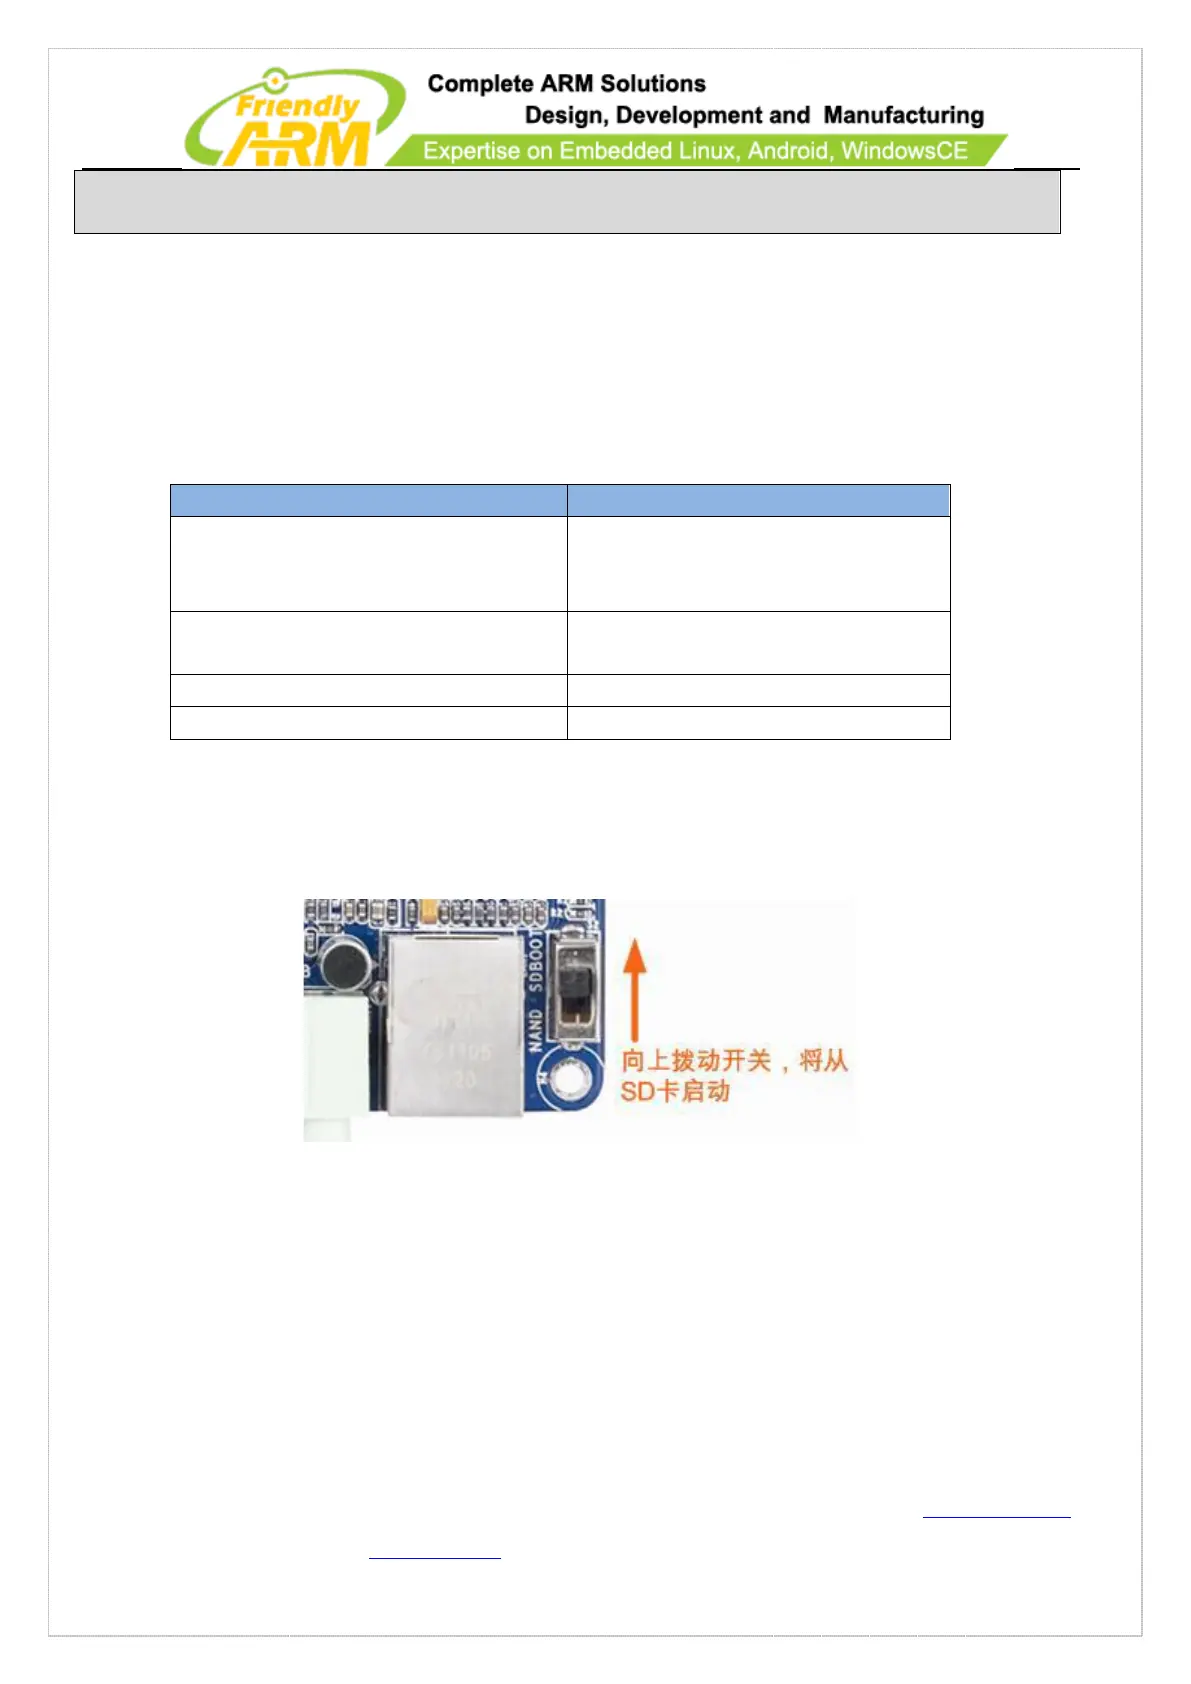
Step3: insert the SD card to the board’s SD socket and switch S2 to the SD side. Power
on the board and you will hear a beep and see a progress bar on the LCD.
Step4: after system burning is done you will hear two continuous beepings and the LCD
will show the burning status. Switch S2 to the Nand Flash side, reboot the system and
you will see Android loads.