Installing the mounting bracket and attaching the
inverter
Selecting the
mounting mater-
ial
Use the corresponding fixing materials depending on the subsurface and observe
the screw dimension recommendations for the mounting bracket.
The installer is responsible for selecting the right type of fixing.
Properties of the
mounting brack-
et
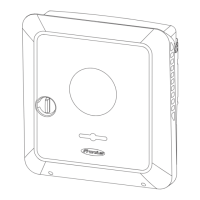
The mounting bracket (illustration) can
also be used as a guide.
The pre-drilled holes on the mounting
bracket are intended for screws with a
thread diameter of 0.24 - 0.32 inches.
The distance from the left to the right
pre-drilled hole is 12 inches.
Unevenness on the mounting surface
(e.g. coarse-textured plaster) is largely
compensated by the mounting bracket.
Do not deform
the mounting
bracket
NOTE!
When attaching the mounting bracket to the wall or to a column, make sure that
the mounting bracket is not deformed.
A deformed mounting bracket may make it difficult to clip/swivel the inverter in-
to position.
Fitting the
mounting brack-
et to a wall
IMPORTANT!
When installing the mounting bracket, make sure that it is installed with the ar-
row pointing upwards.
42

 Loading...