Before printing
15
ENGLISH
CHAPTER
3 Before printing
3.1 INSTALLING PAPER
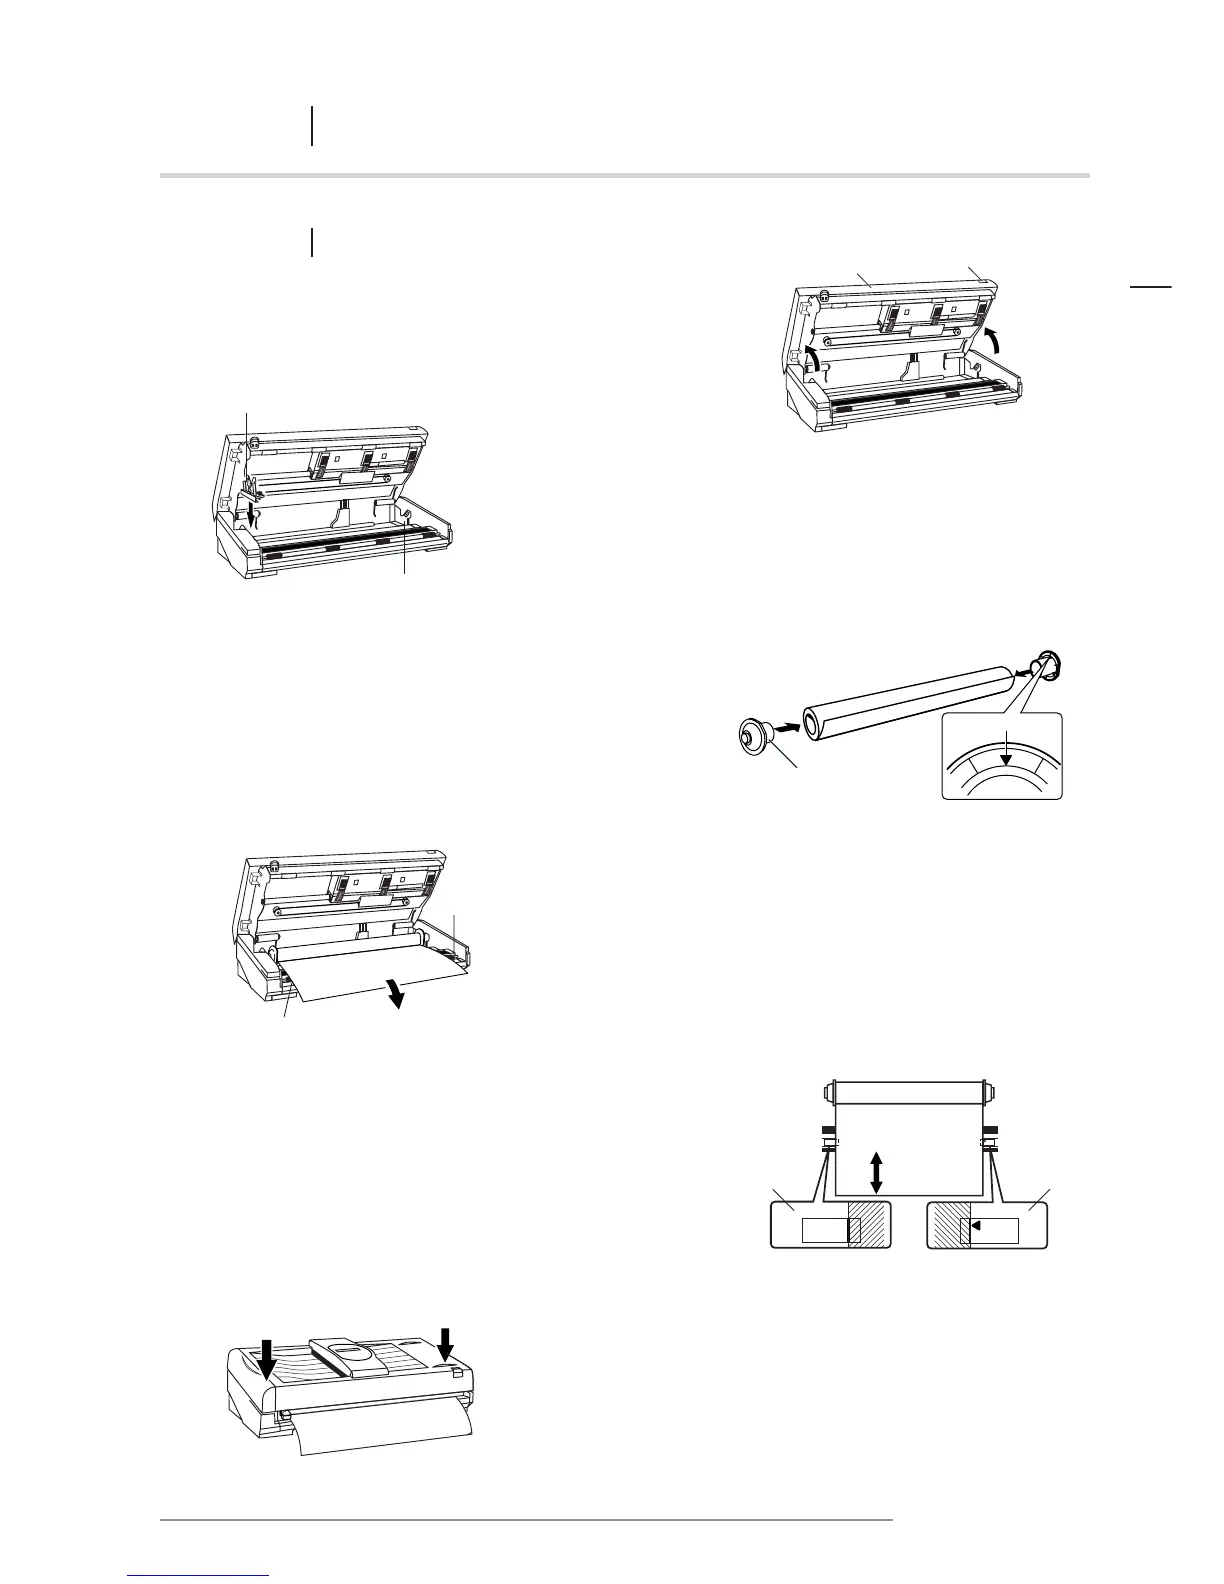
1 After releasing the open/close knob, lift the printer cover gently
until it comes to rest in the open position.
2 Set the left paper bracket into position according
to the width of the paper to be used.
Refer to “Setting the left paper bracket”, p 16.
3 Insert the end caps into both ends of the paper roll.
NOTE: The triangular marks on the end caps are designed as
guides to show the amount of paper remaining on the roll.
The paper remaining from the tip of the mark:
• Direct Thermal Paper: approximately 6 meters
• Thermal Transfer Paper and HDP Paper: approximately 8 meters
4 Install the paper in the printer.
Install the paper roll so that the end of the paper
runs out from the bottom of the roll.
5 Align the paper with the guide marks.
When installing paper, pull the end of the roll out approximately
200 mm, so that any slack is removed from the paper. Align the
paper with the guide marks on either side.
NOTE: If the paper is installed incorrectly, the poster may
be printed at an angle, or wrinkles may occur.
6 Hold the ends of the printer cover with both hands
and gently push the cover down until locked in place.
Check that both ends are closed properly.
NOTE: If the printer is turned on, about 45 mm of paper
will automatically advance.
 Loading...