Do you have a question about the FujiFilm APERTO Lucent and is the answer not in the manual?
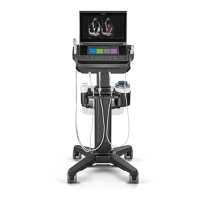
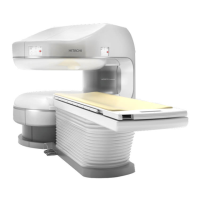
Details the Gantry, Table, and Operation Console of the APERTO Lucent system.
Describes the switch unit, including its buttons and status indicators for system operation.
Provides step-by-step instructions for powering on and starting the MR imaging system.
Explains the function of each icon within the system's Launcher interface.
Details the process of positioning the patient on the table and preparing them for scanning.
Describes the gantry and its control panel, including emergency operations and table movement controls.
Details the components and functions of the Exam window during the imaging process.
Explains the features and settings available in the Exam window for reviewing acquired images.
Describes the process of acquiring scanogram images for patient positioning and localization.
Details the steps for performing T2 weighted image acquisition, including slice positioning.
Explains how to perform T1 weighted and FLAIR imaging, including the reservation of future operations.
Guides through DWI acquisition, including volume shimming and gating sensor setup.
Details the procedure for MRA imaging, including slice positioning and reservation for future scans.
Provides instructions on attaching and connecting the gating sensor for physiological monitoring.
Explains how to apply slice lines and positioning settings from one scan to another using position links.
Describes how to view and display acquired images within the Review window.
Explains how to adjust the layout of the Review window to display multiple images efficiently.
Details how to perform clipping and MIP rotation for image enhancement and visualization.
Explains how to rotate MIP images by selecting a 'Rotating' mode and adjusting Tilt values.
Initiates filming, selects image series, and opens the Filming Window for output preparation.
Prints images, performs manual insertion, and manages sheets within the Filming window.
Opens the Patient Directory from the Launcher to manage patient data for saving or transfer.
Chooses the save location and selects patients/series for transfer.
Starts the DICOM transfer or CD/DVD writing process after selecting images and destination.
Details the standard procedure for safely shutting down the MR imaging system.
Provides alternative methods for forcibly shutting down the system when the standard procedure fails.
| Brand | FujiFilm |
|---|---|
| Model | APERTO Lucent |
| Category | Medical Equipment |
| Language | English |