4.3
Cutting Force and Offset Adjustment
Before sending your designs for cutting, you may perform a “cut test” to generate satisfactory
cutting results. The “Cut Test” should be repeated until the appropriate cutting conditions for the
media are discovered.
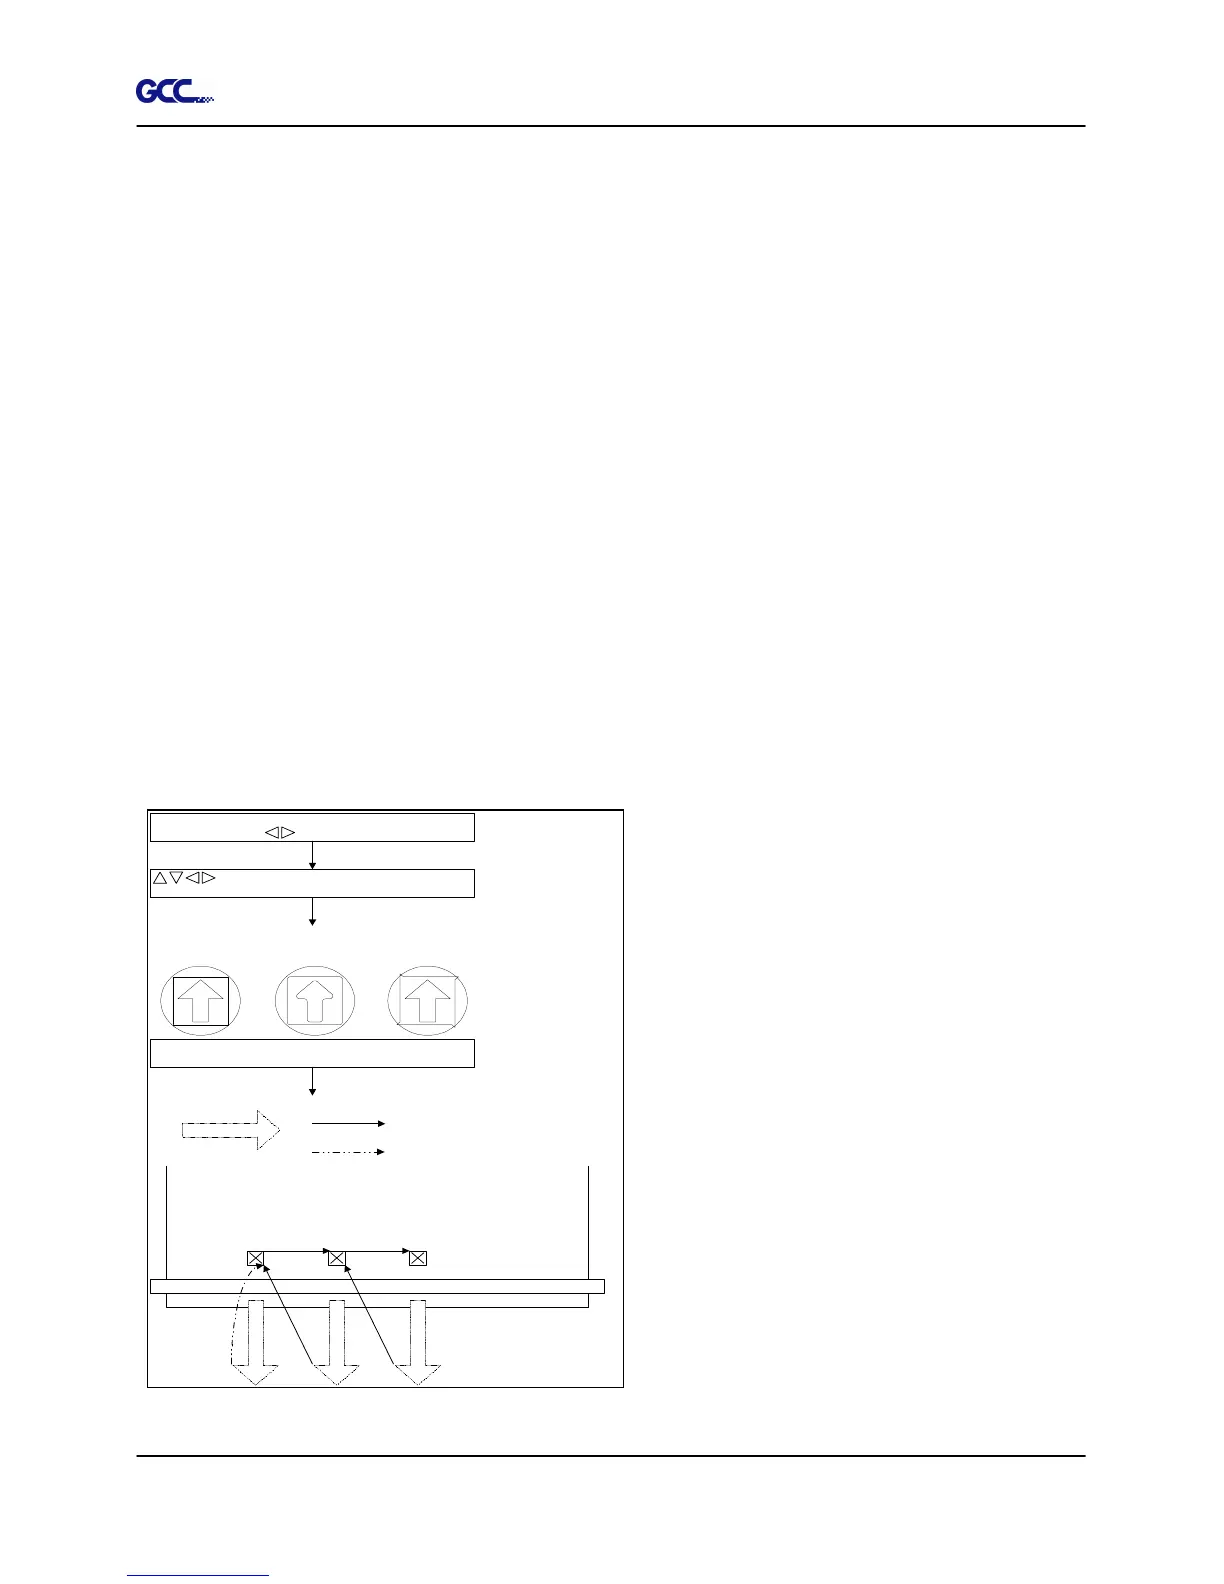
After sizing the media, press [CUT TEST] button to select the “square cut”, and press [ENTER
KEY] to confirm.
The default cutting force and offset value of the cutting test are 80gf and 0.275mm respectively.
Press [ARROW KEY] to move the tool carriage to the position where you like. Then, press the
[ENTER KEY] to perform Cut Test.
Note: At the same time, the new origin is also set at the cutting test position.
When the cutting test is completed, a pattern appears. Peel off the pattern to see if it can be
easily separated from the media base. If yes, the setup tool force is appropriate. If not or cut
through the back paper, press [FORCE KEY] to adjust the tool force until an optimum force is
obtained (Figure 4-14).
If the pattern appears to be BB or CC layout,
press [OFFSET KEY] to adjust the offset
value until AA pattern discovered.
S q u a r e C u t
Press E NTER_KEY
AA CCBB
Press E NTER_KEY
E n t e r:O KS e l e c t :
M o v e t t ec u
X Y: :
Ms t
S q u a r e C u t
Press SPEED _KEY,
FO RCE _K EY,
OFFSET_KEY to setup
or
Press arrow keys to
desired position for next
square cut
E n t e r:O K
C o n t
/N : O O F FN
M achine
3m m
80 mm
3m m
80 mm
Press E NTER_KEY
80 mm
Fin ish square cut
Press
ENTE R_KEY
Press ON /O FF
line_ K EY
i n o u s
L NI E