PRINTED IN U.S.A. 57 913287/BP0808
1. Thoroughly clean fuel filter assemblies and sur-
rounding areas.
2. Disconnect water sensor wiring.
3. Loosen drain plugs (C) and drain fuel into a suit-
able container.
4. Firmly grasp the retaining ring (A) and rotate it
clockwise 1/4 turn (when viewed from the top).
Remove the ring with filter element (B or F).
NOTE: Lifting up on retaining ring (A) as it is rotat-
ed helps to get it past raised locators.
5. Inspect filter mounting base for cleanliness. Clean
as required.
NOTE: Raised locators on the fuel filter canister
must be indexed properly with slots in mounting
base for correct installation.
6. Install new filter elements onto mounting bases.
Be sure elements are properly indexed and firmly
seated on bases. It may be necessary to rotate fil-
ters for correct alignment.
If equipped with water seperator bowl (E),
remove filter element from seperator bowl. Drain
and clean the separator bowl. Dry with com-
pressed air. Install bowl onto new element.
Tighten securely.
7. Align keyes on filter element with slots in filter
base.
8. Install retaining ring onto mounting base making
certain dust seal is in place on filter base. Hand
tighten ring counter-clockwise (about 1/3 turn)
until it snap into the detent. DO NOT overtighten
retaining ring.
NOTE: The proper installation is indicated when a
“click” is heard and a release of the retaining ring
is felt.
9. Reconnect water sensor wiring.
After fuel filter replacement, bleed the air out of the
fuel system by following the fuel bleeding procedure.
Fuel Bleeding Procedure
When the fuel filter is removed and replaced, or if the
engine runs out of fuel, air must be bled from the sys-
tem. Refer to the following procedure for proper bleed-
ing procedure.
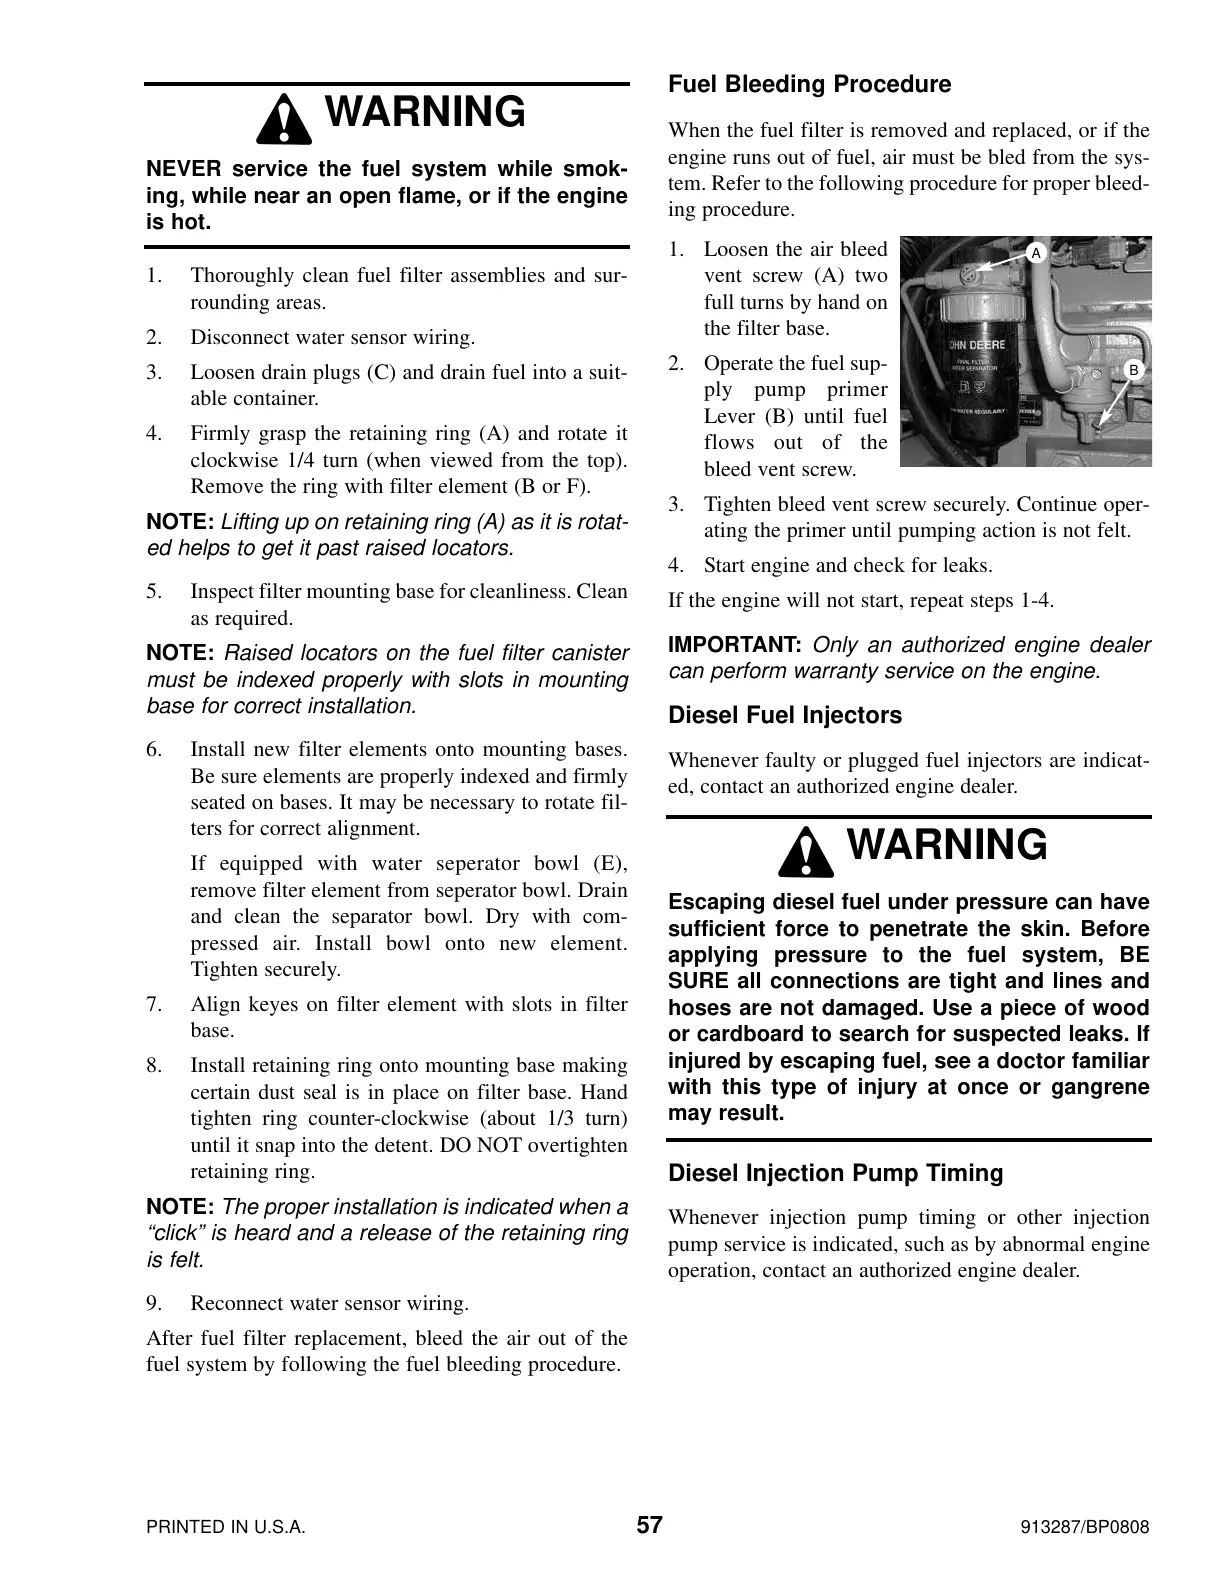
1. Loosen the air bleed
vent screw (A) two
full turns by hand on
the filter base.
2. Operate the fuel sup-
ply pump primer
Lever (B) until fuel
flows out of the
bleed vent screw.
3. Tighten bleed vent screw securely. Continue oper-
ating the primer until pumping action is not felt.
4. Start engine and check for leaks.
If the engine will not start, repeat steps 1-4.
IMPORTANT: Only an authorized engine dealer
can perform warranty service on the engine.
Diesel Fuel Injectors
Whenever faulty or plugged fuel injectors are indicat-
ed, contact an authorized engine dealer.
Diesel Injection Pump Timing
Whenever injection pump timing or other injection
pump service is indicated, such as by abnormal engine
operation, contact an authorized engine dealer.
WARNING
Escaping diesel fuel under pressure can have
sufficient force to penetrate the skin. Before
applying pressure to the fuel system, BE
SURE all connections are tight and lines and
hoses are not damaged. Use a piece of wood
or cardboard to search for suspected leaks. If
injured by escaping fuel, see a doctor familiar
with this type of injury at once or gangrene
may result.
WARNING
NEVER service the fuel system while smok-
ing, while near an open flame, or if the engine
is hot.
B
A
Courtesy of Crane.Market
 Loading...