Repair
42 310648P
Solvent Purge Assembly
1. Follow Pressure Relief Procedure, page 19.
2. Flush Gun, page 24.
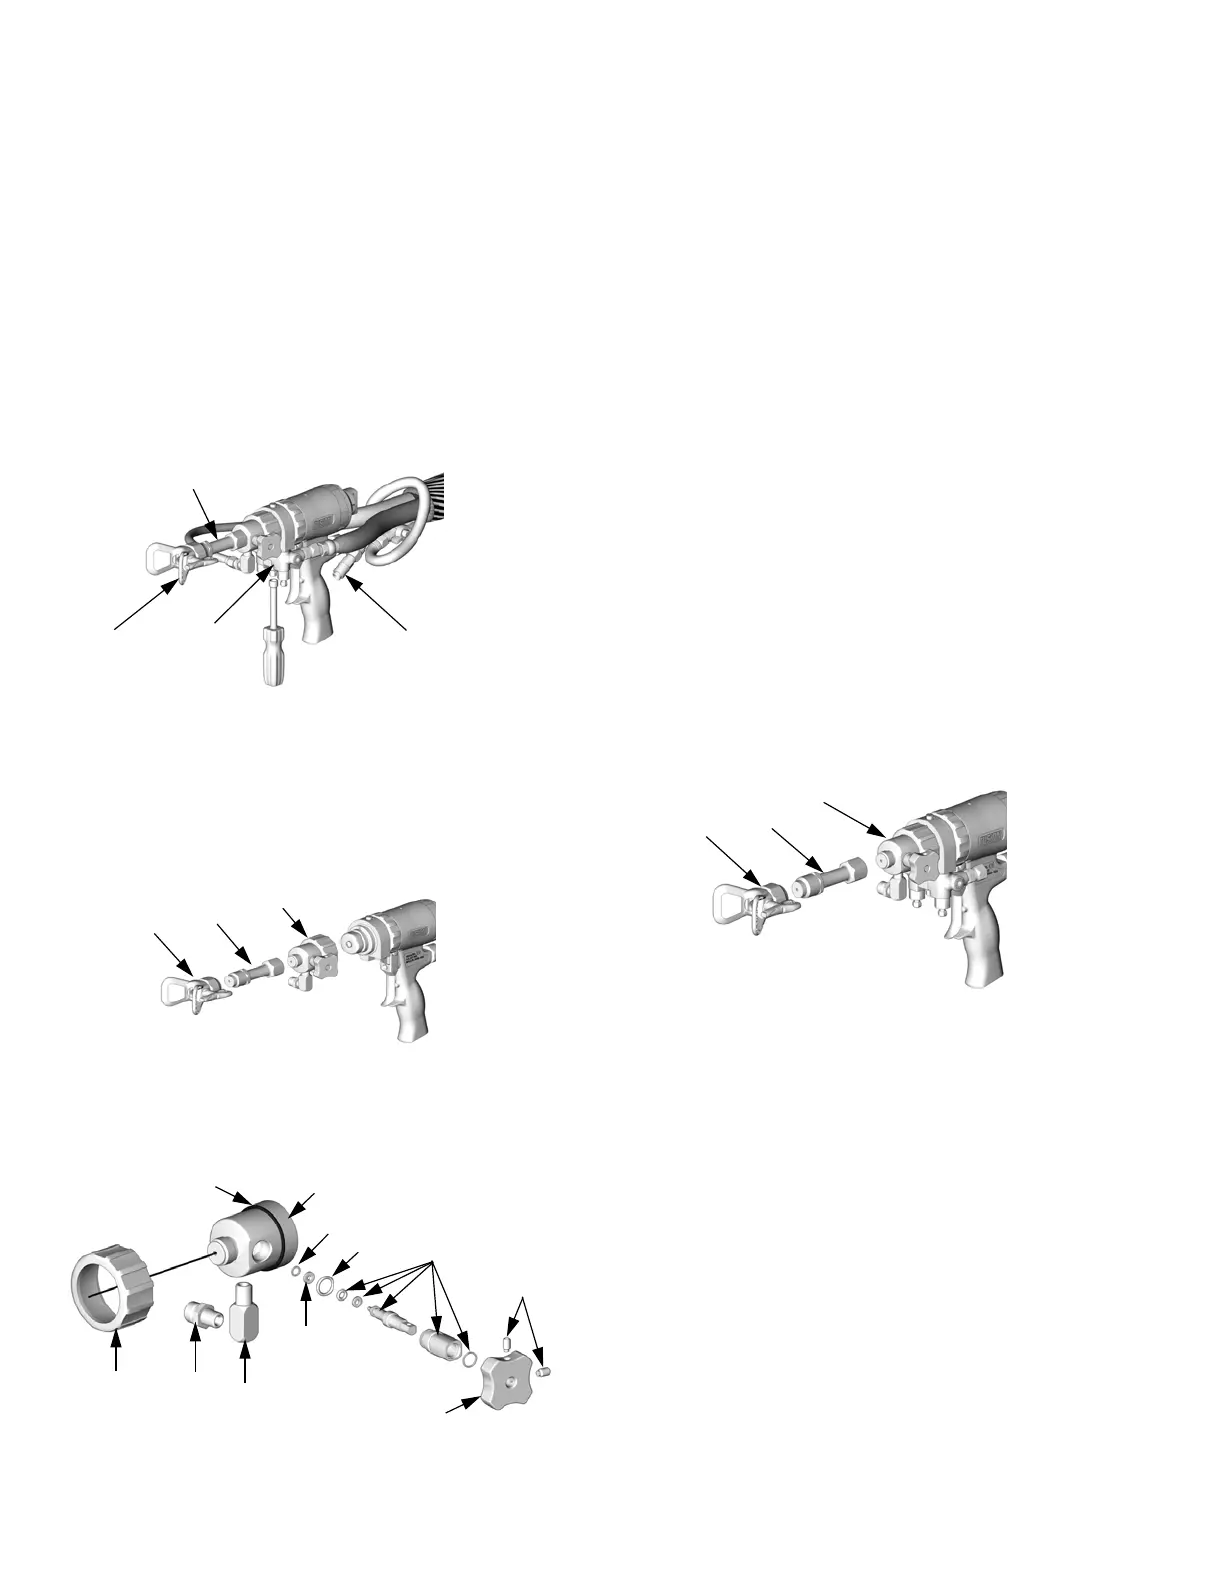
3. Disconnect air (D) and remove fluid manifold (G).
4. Disassemble RAC tip and guard (9, 63), static
mixer (40), and solvent purge assembly (28) from
front end of gun.
5. Disassemble Solvent Purge Assembly (28a-m).
Inspect parts for damage, replace if necessary.
TI4968b
G
D
9, 63
40
9, 63
40
28
TI5002b
TI5035a
28b
28k
28j
28a
28g
28e
28f
28c
28h
28d
28m
6. Reassemble air cap (28b) to housing (28a), then
install (28c) and (28d) into housing (28a).
7. Assemble (28e). Lubricate packings. Slide (28h)
over assembled (28e) into groove and lubricate.
8. Assemble knob (28f) onto (28e). Assemble screws
(28g) and tighten with a 3/32 in. allen wrench.
9. To position correctly, turn knob (28f) fully counter
clockwise to the open position. Screw assembly
(28e) into housing (28a). Tighten using the wrench
flats on (28e).
10. Reassemble RAC tip and guard (9, 63) and
static mixer (40) to solvent purge assembly (28).
Tighten with wrench.
11. Attach fluid manifold. Connect air. Return gun to
service.
9, 63
40
28
TI5033b